Resistance Band Workout for Weight Loss: A 4-Week Plan That Works

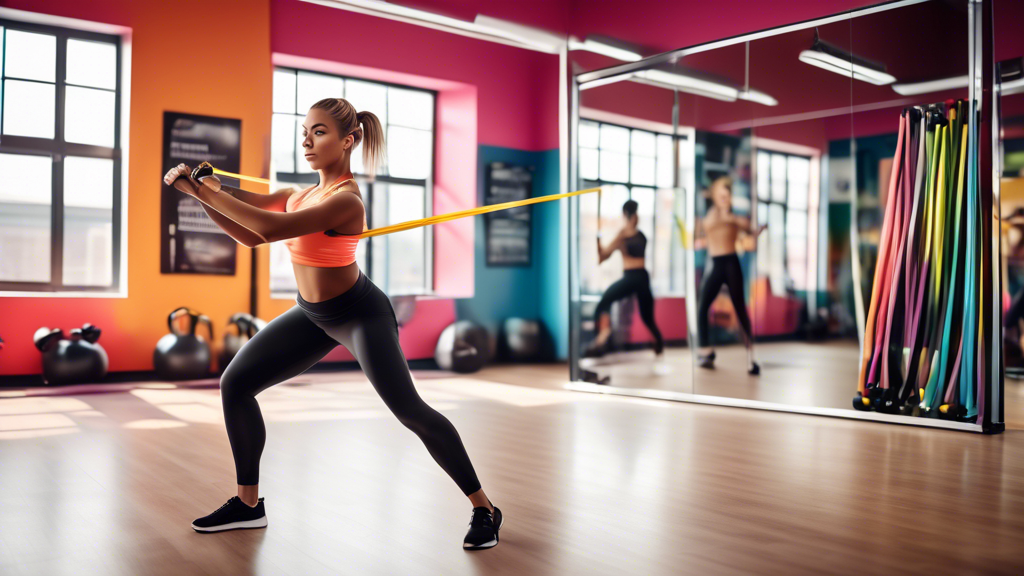
A dynamic and energetic scene featuring an individual performing a resistance band workout in a bright, spacious fitness studio. The person, dressed in mod

Resistance bands have a quiet superpower that makes them ideal for fat loss: they force your muscles to work hard on both the lift and the lower. That constant tension — unlike free weights that go slack at the top — means more muscle fibers recruited per rep, which translates to more calories burned and greater metabolic disruption. Here’s a complete 4-week resistance band program designed specifically to promote weight loss at home.

Why Bands Are Effective for Fat Loss

Research published in Current Sports Medicine Reports by Wayne Westcott found that resistance training increases resting metabolic rate by preserving and building lean muscle mass — meaning your body burns more calories at rest, not just during exercise. Bands enable compound, multi-joint circuits that spike your heart rate while building strength simultaneously — making each session work twice as hard.

A key 2012 study in the Journal of Applied Physiology (Willis et al.) found that combined resistance and aerobic training produced better body composition changes than cardio alone — specifically more fat loss while preserving lean muscle. This plan is built around that principle.

What You’ll Need

  • 2–3 resistance bands in different tensions (light, medium, heavy) — one medium band will work if that’s all you have
  • A door anchor (optional — expands exercise options)
  • 6 feet of floor space
  • A timer (your phone works fine)

The 4-Week Band Workout Plan

Train 3 days per week with at least one rest day between sessions. Each workout is 30–35 minutes including warm-up.

Warm-Up (5 minutes — do this every session)

  • 30 seconds arm circles (forward + backward)
  • 30 seconds leg swings (forward/back, then side to side)
  • 30 seconds bodyweight squats (slow and controlled)
  • 30 seconds band pull-aparts (light band)
  • 60 seconds marching in place

Weeks 1–2: Foundation Circuit

Complete 3 rounds. Rest 45 seconds between rounds. Rest 15 seconds between exercises within a round.

Exercise Reps Key Coaching Cue
Band Squat 15 Band just above knees — push knees out over toes, not caving in
Band Bent-Over Row 12 Hinge at hips 45°, pull elbows past ribs — not up toward ears
Band Chest Press (lying) 12 Band under upper back; press straight up, lower in 3 seconds
Band Romanian Deadlift 12 Stand on band, hinge hips back — keep back flat, feel hamstring stretch
Band Pallof Press 10 each side Press band away from chest and resist rotation — abs brace hard

Weeks 3–4: Intensity Circuit

Complete 4 rounds. Rest 30 seconds between rounds. Increase band resistance if Week 1–2 felt manageable.

Exercise Reps Key Coaching Cue
Band Squat to Press 12 Combine squat + overhead press — squat down, press up as you stand
Band Lateral Walk 15 steps each side Band just above knees; maintain slight squat throughout, don’t let band go slack
Band Pull-Apart 15 Arms straight out in front; pull band wide, squeeze shoulder blades at end
Band Glute Bridge 15 Band just above knees; drive hips to ceiling, hold 2 seconds at top
Band Woodchop 12 each side Anchor band high; rotate from your core, not just your arms — control the return

Optional Cardio Add-On

After completing the band circuit, add 10 minutes of continuous low-impact cardio to extend the calorie burn: brisk walking, step-ups, jumping jacks, or stationary cycling. This elevates the session’s total energy expenditure without adding excessive joint stress.

Progression Milestones

Week Target Adjust When
1 3 rounds, 45-sec rest — focus on form
2 3 rounds, same structure — improve range of motion Move to Week 3 when 15 reps feel manageable with good form
3 4 rounds, 30-sec rest — add harder band tension if available
4 4 rounds, aim for zero rest within circuits After week 4, restart with heavier bands or add bodyweight finishers

Common Mistakes That Stall Fat Loss

  • Using the same band for everything: Rows need more resistance than curls. Use the right tension for each movement — you should reach fatigue in the target rep range, not fly through easily.
  • Moving too fast: Explosive, sloppy reps reduce time under tension. A controlled 2-second lowering phase produces more muscular stimulus than rushing through 20 reps.
  • Skipping sessions when “not feeling it”: Consistency beats perfect sessions. A moderate 25-minute session beats skipping — momentum matters more than any single workout.

Want a plan customized to your specific goals and schedule? Try our AI Workout Plan Builder — it generates a personalized program based on your fitness level and available equipment.

References

  • Westcott WL. “Resistance training is medicine: effects of strength training on health.” Current Sports Medicine Reports, 11(4): 209–216, 2012.
  • Willis LH, et al. “Effects of aerobic and/or resistance training on body mass and fat mass in overweight or obese adults.” Journal of Applied Physiology, 113(12): 1831–1837, 2012.

15 Best Resistance Band Exercises for Full-Body Strength at Home

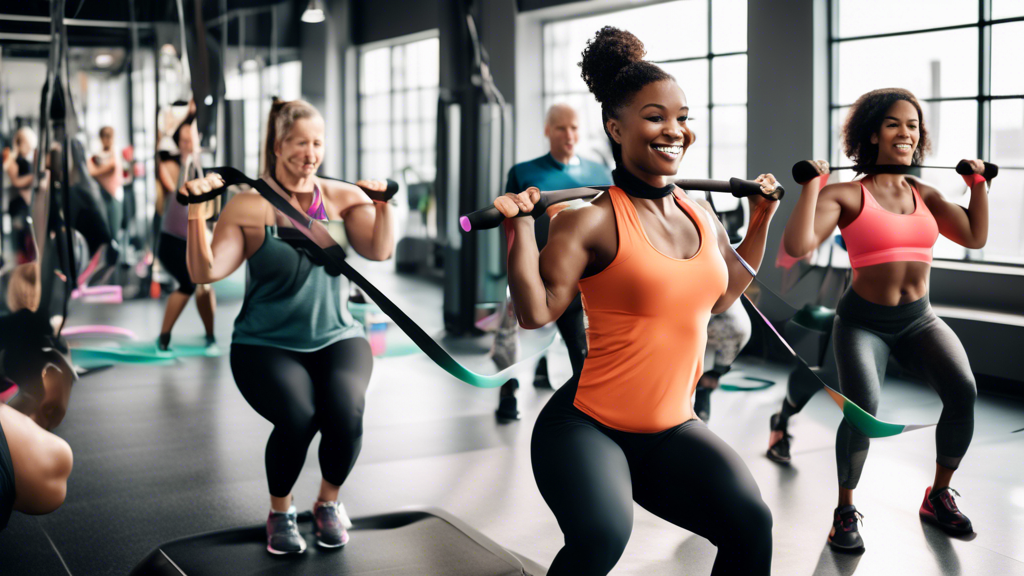
An athletic person in a well-lit home gym performing various resistance band exercises such as bicep curls, squats, and shoulder presses, with colorful res

A single resistance band is one of the most versatile pieces of fitness equipment you can own. It can load almost any movement pattern — push, pull, hinge, squat, and carry — without taking up more space than your sock drawer. Here are the 15 best resistance band exercises for building full-body strength at home, including the coaching cues that most exercise lists leave out.

How to Choose Your Band Resistance

Before diving into the exercises: resistance bands come in loop bands (flat circles, great for lower body and anchored pulls), tube bands (handles on each end, good for upper body pressing and curling), and therapy bands (flat, used in rehab and mobility work). For the exercises below, a loop band and a tube band together cover everything.

Choose resistance where you can complete the listed reps with solid form but feel genuine effort on the last 2–3 reps. If it feels easy throughout, go heavier. If your form breaks down by rep 8, go lighter.

Upper Body Exercises

1. Band Pull-Apart

Hold a band at shoulder height, arms extended in front of you. Pull the band apart until it touches your chest, squeezing your shoulder blades together. Return slowly — don’t let the band snap back.

Coaching cue: Keep arms straight throughout. Most people bend their elbows to make it easier — that defeats the purpose. The movement comes from your upper back, not your arms.

Progression: Start with 15 reps. Build to 3 sets of 20 with a 2-second hold at the end range.

2. Band Bent-Over Row

Stand on the band, hinge forward at the hips to 45°, and pull both ends up toward your lower ribs. Hold 1 second at the top. Lower in 3 seconds.

Coaching cue: Pull with your elbows, not your hands. Imagine you’re trying to push your elbows through the wall behind you — your hands just follow. Elbows go past your ribs, not up toward your ears.

Progression: 3 sets of 10–12 reps. When 12 reps feel easy, add a narrower grip or use a heavier band.

3. Band Bicep Curl

Stand on the band, hold both ends with palms facing up. Curl hands toward shoulders, keeping elbows pinned at your sides.

Coaching cue: The most common mistake is swinging the elbows forward at the top of the curl. Keep elbows stationary — only your forearms move. If you can’t, the band is too heavy.

Progression: 3 sets of 12–15 reps. Add a 2-second squeeze at the top for more bicep activation.

4. Band Overhead Tricep Extension

Stand on the band, hold one end (or both) behind your head with elbows pointed up. Extend arms overhead until straight. Return slowly.

Coaching cue: Keep your elbows pointing straight up — not flaring out to the sides. Flaring shifts load off the triceps onto your shoulders.

Progression: 3 sets of 12. When this feels easy, use a heavier band or hold the top position for 2 seconds.

5. Band Chest Press (Floor)

Lie on your back. Loop a band under your upper back and hold both ends. Press both hands straight up toward the ceiling. Lower in 3 seconds.

Coaching cue: The band wants to pull your hands inward. Fight to keep hands shoulder-width apart throughout the press — this protects your shoulders and keeps chest muscles engaged.

Progression: 3 sets of 10–12. Increase band thickness or move to feet-elevated position to increase difficulty.

Core Exercises

6. Band Pallof Press

Anchor the band at chest height (door anchor or wrap around a stable post). Stand sideways to the anchor, hold the band with both hands at your chest, then press it straight out in front of you. Hold 2 seconds, return. Repeat on both sides.

Coaching cue: This is an anti-rotation exercise — your entire job is to resist the band pulling you sideways. Don’t let your torso rotate toward the anchor. Brace your core as if preparing to take a punch.

Progression: 3 sets of 10 reps each side. Increase by stepping further from the anchor or using a heavier band.

7. Band Woodchop (High to Low)

Anchor the band high (door anchor or overhead). Hold with both hands, rotate and pull the band diagonally across your body to the opposite hip. Control the return.

Coaching cue: Rotate from your core and hips — not just your arms. Think about your belly button pointing away from the anchor at the end position.

Progression: 3 sets of 12 each side.

Lower Body Exercises

8. Band Squat

Loop a band just above your knees. Stand hip-width apart and lower into a squat, keeping your knees pressing out against the band. Drive through your heels to stand.

Coaching cue: The band creates a valgus challenge — it’s trying to pull your knees inward. Actively push knees out against the band throughout the movement. This cue alone dramatically improves squat mechanics and glute activation.

Progression: 3 sets of 15. Progress to band squat jumps, then add a pause at the bottom (3 seconds).

9. Band Romanian Deadlift

Stand on the band with feet hip-width. Hold both ends at thigh height. Hinge at the hips — pushing hips back, maintaining a flat back — and lower hands toward mid-shin. Drive hips forward to stand.

Coaching cue: This is a hip hinge, not a back bend. Before you start, imagine pushing a door open with your hips behind you — that’s the movement. Your back doesn’t round; your hips drive the motion.

Progression: 3 sets of 12. When 12 reps feel easy, narrow your stance (band becomes longer and harder) or use a thicker band.

10. Band Glute Bridge

Lie on your back with knees bent, feet flat. Place a loop band just above your knees. Drive hips up toward the ceiling until hips, knees, and shoulders form a straight line. Hold 2 seconds at the top. Lower in 3 seconds.

Coaching cue: Squeeze your glutes hard at the top — most people just lift their hips without actually contracting the glutes. Push knees outward against the band throughout for maximum glute activation.

Progression: Double-leg to single-leg (one foot lifted). Eventually elevate shoulders on a couch or chair for a full-range hip thrust.

11. Band Lateral Walk

Place a loop band just above your knees. Assume a slight squat position (hips back, knees slightly bent). Step sideways — keeping tension on the band — for 15 steps in each direction.

Coaching cue: Don’t let the trailing foot drag or the band go slack. The moment you lose tension is the moment the glute medius stops working — the exact muscle you’re targeting.

Progression: Start with 10 steps each side; build to 20. Move the band lower (around ankles) for more difficulty.

12. Band Clamshell

Lie on your side with knees stacked and bent to 90°. Band just above knees. Keeping feet together, rotate the top knee open like a clamshell. Return slowly — don’t let the band slam it back down.

Coaching cue: Your hips should not rock backward as you open. If they do, you’re compensating — reduce band resistance. The rotation comes entirely from your hip, not your lower back.

Progression: 3 sets of 15 each side. Add a 2-second hold at the top for increased glute medius engagement.

Full-Body Exercises

13. Band Squat to Press

Stand on the band, hold both ends at shoulder height. Squat down, then as you rise, press both hands overhead. Lower hands back to shoulders as you descend into the next squat.

Coaching cue: Don’t press until you’ve started rising from the squat — combining the press with the leg drive makes the movement more powerful and natural.

Progression: 3 sets of 10–12. This is an excellent finisher or conditioning move.

14. Band Deadlift to Row

Stand on band. Hinge into a Romanian deadlift position. From the bottom of the hinge, row both hands to your lower ribs before standing. Lower hands and stand. That’s one rep.

Coaching cue: This combines a hip hinge with a row — keep your back flat during the row, don’t let your hips rise before the row is complete.

Progression: 3 sets of 10. A demanding compound movement — rest 60 seconds between sets.

15. Band Overhead Squat

Stand on band with feet slightly wider than hip-width. Press the band overhead and hold it there throughout the entire squat. Descend slowly, keeping arms locked overhead.

Coaching cue: This exercise exposes mobility limitations immediately — if your arms want to drift forward, your thoracic spine or shoulder mobility is restricted. Work on band pull-aparts and overhead stretches before forcing this pattern.

Progression: 3 sets of 8. This is a challenging exercise — master the basic squat first.

Sample Full-Body Band Workout

Exercise Sets Reps
Band Pull-Apart 3 15
Band Squat 3 15
Band Romanian Deadlift 3 12
Band Bent-Over Row 3 12
Band Glute Bridge 3 15
Band Pallof Press 3 10 each side

If you want these exercises organized into a full structured program, try our AI Workout Plan Builder — it creates a personalized band training plan based on your goals and fitness level. You can also explore alternatives when a specific exercise doesn’t work for you with our Exercise Substitute Finder.

References

  • Page P. “Current concepts in muscle stretching for exercise and rehabilitation.” International Journal of Sports Physical Therapy, 7(1): 109–119, 2012.
  • American Council on Exercise. ACE Personal Trainer Manual, 5th ed. ACE, 2014.

Full-Body Resistance Band Workout Routine: 3-Day Weekly Plan

A diverse group of individuals performing a full-body workout routine using resistance bands in a bright, modern gym. The image shows various exercises lik

A full-body resistance band workout routine works every major muscle group using just one or two bands. What makes it effective isn’t the equipment — it’s the structure. Three days per week, a clear progression, and exercises that actually challenge you. Here’s a complete 3-day weekly program you can run at home with a single loop band and a tube band with handles.

Who This Program Is For

This plan suits anyone training at home without access to weights or gym machines — beginners building their first routine, experienced lifters maintaining strength while traveling, or anyone returning to fitness after a break. It’s built around full-body sessions (rather than body-part splits) because research published by the Journal of Strength and Conditioning Research found that full-body frequency produces superior muscle growth in training frequencies of 2–3x per week for each muscle group versus once-weekly split training.

Equipment You’ll Need

  • 1 loop resistance band (medium tension — roughly 30–50 lb resistance)
  • 1 tube band with handles (optional — adds more upper body pressing/pulling options)
  • A door anchor (optional — expands exercise variety significantly)

If you’re unsure which bands to buy, our Home Gym Equipment Advisor can recommend the right set for your budget and goals.

The 3-Day Full-Body Band Program

Train Monday / Wednesday / Friday (or any three non-consecutive days). Each session includes a warm-up, main circuit, and cool-down. Total time: 35–40 minutes.

Day 1: Strength Emphasis

Rest 60 seconds between exercises, 90 seconds between rounds. Complete 3 rounds.

Exercise Reps Coaching Cue
Band Squat 15 Band above knees — push knees out throughout
Band Bent-Over Row 12 Hinge at hips, pull elbows past ribs — not toward ears
Band Romanian Deadlift 12 Hips back, flat back — feel hamstrings load before standing
Band Floor Press 12 Band under upper back — press straight up, 3-second lower
Band Glute Bridge 15 Squeeze glutes at top, hold 2 seconds
Band Pallof Press 10 each side Brace core hard, resist rotation

Day 2: Conditioning Emphasis

Perform as a circuit with minimal rest (15 seconds) between exercises. Rest 60 seconds between rounds. Complete 3–4 rounds.

Exercise Duration / Reps Coaching Cue
Band Squat to Press 45 seconds Squat down, press overhead on the way up — fluid movement
Band Lateral Walk 10 steps each side Maintain slight squat, keep tension on band throughout
Band Pull-Apart 15 reps Arms straight — squeeze shoulder blades at end range
Band Woodchop 10 each side Rotate from hips and core, not just arms
Band Bicycle Crunch 20 total (alternating) Slow and controlled — don’t rush, don’t pull your neck

Day 3: Volume Emphasis

Rest 45 seconds between exercises, 60 seconds between rounds. Complete 4 rounds.

Exercise Reps Coaching Cue
Band Split Squat 10 each leg Front knee tracks over toes — back knee drops straight down
Band Single-Arm Row 12 each arm Rotate torso slightly at the bottom — full stretch at the start
Band Bicep Curl 15 Elbows pinned at sides throughout — only forearms move
Band Overhead Tricep Extension 15 Elbows pointing up, not flaring out to the sides
Band Clamshell 15 each side Don’t rock hips — rotate from the hip joint only
Plank (bodyweight) 30–45 seconds Hips level — don’t let lower back sag or hips pike up

Progression Schedule

Use this guide to know when and how to make each session harder:

Weeks Adjustment
1–2 Focus on form — complete all sets and reps without modifying. Prioritize controlled tempo (2 seconds up, 3 seconds down)
3–4 Reduce rest times (60 → 45 seconds between exercises). Add 2–3 reps to each set if possible
5–6 Increase band resistance or add a 2-second pause at the hardest point of each rep
7+ Add a 4th set to each day, or switch to more demanding variations (split squats → Bulgarian split squats, glute bridge → single-leg hip thrust)

Rest and Recovery

Training days matter — but rest days are where adaptation happens. On non-training days:

  • Walk 20–30 minutes (improves circulation and recovery without adding stress)
  • Do 10 minutes of mobility work (hip flexors, thoracic spine, calves)
  • Prioritize 7–9 hours of sleep — muscle protein synthesis peaks during deep sleep

Common Mistakes That Kill Band Program Results

  • Using the same band for everything: You should use a heavier band for squats and rows than for curls. Match resistance to the exercise.
  • Skipping progressive overload: If every session is the same reps with the same band, you’ll plateau fast. Add resistance, reps, or reduce rest every 2 weeks.
  • Letting the band go slack: Resistance bands only work when under tension. Move deliberately — control the eccentric (lowering) phase rather than letting the band snap back.

Want a program built around your specific fitness level and goals? Try our AI Workout Plan Builder for a fully personalized resistance band plan.

References

  • Ralston GW, et al. “The effect of weekly set volume on strength gain.” Journal of Strength and Conditioning Research, 31(8): 2219–2226, 2017.
  • American College of Sports Medicine. ACSM’s Guidelines for Exercise Testing and Prescription, 11th ed. Wolters Kluwer, 2022.

The 30-Minute Full-Body Home Workout: How to Train Efficiently When Time Is Short

A vibrant gym scene where a diverse group of people are engaging in a time-efficient full-body workout. They are using a combination of equipment such as d

Thirty minutes is enough time for a genuinely effective full-body workout — if you know how to use it. The problem isn’t duration; it’s structure. Most 30-minute workouts either move too slow (turning into a 50-minute session) or skip the exercises that actually produce results. This guide gives you a complete, tested framework for full-body training when you have limited time at home.

The Case for Short, Frequent Sessions

A landmark 2016 study published in the Journal of Strength and Conditioning Research (Ralston et al.) found that training frequency and total weekly volume matter more for strength and muscle maintenance than session length. Three 30-minute sessions produce better results than one 90-minute session per week, even at equal total volume — because higher frequency keeps protein synthesis elevated more consistently.

For fat loss specifically, 30-minute circuit-style sessions have been shown to produce similar caloric expenditure to 45–60 minute moderate-intensity cardio when intensity is maintained throughout (Gibala et al., Journal of Physiology, 2012).

The Structure: How to Build a 30-Minute Full-Body Session

Every efficient session follows this sequence:

Phase Duration Purpose
Warm-up 4–5 min Raise core temp, mobilize joints, activate key muscles
Main circuit 20–22 min Resistance + cardio combined, maximum efficiency
Cool-down 3–4 min Lower heart rate, begin recovery

The Warm-Up (5 minutes)

Don’t skip this — even 3–4 minutes of prep reduces injury risk and improves power output in the main circuit. Do each move for 30–45 seconds:

  • Leg swings (forward/back, then side to side)
  • Hip circles (large, slow rotations both directions)
  • Arm circles (forward and backward)
  • Bodyweight squats (slow and controlled)
  • High knees (marching pace)

The 30-Minute Full-Body Circuit

This session uses a 40-second work / 15-second rest interval structure. Perform 3 rounds of 5 exercises. Total main circuit time: approximately 22 minutes.

Circuit A (Rounds 1–3)

Exercise Work Rest Coaching Cue
Squat 40 sec 15 sec Feet hip-width, drive knees out, chest up — don’t let knees cave inward
Push-Up (any variation) 40 sec 15 sec Body forms a straight line from head to heels — if hips sag, drop to knees
Reverse Lunge 40 sec 15 sec Back knee drops straight down, front knee stays over ankle (not past toes)
Plank to Downward Dog 40 sec 15 sec From plank, push hips up and back — hold 1 second at top, return to plank
Mountain Climber 40 sec 15 sec Hips stay level — don’t let them pike up when you drive knees forward

Rest 90 seconds after completing all 5 exercises in a round before beginning the next round.

Intensity Modifications

The same circuit works at different fitness levels based on intensity adjustment — not different exercises:

Level Adjustment
Beginner 40 sec work / 30 sec rest, 2 rounds only, reduce mountain climber pace
Intermediate 40 sec work / 15 sec rest, 3 rounds — as written
Advanced 45 sec work / 10 sec rest, 4 rounds. Replace squats with jump squats, push-ups with pike push-ups

The Cool-Down (4 minutes)

Hold each stretch for 30–45 seconds:

  • Standing quad stretch (balance on one leg, hold opposite foot behind you)
  • Hip flexor stretch (low lunge, push front hip toward floor)
  • Chest opener (arms wide behind you, squeeze shoulder blades)
  • Child’s pose (kneeling, arms extended forward, hold)

How to Progress Week Over Week

Week Target Progression
1–2 Complete all rounds with solid form — get comfortable with the structure
3–4 Add one round (total 4 rounds). Increase squat depth and push-up range of motion
5–6 Switch one flat-ground exercise for a more demanding variation (squats → jump squats, push-ups → diamond push-ups)
7+ Reduce rest periods by 5 seconds per round or add a resistance band to squat and lunge variations

Common Mistakes in Short Workouts

  • Moving too fast and losing form: The goal is sustained effort, not maximum speed. Sloppy reps reduce stimulus and increase injury risk. Control the movement even when fatigued.
  • Using the same workout for months: After 4–6 weeks without changes, your body adapts and progress slows. Change resistance, rest periods, or exercise variations to keep challenging yourself.
  • Treating 30 minutes as “not a real workout”: The research is clear — 30 minutes of structured, high-intensity work outperforms 60 minutes of unfocused effort. Commit fully to the time you have.

Need a fully customized 30-minute workout plan for your specific goals? Try our AI Workout Plan Builder — it generates a structured plan based on your fitness level, schedule, and available equipment.

References

  • Gibala MJ, et al. “Physiological adaptations to low-volume, high-intensity interval training in health and disease.” Journal of Physiology, 590(5): 1077–1084, 2012.
  • Ralston GW, et al. “The effect of weekly set volume on strength gain.” Journal of Strength and Conditioning Research, 31(8): 2219–2226, 2017.

How To Build Strong Legs At Home

A detailed digital illustration of a person working out in their living room, performing various leg exercises such as squats, lunges, and calf raises. The

You do not need a squat rack, a leg press machine, or a gym membership to build powerful legs. The foundational leg exercises — squats, lunges, and calf raises — are bodyweight movements that have been used to build strong lower bodies long before commercial gyms existed. This guide gives you the exact exercises, form cues, and a 4-week progression plan to build strong legs at home starting today.

Why Leg Training at Home Works

Your leg muscles are the largest muscle group in your body. They respond well to volume and progressive challenge — both of which are completely achievable with bodyweight training. Research published in the Journal of Strength and Conditioning Research shows that bodyweight squat variations activate the quadriceps and glutes effectively when performed through a full range of motion.

The key is progressive overload — making the exercises harder over time. Below you will find both beginner and advanced versions of each exercise so you always have somewhere to progress.

The 3 Essential Home Leg Exercises

1. Bodyweight Squat

The squat is the foundation of any leg program. It targets your quads, hamstrings, glutes, and core all at once — no equipment required.

How to do it:

  1. Stand with feet shoulder-width apart, toes pointing slightly outward.
  2. Push your hips back and bend your knees — like sitting into an invisible chair.
  3. Keep your chest up and your knees tracking over your toes throughout.
  4. Lower until your thighs are parallel to the floor, or as low as is comfortable.
  5. Push through your heels to stand. Squeeze your glutes at the top.

Common mistake: Letting the knees cave inward as you rise. To fix this, push your knees outward deliberately on the way up — think “spread the floor” with your feet.

Progressions:

  • Beginner: Squat to a chair (sit and stand)
  • Standard: Full bodyweight squat
  • Intermediate: Slow tempo squat (3 seconds down, 1 second hold, 2 seconds up)
  • Advanced: Single-leg squat (pistol squat progression)

2. Reverse Lunge

Reverse lunges are easier on the knees than forward lunges and equally effective for building glute and quad strength. They also challenge your balance, which recruits stabilizing muscles throughout your lower body.

How to do it:

  1. Stand tall with feet together.
  2. Step one foot back and lower your back knee toward the floor — stop just before it touches.
  3. Keep your front shin as vertical as possible and your torso upright.
  4. Push through your front heel to return to standing.
  5. Complete all reps on one side, then switch.

Common mistake: Leaning forward at the torso. Keep your chest up and shoulders back throughout the movement.

Progressions:

  • Beginner: Shallow reverse lunge (small step back)
  • Standard: Full reverse lunge
  • Intermediate: Rear-foot-elevated split squat (Bulgarian split squat using a couch)
  • Advanced: Walking lunge with a pause at the bottom

3. Calf Raise

The calves are often neglected in home training because people assume they need a machine. They do not. Calf raises done on a stair edge with a full range of motion are extremely effective.

How to do it:

  1. Stand with the balls of your feet on the edge of a stair, heels hanging off the edge.
  2. Lower your heels below the step level to get a full stretch in the calf.
  3. Slowly raise up onto the balls of your feet as high as possible.
  4. Hold the top position for 1 second. Lower slowly over 3 seconds.

Progressions:

  • Beginner: Two-leg calf raise on flat ground
  • Standard: Two-leg calf raise on stair edge
  • Advanced: Single-leg calf raise on stair edge

Your 4-Week Home Leg Training Plan

Train legs 2 to 3 times per week with at least 48 hours between sessions. According to ACE Fitness, muscles need 48 to 72 hours of recovery to repair and grow stronger — especially for beginners.

Week Bodyweight Squat Reverse Lunge Calf Raise Rest Between Sets
Week 1 3 sets x 10 reps 3 sets x 8 each leg 3 sets x 15 reps 60 seconds
Week 2 3 sets x 12 reps 3 sets x 10 each leg 3 sets x 20 reps 60 seconds
Week 3 4 sets x 12 reps 3 sets x 12 each leg 3 sets x 20 reps 45 seconds
Week 4 4 sets x 15 reps 4 sets x 12 each leg 4 sets x 15 single-leg 45 seconds

Warm-Up and Cool-Down (Do Not Skip These)

Before every session (5 minutes):

  • Leg swings — 10 forward/back and 10 side to side, each leg
  • Hip circles — 10 each direction
  • Bodyweight squat x 10 (slow, just warming up)

After every session (5 minutes):

  • Standing quad stretch — 30 seconds each leg
  • Standing hamstring stretch (forward fold) — 45 seconds
  • Hip flexor lunge stretch — 30 seconds each side
  • Calf stretch at wall — 30 seconds each leg

What to Expect After 4 Weeks

By the end of Week 4, most people notice squats feel significantly easier, balance during lunges has improved, and climbing stairs feels less taxing. Visible muscle changes take longer — typically 8 to 12 weeks of consistent training — but functional strength improvements happen within the first month.

Once you complete this plan, move to the intermediate progressions: Bulgarian split squats, single-leg deadlifts, and jump squats for power development.

How to Build Bigger Arms at Home: Bodyweight and Band Exercises That Work

A fit man working out in a cozy home gym with minimal equipment, performing bicep curls with dumbbells and tricep dips on a sturdy chair. The room is brigh

Bigger arms don’t require a gym. What they require is progressive tension applied consistently to the biceps, triceps, and forearms — and bodyweight movements combined with resistance bands can deliver that tension effectively at home. Here’s a complete guide to building arm size and strength without setting foot outside your front door.

The Anatomy of Arm Growth

Arm size comes primarily from two muscle groups: the biceps (front of the arm — responsible for elbow flexion and forearm supination) and the triceps (back of the arm — three heads that account for roughly two-thirds of upper arm mass). Most people overtrain biceps and underwork triceps, which limits overall arm development. A balanced program trains both equally.

Bodyweight Exercises That Build Arm Size

1. Diamond Push-Up (Tricep Focus)

Place hands close together beneath your chest with thumbs and index fingers forming a diamond shape. Lower your chest to your hands, then press back up.

Coaching cue: The most common error is flaring elbows wide — that shifts load to the chest and away from triceps. Keep elbows pointing backward (not to the sides) throughout the movement. If this is too hard initially, do it from your knees.

Progression: 3 sets of 8 → build to 3 sets of 15 → add slow (5-second) lowering phase → elevate feet on a chair.

2. Close-Grip Push-Up (Tricep + Inner Chest)

Hands slightly narrower than shoulder-width, elbows graze your sides as you lower and press.

Coaching cue: This is the foundation before the diamond push-up. If diamond push-ups cause wrist discomfort, use this variation instead — same tricep emphasis with less wrist strain.

Progression: 3 sets of 12. When 15 reps feel easy, move to diamond push-ups.

3. Tricep Dip (Using a Chair)

Sit on the edge of a stable chair. Hands on the seat beside your hips, fingers pointing forward. Lower yourself off the seat by bending your elbows to 90°, then press back up.

Coaching cue: Keep your hips close to the chair. Drifting hips forward shifts the load off your triceps and onto your shoulders. Elbows should stay pointing directly behind you — not flaring outward.

Progression: 3 sets of 10. Build to 15 reps, then add a 2-second pause at the bottom.

4. Chin-Up (Bicep Focus)

Hang from a pull-up bar with palms facing you (underhand/supinated grip), shoulder-width. Pull yourself up until your chin clears the bar. Lower in 3 seconds.

Coaching cue: The underhand grip puts your biceps in their strongest position (supinated forearm). Don’t let shoulders shrug toward your ears at the bottom — maintain shoulder engagement. If you can’t do one full chin-up, start with jumping chin-ups (jump to the top, lower yourself slowly).

Progression: 3 sets of 5 → build to 3 sets of 10 → add a 3-second lowering phase → add bodyweight via a backpack.

Resistance Band Exercises for Arm Building

5. Band Bicep Curl

Stand on the band with feet hip-width. Hold both ends with palms facing up. Curl hands toward shoulders, keeping elbows pinned at sides. Lower in 3 seconds.

Coaching cue: Bands increase resistance as they stretch — meaning the hardest point is at the top (opposite of free weights where the hardest point is the bottom). This unique resistance curve produces excellent bicep peak contraction. Hold the top position 1–2 seconds to maximize it.

Progression: 3 sets of 12–15. Narrow stance to increase band length and resistance.

6. Band Hammer Curl

Same setup as a standard curl but palms face each other (neutral grip) throughout the movement.

Coaching cue: The hammer position targets the brachialis — the muscle under your bicep that, when developed, pushes the bicep up and makes arms look larger from the front. Don’t skip this variation.

Progression: 3 sets of 12. Alternate arms for each rep to increase time under tension.

7. Band Overhead Tricep Extension

Stand on the band with one foot. Hold the other end behind your head with both hands, elbows pointing up. Extend arms overhead until straight. Return slowly.

Coaching cue: Keep elbows pointing straight up throughout — don’t let them flare to the sides. Flaring shifts work to your shoulders. The triceps long head (the biggest head) is best activated when the arm is overhead, making this a high-value exercise.

Progression: 3 sets of 12. Use heavier band or single-arm variation for more difficulty.

8. Band Tricep Kickback

Hinge at hips to 45°. Stand on band, hold both ends. Upper arms parallel to the floor, elbows bent. Extend forearms back behind you until arms are straight. Return slowly.

Coaching cue: The key is keeping the upper arm locked parallel to the floor throughout the movement — only the forearm moves. Most people let the upper arm drop, which reduces tricep engagement.

Progression: 3 sets of 15. Add a 1-second hold at full extension.

Sample Arm Day Program

Exercise Sets Reps Target
Close-Grip Push-Up 3 12 Triceps
Band Bicep Curl 3 12–15 Biceps
Tricep Dip 3 10–12 Triceps
Band Hammer Curl 3 12 Brachialis + Biceps
Band Overhead Tricep Extension 3 12 Tricep Long Head
Chin-Up or Jumping Chin-Up 3 5–8 Biceps + Back

Rest 45–60 seconds between sets. Complete this workout 2x per week — arms also receive work in any push or pull session, so more than twice weekly risks overtraining the elbow joint.

Progression Milestones

Stage Target Before Moving On
Beginner 3 sets of 8 push-ups, 3 sets of 12 band curls with good form
Intermediate 3 sets of 12 diamond push-ups, 5+ full chin-ups, 15 band curls
Advanced 10+ chin-ups, 15 diamond push-ups, add weight via backpack or dip belt

Common Mistakes That Limit Arm Growth

  • Training biceps only: Triceps are two-thirds of upper arm mass. A program with 4 bicep exercises and 1 tricep exercise will leave your arms looking small from the side.
  • Using momentum: Swinging your elbows forward during curls or bouncing during push-ups removes the load from the target muscle. Controlled reps produce results; sloppy reps just fatigue you.
  • Not eating enough protein: Muscles don’t grow in the gym — they grow when you rest and recover, using protein as raw material. Aim for 0.7–1g of protein per pound of bodyweight daily for muscle building.

For a fully personalized arm-building program based on your current level and available equipment, try our AI Workout Plan Builder. If a specific exercise doesn’t work for you, our Exercise Substitute Finder provides instant alternatives.

References

  • Schoenfeld BJ. “The mechanisms of muscle hypertrophy and their application to resistance training.” Journal of Strength and Conditioning Research, 24(10): 2857–2872, 2010.
  • American Council on Exercise. ACE Personal Trainer Manual, 5th ed. ACE, 2014.