Tricep Exercises Without Equipment: 7 Moves That Build Real Arm Strength

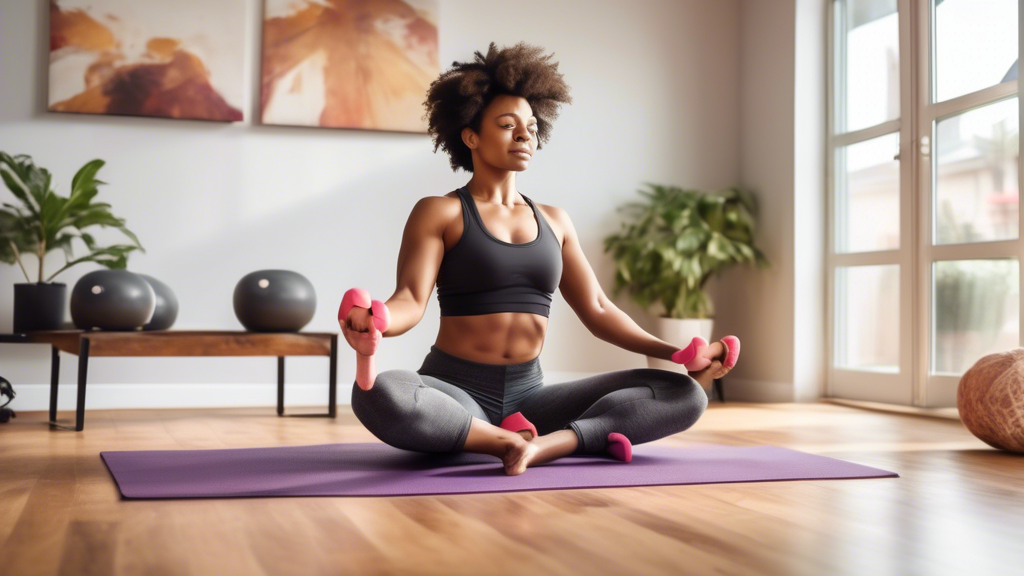
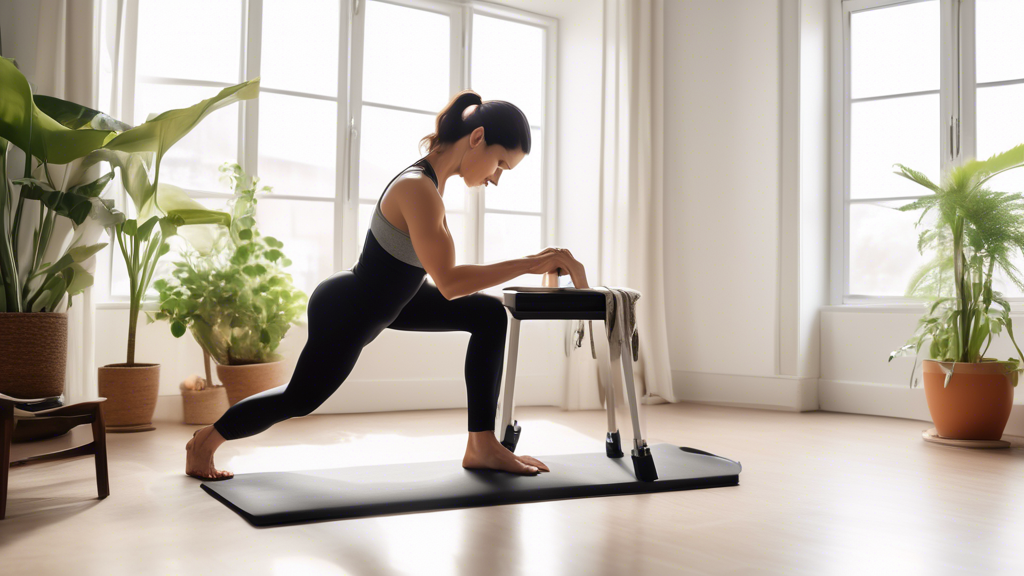
A fit person performing bodyweight tricep exercises in a minimalist home setting. They are doing tricep dips using a sturdy chair, close-grip push-ups on a

The triceps make up roughly two-thirds of your upper arm. If you want arms that look and feel strong, you need to train them directly — and you don’t need a single piece of equipment to do it effectively. Bodyweight tricep training is underused and underestimated. Here’s a complete guide to the best no-equipment tricep exercises, with the coaching cues that turn average results into real ones.

Understanding the Triceps

The triceps brachii has three heads: the long head (runs along the back of the upper arm, largest head — best trained with arms overhead), the lateral head (outside of the arm — prominent when arms are at the sides), and the medial head (underneath, active in nearly all tricep movements). A complete tricep routine includes exercises that target all three — and the exercises below cover each.

The Best No-Equipment Tricep Exercises

1. Close-Grip Push-Up

Hands slightly narrower than shoulder-width. As you lower, elbows track backward along your sides — not flaring outward.

Coaching cue: Think “elbows graze your ribs” on the way down. The moment your elbows flare wide, the load shifts to your chest and shoulders. Hands close + elbows back = triceps do the work.

Muscles targeted: Tricep lateral and medial heads, chest (secondary)

Progression: Start from knees if needed. Build from 3 × 8 to 3 × 15, then elevate feet on a chair.

2. Diamond Push-Up

Hands together beneath your chest, thumbs and index fingers touching to form a diamond. Lower and press, keeping elbows pointing backward.

Coaching cue: This variation places more load on the triceps than any other push-up. The trade-off is it also stresses the wrists — if wrists ache, use the close-grip push-up instead and build wrist strength gradually.

Muscles targeted: Tricep lateral and medial heads (very high), chest (secondary)

Progression: 3 × 8 → 3 × 12 → slow lower (5 seconds) → feet elevated.

3. Chair Dip (Tricep Dip)

Hands on the seat of a sturdy chair, fingers pointing forward, arms straight. Lower yourself by bending elbows until upper arms are parallel to the floor, then press back up.

Coaching cue: Hips stay close to the chair throughout — sliding forward shifts the load off triceps and onto your shoulders, which can cause impingement. Focus on keeping your torso vertical as you lower. Elbows bend backward, not out to the sides.

Muscles targeted: Tricep all three heads, anterior deltoid (secondary)

Progression: Straight legs (easier) → feet elevated on second chair (harder). 3 × 10 → 3 × 15 → add a backpack with books for load.

4. Pike Push-Up (Overhead Tricep Load)

Start in a downward dog position — hips high, hands and feet on the floor, creating an inverted V. Bend elbows and lower the top of your head toward the floor between your hands. Press back up.

Coaching cue: This exercise targets the tricep long head (the one that activates most when arms are overhead) along with shoulders. Keep your core braced — don’t let your lower back arch as you lower. Head lowers between your hands, not toward your hands.

Muscles targeted: Tricep long head, anterior and medial deltoid

Progression: 3 × 8 pike push-ups → elevate feet on a chair → progress toward wall handstand push-ups.

5. Tricep Push-Up (Wide to Narrow)

Begin in a wide push-up position. As you lower, walk both hands inward to create a narrow grip position, then press up from the narrow position. Walk hands back out for the next rep.

Coaching cue: This moving push-up variation dynamically changes the muscle emphasis — great for variety and preventing adaptation plateaus. Go slow; the transition between positions is where form usually breaks down.

Progression: 3 × 8 slow reps. Rest 60–90 seconds between sets.

6. Bench / Floor Skull Crusher (No Weights Version)

Lie on your back on the floor. Place hands on the floor beside your head with elbows pointing straight up (not flaring). Push the floor away to extend your arms overhead. Lower back slowly.

Coaching cue: This movement mimics a dumbbell skull crusher using just your bodyweight and the floor as resistance. The range of motion is limited but the tricep stretch at the bottom is excellent. Keep elbows pointing straight up — any flaring removes the tricep challenge.

Progression: 3 × 12. Move to incline version (head higher than feet) using a couch to increase range of motion.

7. Tricep Pushdown (Using a Door Frame)

Stand facing a door frame. Place both hands on the frame at shoulder height. Keeping elbows at your sides and upper arms fixed, push down on the frame until arms are straight. Release slowly.

Coaching cue: This improvised pushdown works best if you angle slightly away from the door frame to increase resistance. The key is fixing the upper arms in place — only forearms move, just like a cable pushdown at a gym.

Progression: Use a resistance band looped over the door frame for a proper pushdown that allows progressive overload.

Sample No-Equipment Tricep Workout

Exercise Sets Reps Rest
Close-Grip Push-Up 3 12 45 sec
Chair Dip 3 10 60 sec
Pike Push-Up 3 8 60 sec
Diamond Push-Up 3 8 60 sec
Floor Skull Crusher 3 12 45 sec

Run this workout 2–3 times per week. Allow 48 hours between tricep sessions for recovery.

Progression Timeline

Milestone Target
Week 2–3 Complete all sets without form breakdown on close-grip push-ups and dips
Week 4–6 Add slow eccentric (3-second lower) to push-ups and dips
Week 6–8 Add pike push-ups and feet-elevated dips
Week 8+ Add a resistance band for banded dips or overhead extensions for additional progressive overload

Common Mistakes That Limit Tricep Development

  • Flaring elbows during push-ups: Wide elbows = chest exercise. Elbows tracking back = tricep exercise. This single cue changes the entire effect of the movement.
  • Stopping at parallel on dips: Partial range of motion means partial muscle development. Lower until your upper arm is roughly parallel to the floor — if you can’t, build strength gradually.
  • Only doing push-ups: Push-ups are great but they primarily target the medial and lateral tricep heads. Include overhead movements (pike push-ups, overhead extensions) to develop the long head, which gives the arm that thick, rounded look.

Looking to add resistance band exercises to your tricep routine? Our Exercise Substitute Finder can show you band-based alternatives to any of these movements.

References

  • American Council on Exercise. “ACE Study Reveals Best and Worst Triceps Exercises.” ACE Fitness, 2012.
  • Schoenfeld BJ. “The mechanisms of muscle hypertrophy and their application to resistance training.” Journal of Strength and Conditioning Research, 24(10): 2857–2872, 2010.

The Complete At-Home Full-Body Workout Plan: 12 Weeks, 3 Days a Week

A high-energy scene in a modern gym with diverse individuals engaging in various full-body workout exercises, such as squats, lunges, push-ups, burpees, an

A full-body workout plan that actually works has three components: the right exercises, a clear progression structure, and a sustainable frequency. Skip any one of those and you’re just exercising — not training toward a result. This is a complete 12-week, three-days-per-week, no-equipment full-body plan designed for home training.

Why Full-Body Training Works

Full-body sessions (working all major muscle groups each session) outperform body-part splits for most home exercisers for a simple reason: frequency. Each muscle group gets trained 3x per week instead of once, which means more opportunities for growth stimulus. Research published in the Journal of Strength and Conditioning Research confirmed that training frequency of 2–3 sessions per muscle per week produces superior hypertrophy compared to once-weekly splits at equal total volume.

For fat loss, full-body training burns more calories per session because more muscles are working simultaneously — producing a greater metabolic response than isolated exercises or single-body-part days.

How This Plan Works

Three sessions per week: Day 1 (Monday), Day 2 (Wednesday), Day 3 (Friday). At least one full rest day between each session. The program runs in three four-week phases, each progressively more demanding.

Phase 1 — Weeks 1–4: Foundation

Focus on learning movement patterns with full range of motion. Rest 60 seconds between exercises, 90 seconds between rounds. Complete 3 rounds.

Session A (Days 1 and 3 of each week)

Exercise Reps Coaching Cue
Bodyweight Squat 15 Feet hip-width, knees tracking over toes, chest tall
Push-Up (or knee push-up) 10 Body straight head to heels — hips don’t sag or pike
Reverse Lunge 10 each leg Back knee drops straight down, front knee stays over ankle
Superman Hold 10 (3 sec hold) Lift opposite arm and leg simultaneously — squeeze glute and upper back
Plank 20–30 seconds Hips in line with shoulders — don’t hold your breath

Session B (Day 2 of each week)

Exercise Reps Coaching Cue
Glute Bridge 15 Drive hips up, squeeze glutes at top for 2 seconds
Incline Push-Up (hands on chair) 12 Easier than floor push-ups — use to build confidence and form
Step-Up 12 each leg Drive through the heel of the working leg — don’t push off the back foot
Bird Dog 10 each side Opposite arm and leg extend — keep hips level, don’t rotate
Dead Bug 8 each side Lower back stays pressed flat to floor throughout — don’t let it arch

Phase 2 — Weeks 5–8: Build

Add difficulty to each exercise. Reduce rest to 45 seconds between exercises, 60 seconds between rounds. Complete 4 rounds.

Session A

Exercise Reps Upgrade From Phase 1
Jump Squat 10 Replace bodyweight squat — land softly with bent knees
Close-Grip Push-Up 10 Replace standard push-up — elbows track backward
Walking Lunge 10 each leg Replace reverse lunge — maintain upright torso throughout
Superman with Hold + Pause 10 (5 sec hold) Longer hold increases lower back and glute demand
Plank + Shoulder Tap 10 each arm Tap opposite shoulder — keep hips from rotating

Session B

Exercise Reps Upgrade From Phase 1
Single-Leg Glute Bridge 12 each leg One foot lifted — same drive and squeeze cue applies
Pike Push-Up 8 Replace incline push-up — targets shoulders and triceps
Bulgarian Split Squat 10 each leg Back foot on chair — front leg does all the work
Bird Dog with Band 10 each side Add loop band around thighs for glute activation
V-Up 8 Replace dead bug — full range core compression exercise

Phase 3 — Weeks 9–12: Intensity

Circuit style with 30-second rest between exercises only. 4–5 rounds per session.

Circuit (All sessions this phase use the same circuit)

Exercise Reps / Duration Notes
Burpee 8 Full range — chest to floor on the way down
Diamond Push-Up 10 Slow lower (3 seconds), explosive press
Jump Lunge 8 each leg Alternate legs in the air — land softly
Inverted Row (table or low bar) 10 Body straight, pull chest to table edge
Single-Leg Squat to Box 8 each leg Sit to a chair on one leg, stand using one leg
Hollow Body Hold 20–30 sec Lower back pressed flat, arms and legs hovering

What to Do After Week 12

After completing all three phases, you’ll have built a strong movement foundation. Options for continued progress:

  • Restart Phase 1 with resistance bands added to squat, bridge, and lunge variations
  • Add weighted vest or a loaded backpack for bodyweight exercises
  • Use our AI Workout Plan Builder to generate the next phase based on your updated fitness level

Common Mistakes in Full-Body Programs

  • Adding rest days when sessions feel hard: Hard sessions mean the program is working. Adapt, don’t avoid.
  • Skipping Phase 1 because it “looks too easy”: Movement quality in Phase 1 determines how effective Phases 2 and 3 can be. Master the foundation — don’t skip it.
  • Changing exercises too frequently: Consistency with a good program beats constantly switching to “optimal” programs. Stick with each phase for the full 4 weeks to allow adaptation.

References

  • Ralston GW, et al. “The effect of weekly set volume on strength gain.” Journal of Strength and Conditioning Research, 31(8): 2219–2226, 2017.
  • American College of Sports Medicine. ACSM’s Guidelines for Exercise Testing and Prescription, 11th ed. Wolters Kluwer, 2022.

Build Arm Muscle at Home with Dumbbells and Improvised Weights

A fit, determined individual exercising in a cozy home gym, lifting dumbbells with a focused expression a well-equipped home setting filled with a variety

You don’t need a fully equipped gym to build arm muscle at home. A pair of adjustable dumbbells and a resistance band can produce significant arm development — and if you don’t have dumbbells yet, household objects (filled water bottles, a loaded backpack, a gallon jug) work as entry-level substitutes while you build the habit. Here’s exactly how to train arms with whatever you have at home.

What You Need

This guide covers three equipment levels so you can start where you are:

  • Level 1: No equipment — bodyweight only (push-ups, dips, floor exercises)
  • Level 2: Light improvised weights — water bottles (2–8 lbs), a loaded backpack (10–30 lbs), or a gallon jug (8 lbs)
  • Level 3: Resistance bands or adjustable dumbbells — the most effective home arm training setup

If you’re considering buying equipment, our Home Gym Equipment Advisor can recommend adjustable dumbbells or bands within your budget.

Bicep Exercises at Home with Weights

1. Dumbbell / Improvised Bicep Curl

Stand with feet hip-width. Hold weights with palms facing up. Curl hands toward shoulders, keeping elbows pinned at your sides. Lower in 3 seconds.

Coaching cue: Elbows stay fixed — they don’t swing forward or flare out. If they drift, the weight is too heavy. Use lighter objects with perfect form over heavy objects with swing.

Sets and reps: 3 sets of 10–15. Rest 45 seconds between sets.

Progression: Water bottles → gallon jugs → resistance band → adjustable dumbbells starting at 10–15 lbs, progressing 2.5–5 lbs per month.

2. Hammer Curl

Same starting position, but palms face each other (neutral grip) throughout the movement. Curl hands toward shoulders without rotating the wrist.

Coaching cue: The hammer curl targets the brachialis — the muscle that sits underneath your bicep. Developing the brachialis pushes the bicep up, making arms look larger from the front even before the bicep itself grows significantly. Don’t skip this variation.

Sets and reps: 3 sets of 12. Alternate arms (left, right, left, right) to extend time under tension.

3. Concentration Curl

Sit on the edge of a chair. Brace the back of your upper arm against your inner thigh. Curl the weight toward your shoulder. Lower slowly.

Coaching cue: This variation eliminates momentum entirely — your leg acts as a stabiliser that prevents elbow swing. It’s the best isolation curl you can do at home. The range of motion ends when the weight reaches your chin, not your shoulder (longer range = more muscle activation).

Sets and reps: 3 sets of 10–12 each arm.

Tricep Exercises at Home with Weights

4. Dumbbell / Improvised Overhead Tricep Extension

Hold one weight with both hands above your head, elbows pointing up. Lower the weight behind your head by bending your elbows to 90°. Press back up.

Coaching cue: The overhead position is what makes this exercise effective — it puts the tricep long head (the biggest of the three tricep heads) in its fully stretched position, which produces the greatest growth stimulus. Keep elbows pointing straight up throughout; don’t let them drift to the sides.

Sets and reps: 3 sets of 12. Use the heaviest single improvised weight you can manage with control.

5. Dumbbell Skull Crusher (Floor)

Lie on your back on the floor. Hold weights directly above your chest, arms straight. Keeping upper arms vertical, bend elbows and lower weights toward your forehead. Extend back to start.

Coaching cue: Upper arms should not move — only forearms. The moment upper arms start to drift toward your feet, you’re doing a pullover, not a skull crusher. Keep them perpendicular to the floor throughout.

Sets and reps: 3 sets of 10.

6. Tricep Kickback

Hinge at hips to 45°, back flat. Hold weights at your sides with elbows bent. Keeping upper arms parallel to the floor and pinned at your sides, extend forearms behind you until arms are straight. Return slowly.

Coaching cue: The upper arm stays locked parallel to the floor throughout — only the forearm moves. Letting the elbow drop reduces tricep engagement. If you can’t maintain the position, the weight is too heavy.

Sets and reps: 3 sets of 15. A lighter weight with perfect form beats a heavy weight with a moving upper arm.

Sample At-Home Arm Day with Weights

Exercise Sets Reps Target
Bicep Curl 3 12 Biceps
Overhead Tricep Extension 3 12 Tricep Long Head
Hammer Curl 3 12 Brachialis + Biceps
Floor Skull Crusher 3 10 Tricep Medial + Lateral Head
Concentration Curl 3 10 each Bicep Isolation
Tricep Kickback 3 15 Tricep Lateral Head

Rest 45–60 seconds between sets. Train arms 2x per week — muscles need 48 hours between sessions to recover and grow.

Progressive Overload: How to Keep Getting Stronger

Progressive overload is the fundamental principle behind all muscle building — you must give your muscles a progressively harder stimulus over time. At home, without a full dumbbell rack, this means:

  • Add reps first: When you can complete 15 clean reps, it’s time to increase load
  • Then add load: Move from water bottles to a loaded backpack, then to a resistance band, then to actual dumbbells
  • Or increase time under tension: Slow the lowering phase to 4–5 seconds — this increases the challenge without needing more weight
  • Or increase sets: Move from 3 to 4 sets per exercise before adding load

Common Mistakes

  • Using objects that are too light: If the last 2 reps don’t feel challenging, the load needs to increase. “I felt fine” usually means the muscles weren’t sufficiently challenged.
  • Training biceps only: Triceps are two-thirds of upper arm mass. A balanced arm routine trains both equally — not 4 bicep exercises and 1 tricep exercise.
  • Not tracking progress: Keep a simple log (date, exercise, reps, load). Without tracking, you’ll likely repeat the same session for months without progression.

For a fully personalized home arm training plan, try our AI Workout Plan Builder. If a specific exercise isn’t working for you, our Exercise Substitute Finder has instant alternatives.

References

  • Schoenfeld BJ. “The mechanisms of muscle hypertrophy and their application to resistance training.” Journal of Strength and Conditioning Research, 24(10): 2857–2872, 2010.
  • American Council on Exercise. ACE Personal Trainer Manual, 5th ed. ACE, 2014.

10 Best Full-Body Exercises to Do at Home (With Progression for Every Level)

A dynamic and energetic gym scene featuring a diverse group of individuals performing a variety of full-body exercises. Participants are engaged in activit

A handful of exercises done consistently will build more strength and fitness than an endless rotation of workouts you never master. These 10 full-body exercises are the ones worth mastering — each works multiple muscle groups simultaneously, requires no equipment, and has a clear progression path from beginner to advanced. Here’s how to do each one correctly, and what to do when it gets easy.

How to Use This Guide

These exercises are organized by movement pattern — not by body part. Each pattern (squat, hinge, push, pull, carry) trains your body in ways that translate to everyday strength. Together they cover every major muscle group. Use them as a standalone workout or mix and match based on your goals.

1. Squat

The squat trains the quadriceps, glutes, hamstrings, and core simultaneously — making it the single most effective lower-body exercise you can do without equipment.

How to do it: Feet hip-width, toes slightly out. Lower by pushing hips back and down until thighs are parallel to the floor (or as low as mobility allows). Drive through heels to stand.

Coaching cue: Keep your chest tall — if your torso falls forward, your heels will lift. Think “chest up” every rep. Knees should track in the same direction as your toes throughout the movement.

Beginner: 3 × 10 bodyweight squats | Intermediate: 3 × 15 with a 3-second pause at the bottom | Advanced: Jump squats, pistol squat progressions

2. Hip Hinge (Glute Bridge)

The hip hinge is the foundational pattern for every pulling movement — it trains the glutes, hamstrings, and lower back. The glute bridge is the safest entry point for most people.

How to do it: Lie on your back, knees bent, feet flat. Drive your hips up by squeezing your glutes until your hips, knees, and shoulders form a straight line. Hold 2 seconds. Lower slowly.

Coaching cue: Most people just lift their hips without squeezing their glutes — the hips go up but the muscles don’t activate fully. Focus on the squeeze at the top. Push your knees outward slightly (don’t let them cave inward) for full glute activation.

Beginner: 3 × 12 double-leg | Intermediate: Single-leg glute bridge | Advanced: Feet elevated on a couch (full hip thrust range of motion)

3. Push-Up

The push-up trains the chest, triceps, anterior deltoids, and core in one integrated movement. It scales from beginner (incline / knee push-up) to advanced (diamond, plyometric, pike) without any equipment.

How to do it: Hands slightly wider than shoulder-width. Body forms a straight line from head to heels. Lower until chest nearly touches the floor. Press back up.

Coaching cue: The most common error is letting hips sag toward the floor — this removes core engagement and puts strain on the lower back. Brace your core as if bracing for a punch, and maintain that tension throughout every rep.

Beginner: 3 × 8 knee or incline push-ups | Intermediate: 3 × 12 full push-ups | Advanced: Diamond push-ups, pike push-ups, decline push-ups

4. Lunge

The lunge is a single-leg movement that builds unilateral leg strength and addresses muscle imbalances that bilateral (both-legged) squats can hide. It trains the quads, glutes, and hamstrings with a balance challenge.

How to do it: Step one foot forward. Lower your back knee toward the floor until front thigh is parallel to the floor. Keep torso upright. Drive through the front heel to return to standing.

Coaching cue: The front knee should stay over the ankle — not collapsing inward (which stresses the knee joint). Keep your torso vertical — leaning forward shifts work to the lower back instead of your legs.

Beginner: 3 × 8 each leg, reverse lunge (lower knee injury risk) | Intermediate: 3 × 12 walking lunges | Advanced: Bulgarian split squat (back foot elevated), jumping lunges

5. Plank

The plank trains the core as a stability system rather than just the abs. It strengthens the deep stabilizing muscles (transverse abdominis, obliques, and spinal erectors) that protect the lower back in every other exercise.

How to do it: Forearms on the floor, elbows under shoulders. Body forms a straight line. Brace your core and squeeze your glutes. Breathe normally.

Coaching cue: Don’t hold your breath — it inflates intra-abdominal pressure artificially and doesn’t train actual core stability. Breathe steadily throughout. If your hips start to drop, drop to your knees rather than compensating.

Beginner: 3 × 15–20 seconds | Intermediate: 3 × 40–60 seconds | Advanced: Plank shoulder taps, plank to downward dog, RKC plank

6. Superman Hold

The Superman targets the posterior chain — glutes, lower back, and upper back — muscles that are chronically underworked by people who sit for most of the day. It’s one of the most important and most neglected home exercises.

How to do it: Lie face down, arms extended overhead. Simultaneously lift your arms, chest, and legs off the floor. Hold 2–3 seconds. Lower slowly.

Coaching cue: The lift should be controlled, not jerked. Focus on squeezing the glutes as you lift your legs — many people only feel this in their lower back, which means the glutes aren’t engaging. Thinking “squeeze the glutes first” fixes this.

Beginner: 3 × 8 with 2-sec hold | Intermediate: 3 × 12 with 3-sec hold | Advanced: Add a resistance band across shoulders for upper back resistance

7. Mountain Climber

Mountain climbers are a full-body exercise combining core stability, hip flexor strength, and cardiovascular demand. They’re one of the most efficient time-per-benefit exercises in home training.

How to do it: Start in a push-up position. Drive one knee toward your chest, then alternate legs rapidly while keeping hips level.

Coaching cue: The most common error is piking the hips up to make knee drive easier — this removes the core challenge and turns the exercise into something different. Hips stay level, in line with shoulders. If hips rise, slow down.

Beginner: 3 × 20 seconds at walking pace | Intermediate: 3 × 30 seconds at running pace | Advanced: 3 × 45 seconds with cross-body knee drive (knee to opposite elbow)

8. Burpee

The burpee combines a squat, plank, push-up, and jump into one movement — making it one of the most metabolically demanding bodyweight exercises available. Research from the American Council on Exercise identified high-intensity exercises like burpees as among the most effective for caloric expenditure per minute.

How to do it: Stand → squat and place hands on floor → jump or step feet back to plank → lower chest to floor (optional push-up) → jump feet forward → jump up with hands overhead.

Coaching cue: Land with soft, bent knees — not stiff straight legs. Landing stiff compresses the joints and dramatically increases injury risk over time. Every landing is a mini-squat.

Beginner: 3 × 5 step-back burpees (no jump) | Intermediate: 3 × 8 standard burpees | Advanced: 3 × 10 with push-up at the bottom and tuck jump at the top

9. Bird Dog

The bird dog trains core anti-rotation stability — the ability to resist the rotational forces that occur in every movement. It’s particularly valuable for lower back health and carryover to all other exercises.

How to do it: Kneel on all fours, hands under shoulders, knees under hips. Extend one arm forward and the opposite leg back simultaneously. Hold 2–3 seconds. Return. Alternate sides.

Coaching cue: Hips should not rotate as the leg extends — the moment your hip rotates up, you’ve gone too far. Think about keeping your back flat enough that a water glass resting on your lower back wouldn’t spill. This cue immediately reveals overextension.

Beginner: 3 × 8 each side | Intermediate: 3 × 12, add 3-sec hold | Advanced: Add a resistance band around thighs for glute challenge

10. Step-Up

The step-up is one of the most functional exercises in home training — it mirrors the hip extension pattern used in climbing stairs, getting out of a car, and rising from a low seat. It builds single-leg strength and glute power.

How to do it: Stand facing a sturdy step, low chair, or stair. Place one foot fully on the surface. Drive through that heel to stand on the step. Lower the trailing leg back to the floor. Complete all reps on one leg before switching.

Coaching cue: Drive through the working heel — don’t push off the back foot. If you’re pushing off the back foot to help yourself up, the step is too high or you’re not strong enough yet in that position. Lower the step height until you can drive cleanly from the working leg alone.

Beginner: 3 × 8 each leg on a low step (6–8 inches) | Intermediate: 3 × 12 each leg on a chair height (16–18 inches) | Advanced: Weighted step-up (loaded backpack), explosive step-up with knee drive

Sample Full-Body Workout Using These Exercises

Exercise Sets Reps / Duration
Squat 3 15
Push-Up 3 10–12
Glute Bridge 3 15
Reverse Lunge 3 10 each leg
Plank 3 30 sec
Bird Dog 3 8 each side
Step-Up 3 10 each leg
Mountain Climber 3 20 sec

Rest 45–60 seconds between exercises. Complete 2–3 days per week with at least one rest day between sessions.

Want these exercises built into a structured program with progressions tailored to your fitness level? Try our AI Workout Plan Builder. If you need substitutes for any exercise, our Exercise Substitute Finder has you covered.

References

  • American Council on Exercise. “New ACE Research Reveals ‘Best’ and ‘Worst’ Ab Exercises.” ACE Fitness, 2001.
  • Schoenfeld BJ, et al. “Effects of resistance training frequency on measures of muscle hypertrophy.” Sports Medicine, 46(11): 1689–1697, 2016.

Core Workout at Home: 12 Exercises, 3 Levels, One Complete Program

A cozy home living room with an individual performing core exercises, such as planks, sit-ups, and leg raises, on a yoga mat. The room is bright with natur

Most people train their abs but neglect their core. There’s a difference. Your core includes the transverse abdominis (the deep stabilizing muscle), obliques, erector spinae, and glutes — not just the six-pack muscles on the front. Training all of them builds real stability, reduces back pain, and improves every other exercise you do.

This guide gives you 12 exercises organized into three levels, plus a 15-minute routine you can run at home with no equipment.

What “Core” Actually Means

Your core is the cylinder of muscles surrounding your spine — from your diaphragm down to your pelvic floor. When it works properly, your spine stays stable whether you’re lifting, running, or sitting at a desk for eight hours.

The exercises that train this system most effectively are anti-rotation and anti-extension movements — dead bugs, planks, hollow holds — not just crunches, which only train spinal flexion in one direction.

Level 1: Beginner Core Exercises

Start here if core training is new to you or if you have lower back discomfort. Focus on breathing and keeping your lower back pressed to the floor.

Dead Bug — 3 × 6 reps per side

Lie on your back with arms pointing to the ceiling and knees bent at 90 degrees. Slowly lower your right arm and left leg toward the floor while pressing your lower back flat. Return and switch sides. This forces the deep stabilizers to brace your spine exactly as they do in real movement.

Bird Dog — 3 × 8 reps per side

On all fours, extend your right arm and left leg simultaneously, keeping your hips square and level. Hold 2 seconds, return, switch. Don’t let your lower back arch or your hips rotate.

Plank — 3 × 20–30 seconds

Forearm plank, body in a straight line — no sagging hips, no raised butt. If you can hold 30 seconds easily, move to Level 2. Quality beats duration: a 20-second braced plank beats a 60-second saggy one.

Glute Bridge — 3 × 12 reps

Lie on your back, feet flat, knees bent. Drive through your heels to lift your hips until your body forms a straight line from knees to shoulders. Hold 2 seconds at the top. The glutes are a core muscle — don’t skip them.

Level 2: Intermediate Core Exercises

Once you can complete Level 1 with full control and no back discomfort, move here.

Hollow Body Hold — 3 × 20–30 seconds

Lie on your back, press your lower back into the floor, extend arms overhead, and lift your legs 6–12 inches. Hold. This looks like resting but creates enormous demand on the deep core stabilizers. If your back lifts off the floor, raise your legs higher until it doesn’t.

Side Plank — 3 × 20–30 seconds per side

Forearm side plank with hips raised and body straight. Progress by adding hip dips: lower your hips to the floor and raise back up for 10 reps instead of just holding.

Bicycle Crunch (Slow) — 3 × 10 reps per side

Two seconds per rotation, pausing at the top of each twist. Speed cheats; slow reps force real oblique engagement. If you’re swinging your elbows, you’re going too fast.

Single-Leg Glute Bridge — 3 × 10 per leg

Same as the glute bridge, but extend one leg straight while driving through the planted heel. This reveals hip asymmetries and significantly increases the demand on your glutes and hamstrings.

Level 3: Advanced Core Exercises

These require solid baseline stability. Form matters more than getting here quickly.

Ab Wheel Rollout — 3 × 6–8 reps

From your knees, roll forward on an ab wheel (or barbell with plates), extending your arms while keeping your core braced. Roll only as far as you can without your lower back arching — even a few inches at first. Work the range of motion honestly.

Hanging Leg Raise — 3 × 8–10 reps

Hang from a pull-up bar, brace your core, and raise your legs to 90 degrees. Lower under control. Don’t swing. If you don’t have a bar, a sturdy doorframe pull-up bar costs about $30 and handles this exercise well.

Copenhagen Plank — 3 × 10–15 seconds per side

Side plank with your top foot resting on a chair or bench. Raise your bottom leg up to meet it. Brutally effective for the adductors and lateral core — muscles most people never train directly.

Dragon Flag Negative — 3 × 3–5 reps

Lie on a bench, grip the bench above your head, raise your body to vertical, then slowly lower as a unit to horizontal — fighting the descent with your entire core. Start with just the lowering phase. This is the hardest exercise here; work up to it over weeks, not days.

The 15-Minute Home Core Routine

Choose the level that matches your current ability for each exercise. Rest 30–45 seconds between sets.

  • Dead Bug or Hollow Body Hold — 3 × 6 reps / 20 sec
  • Plank or Ab Wheel Rollout — 3 × 20–30 sec / 6 reps
  • Side Plank or Copenhagen Plank — 3 × 20 sec per side
  • Glute Bridge or Single-Leg Bridge — 3 × 10–12 reps
  • Slow Bicycle Crunch or Hanging Leg Raise — 3 × 10 reps

Run this 2–3 times per week with at least one day between sessions. The core recovers faster than large muscle groups but still needs recovery.

Common Mistakes

  • Only training the front. Balance planks and crunches with bird dogs and bridges. Posterior core weakness is the most common cause of lower back pain.
  • Going too fast. Core exercises done with momentum become momentum exercises. Slow down and feel the muscle working.
  • Skipping dead bugs and hollow holds. They look easy. They’re not. They build the foundation that harder exercises depend on.
  • Training core daily. Three times per week is enough. More isn’t better; it just delays recovery.

Move to the next level when you can complete all exercises with full control, proper breathing, and no compensation. That might take two weeks or six — both are fine.

The 20-Minute Full-Body Home Workout: 4 Routines for Every Fitness Level

A vibrant, energetic scene showing a diverse group of people in a modern gym, engaged in various full-body workouts. Some are doing jumping jacks, others a

Twenty minutes is enough time for a genuinely effective full-body workout — if it’s structured right. These four routines use compound movements that hit multiple muscle groups simultaneously, so no time is wasted on isolation work when the clock is ticking.

Pick the routine that fits your current level. No equipment required; dumbbells or resistance bands are optional additions.

How These Routines Work

Each routine uses a circuit format — you move through exercises back-to-back with short rest periods. This keeps your heart rate elevated while building strength, so you get cardiovascular and muscular benefits in the same session. The key variable between levels is intensity, not duration — all four routines fit in 20 minutes.

Routine 1: Beginner — 20 Minutes

For people new to exercise or returning after a long break. Every exercise has a modification if you need it.

Warm-up (3 min): March in place 1 min → slow arm circles 30 sec → hip circles 30 sec → 10 slow bodyweight squats

Circuit — 3 rounds, 30 sec work / 15 sec rest:

  • Wall push-up (or knee push-up)
  • Bodyweight squat
  • Alternating reverse lunge
  • Bird dog (alternating sides)
  • Glute bridge

Cool-down (2 min): Standing quad stretch → seated hamstring stretch → cat-cow × 10

Each round takes about 4–5 minutes. Three rounds plus warm-up and cool-down lands at 20 minutes.

Routine 2: Intermediate — 20 Minutes

For people who’ve been training consistently for at least 8 weeks and can do full push-ups with good form.

Warm-up (2 min): 30 sec jumping jacks → 30 sec inchworms → 30 sec hip flexor stretch → 30 sec leg swings

Circuit — 3 rounds, 40 sec work / 20 sec rest:

  • Push-up
  • Goblet squat (hold a dumbbell, water jug, or go slow bodyweight)
  • Plank row (from push-up position, row one arm up while the other stays planted)
  • Reverse lunge to knee drive
  • Mountain climbers
  • Single-leg glute bridge (switch legs each round)

Cool-down (2 min): Pigeon pose 30 sec per side → thoracic rotation → slow breathing

Routine 3: HIIT — 20 Minutes

Work at maximum effort. If you’re not breathing hard, you’re not going hard enough. This format uses Tabata intervals: 20 seconds work, 10 seconds rest, 8 rounds per exercise pair.

Warm-up (3 min): Light jog in place → dynamic stretches → 20 sec high knees

4 rounds × 4 minutes each (20 sec on / 10 sec off, alternating two exercises):

  • Round 1: Squat jump ↔ push-up
  • Round 2: Burpee ↔ plank hold
  • Round 3: Alternating reverse lunge ↔ mountain climbers
  • Round 4: Jumping jack ↔ hollow body hold

Cool-down (3 min): Walk in place → full-body static stretch → slow breathing

Limit HIIT to twice per week maximum. It’s taxing on your central nervous system and needs 48 hours of recovery between sessions to be effective.

Routine 4: Low-Impact — 20 Minutes

No jumping, no impact. Ideal for recovery days, joint issues, or apartment workouts where floor noise matters.

Warm-up (3 min): March in place → shoulder rolls → slow lateral steps → 5 slow bodyweight squats

Circuit — 3 rounds, 45 sec work / 15 sec rest:

  • Step-touch lateral shuffle
  • Slow squat (4 sec down, 2 sec hold, 2 sec up)
  • Modified push-up (knees or wall)
  • Standing hip abduction (lift one leg out to the side, controlled)
  • Dead bug
  • Seated torso twist

Cool-down (2 min): Full-body stretch sequence

Choosing the Right Routine

Routine Best for Frequency
Beginner New to exercise, returning after a break 3×/week
Intermediate Active for 2+ months, ready to increase intensity 3–4×/week
HIIT Maximum calorie burn in minimum time 2×/week max
Low-Impact Joint issues, recovery days, quiet environment As needed

How to Keep Progressing

Without progressive overload, your body adapts to these routines in 4–6 weeks and the results plateau. To keep progressing with no equipment:

  • Increase work intervals (30 sec → 40 sec → 45 sec)
  • Decrease rest intervals (20 sec → 15 sec → 10 sec)
  • Move to harder exercise variations (wall push-up → knee push-up → full push-up → archer push-up)
  • Add a resistance band or light dumbbells to lower-body exercises

Track your rounds and reps. If the same routine feels significantly easier than it did last week, it’s time to add difficulty.