How to Strengthen Your Leg Muscles at Home: A 6-Week Progressive Plan

A bright and inviting home gym setting featuring a person performing various leg exercises. The person is using resistance bands, doing squats, lunges, and

Six weeks of structured home training is enough time to produce noticeable improvements in leg strength — measured both by how the exercises feel and by objective metrics like max reps and how long you can hold static positions. This plan gives you exactly that: a week-by-week progression with specific targets.

Before You Start: Baseline Tests

Record these numbers before Week 1. You’ll retest at Week 3 and Week 6.

  • Bodyweight squat — max reps with good form
  • Wall sit — max time
  • Single-leg calf raise — max reps per leg
  • Glute bridge hold — max time

Weeks 1–2: Build the Pattern

Three sessions per week. Focus on form and full range of motion — not intensity.

Workout (3× per week):

  • Bodyweight squat — 3 × 15
  • Reverse lunge — 3 × 10 per leg
  • Glute bridge — 3 × 15
  • Wall sit — 3 × 30 sec
  • Standing calf raise — 3 × 20

Rest 60 sec between sets. Controlled tempo: 2 sec down, 1 sec pause, 2 sec up.

Weeks 3–4: Add Difficulty

Midpoint test after Week 3 before increasing difficulty. Then introduce harder variations.

Workout (3× per week):

  • Pause squat (3 sec hold at bottom) — 3 × 10
  • Walking lunge — 3 × 10 per leg
  • Single-leg glute bridge — 3 × 12 per leg
  • Wall sit — 3 × 45 sec
  • Single-leg calf raise — 3 × 15 per leg

Rest 75 sec between sets.

Weeks 5–6: Maximum Challenge

Introduce Bulgarian split squat and Nordic hamstring curl. These are the most demanding bodyweight leg exercises available.

Session A (2 of 3 sessions each week):

  • Bulgarian split squat — 3 × 8 per leg
  • Single-leg RDL (bodyweight) — 3 × 8 per leg
  • Hip thrust (shoulders on couch) — 3 × 12
  • Jump squat — 3 × 8

Session B (1 of 3 sessions each week):

  • Nordic hamstring curl negative — 3 × 5
  • Pause squat — 3 × 8
  • Single-leg calf raise + 3 sec tempo — 3 × 12 per leg
  • Wall sit — 3 × 60 sec

Retest at Week 6

Repeat your baseline tests. Typical results after 6 weeks of consistent training:

  • Squat max reps: +30–50%
  • Wall sit: +40–80% duration
  • Calf raise: +5–10 reps per leg
  • Glute bridge hold: +30–60 sec

After Week 6

Restart the program at Week 1 using harder starting variations — Bulgarian split squat instead of bodyweight squat, single-leg variations everywhere possible. Apply the same 6-week progression to the more demanding exercises. This is how you continue building beyond the beginner phase without needing gym equipment.

How to Tone Your Arms at Home: What It Means, What Works, and a Simple Weekly Plan

A fit person working out in a cozy living room with a yoga mat, dumbbells, and resistance bands. The individual is performing various exercises like bicep

“Toned” arms means two specific things happening together: muscle development that creates shape and definition, and low enough body fat to make that definition visible. Exercise achieves the first. Consistent nutrition achieves the second. Most arm-toning advice covers only one side of this equation. Here’s both.

What “Toning” Actually Is

Muscle doesn’t have a “toned” mode. It either grows from resistance training or it atrophies from disuse. The “toned” appearance is what muscle looks like when body fat is low enough to see the muscle’s shape clearly. You can’t selectively “firm” a muscle — you build it, and you reduce the fat layer over it.

This means arm toning requires two parallel processes: consistent arm training (to build and maintain muscle) and a moderate calorie deficit with high protein (to reduce body fat over the arms and elsewhere).

The Training Side: Best Arm Exercises at Home

Push Side (Triceps + Shoulders)

Tricep dip — 3 × 10–12: Hands on a sturdy chair, lower until elbows at 90°. The triceps are two-thirds of your upper arm — don’t skip them.

Diamond push-up — 3 × 8: Hands close under chest. Best bodyweight tricep exercise.

Pike push-up — 3 × 8: Hips raised in inverted V, lower head toward floor. Develops shoulder shape that makes arms look more defined.

Pull Side (Biceps + Back)

Table row — 3 × 10: Under a sturdy table, pull chest to the surface. Works biceps and upper back simultaneously.

Towel row — 3 × 10: Towel around door handle, lean back and row. Bicep and rear deltoid work.

Sample Weekly Arm Routine

Monday: Diamond push-up 3×8 → Table row 3×10 → Tricep dip 3×10 → Pike push-up 3×8

Wednesday: Close-grip push-up 3×10 → Towel row 3×10 → Plank shoulder tap 3×12 per side

Friday: Repeat Monday with +1 rep per set on each exercise

Rest at least one day between sessions. Arm muscles recover in 48 hours.

The Nutrition Side: Revealing the Definition

Training builds the muscle. Here’s what reduces the fat layer over it:

  • Protein: 0.7–1g per pound of bodyweight daily. High protein preserves muscle while you lose fat.
  • Calorie deficit: 300–400 calories below your daily maintenance. Enough to lose ~0.5–0.75 lb per week without excessive muscle loss.
  • Consistency: This takes months, not weeks. 12–16 weeks of consistent training + diet is a realistic timeline for visible arm definition changes.

What Doesn’t Work

Spot reduction: You cannot target fat loss to your arms by doing arm exercises. Fat is lost from all over the body simultaneously, in a genetically determined pattern. The exercises build the muscle; the overall calorie deficit removes the fat — everywhere.

Very high reps with no resistance: 100 arm circles daily won’t build muscle. The load needs to be challenging enough that the last few reps of each set are difficult.

Timeline to Expect

Strength improvements: 2–3 weeks. Visible muscle definition emerging: 6–8 weeks of consistent training. Significant visible change: 12–16 weeks with training and diet combined. These timelines are the same whether you train at home or in a gym — the variable is consistency, not the equipment.

Abs in 30 Days at Home: What’s Realistic and a Program That Actually Delivers

A fit individual demonstrating effective at-home ab exercises, surrounded by everyday household items, with a visible transformation calendar chart showing

Most “abs in 30 days” programs make a promise they can’t keep because they conflate two different things: building core strength (which 30 days of training absolutely can accomplish) and achieving visible six-pack abs (which requires a level of fat loss that takes most people 3–6 months). Here’s an honest breakdown and a 30-day program built on what’s actually achievable.

What 30 Days of Ab Training Can Accomplish

Will accomplish:

  • Measurably stronger core — better plank time, more controlled leg raises, improved stability in squats and everyday movement
  • Reduced lower back discomfort (for most people with desk jobs)
  • Better posture from improved deep core activation
  • The muscle foundation that becomes visible as body fat decreases over subsequent months

Will not accomplish (in 30 days):

  • Visible six-pack abs if you’re currently above ~15% body fat (men) or ~22% (women)
  • Spot fat reduction from your midsection

The 30-Day Ab Training Program

Train abs 5 days per week, rest 2. Each session is 12–15 minutes. The difficulty increases week by week.

Week 1 (Days 1–5): Foundation

  • Plank — 3 × 20 sec
  • Dead bug — 3 × 6 per side
  • Glute bridge — 3 × 12
  • Slow bicycle crunch — 3 × 8 per side

Week 2 (Days 8–12): Volume

  • Plank — 3 × 30 sec
  • Dead bug (full extension) — 3 × 8 per side
  • Hollow body hold — 3 × 20 sec
  • Slow bicycle crunch — 3 × 10 per side
  • Leg raise (bent knee) — 3 × 10

Week 3 (Days 15–19): Intensity

  • Plank shoulder tap — 3 × 10 per side
  • Hollow body hold — 3 × 25 sec
  • Leg raise (straight) — 3 × 10
  • Dead bug + 3 sec hold — 3 × 6 per side
  • Side plank — 3 × 20 sec per side

Week 4 (Days 22–26): Peak

  • Ab wheel rollout — 3 × 6 (or lying version with towel)
  • Hanging leg raise (bar) or straight-leg floor raise — 3 × 8
  • Hollow body hold — 3 × 30 sec
  • Criss-cross (Pilates) — 3 × 10 per side
  • Side plank hip dip — 3 × 10 per side

Day 30: Retest

Measure: max plank time, max bicycle crunch reps with 1-sec pause, and max hollow body hold time. Compare to Day 1. The improvement will be significant — this is real, measurable progress.

What to Do After Day 30 for Visible Abs

Continue the Week 4 program. Add the diet component: a 300–500 calorie daily deficit with 0.7–1g protein per lb bodyweight. The abs you’ve spent 30 days building will progressively become visible as body fat decreases over the following 3–6 months. The training and diet phases aren’t separate steps — they’re parallel tracks that run together.

Home Leg Workout: 7 Exercises, Sets, Reps, and How to Progress Each One

Create an image of a person exercising in a living room, performing various leg workouts such as squats, lunges, and leg lifts. Include a yoga mat, resista

This is a reference guide for home leg training — seven exercises with specific sets, reps, and progression paths for each. Use it to build a program or add exercises to an existing routine. All exercises require no equipment; optional additions (resistance bands, loaded backpack) are noted where they help.

Exercise 1: Bodyweight Squat

Muscles: Quads, glutes, hamstrings
How to: Feet shoulder-width, chest up, sit back and down until thighs parallel, drive through heels.
Sets/reps: 3 × 15
Progress to: Pause squat (3 sec at bottom) → Bulgarian split squat → Pistol squat

Exercise 2: Reverse Lunge

Muscles: Quads, glutes, hamstrings, balance
How to: Step backward into lunge, lower rear knee toward floor, return. Alternate legs.
Sets/reps: 3 × 10 per leg
Progress to: Walking lunge → Lateral lunge → Deficit lunge (front foot elevated)

Exercise 3: Glute Bridge

Muscles: Glutes, hamstrings, lower back stabilizers
How to: On your back, feet flat, drive hips up, hold 2 sec, lower.
Sets/reps: 3 × 15
Progress to: Single-leg glute bridge → Hip thrust (shoulders on couch) → Hip thrust with resistance band

Exercise 4: Calf Raise

Muscles: Gastrocnemius, soleus
How to: Rise onto toes, hold 1 sec, lower fully. Use a step for extra range if available.
Sets/reps: 3 × 20
Progress to: Single-leg calf raise → Single-leg with slow tempo (3 sec up, 3 sec down) → Add load

Exercise 5: Step-Up

Muscles: Quads, glutes
How to: Step onto a sturdy chair with one foot, bring the other up, step back down.
Sets/reps: 3 × 10 per leg
Progress to: Higher surface → Add loaded backpack → Single-leg step-down (controlled descent on one leg)

Exercise 6: Nordic Hamstring Curl

Muscles: Hamstrings (best bodyweight hamstring exercise available)
How to: Hook feet under a sofa, kneel upright, lower body to floor by resisting with hamstrings only. Catch with hands. This is very difficult — start with just the lowering phase.
Sets/reps: 3 × 4–5 negatives (lower over 3–4 sec)
Progress to: Lower more slowly → Reduce assistance from hands → Full Nordic curl (pulling back up)

Exercise 7: Wall Sit

Muscles: Quads, glutes (isometric)
How to: Back against wall, thighs parallel to floor, hold position. 90-degree angle at the knee is the target.
Sets/reps: 3 × 30–45 sec
Progress to: Longer duration → Single-leg wall sit → Add resistance band above knees

Building a Weekly Program

Train legs 2–3× per week. A simple structure:

Session A (knee-dominant): Squat + Lunge + Step-up + Calf raise

Session B (hip-dominant): Glute bridge + Nordic curl + Single-leg RDL + Wall sit

Alternate between sessions. When any exercise reaches the top of its rep range easily, progress to the next variation.

How to Build Six-Pack Abs at Home: The Training Plan and the Diet Reality

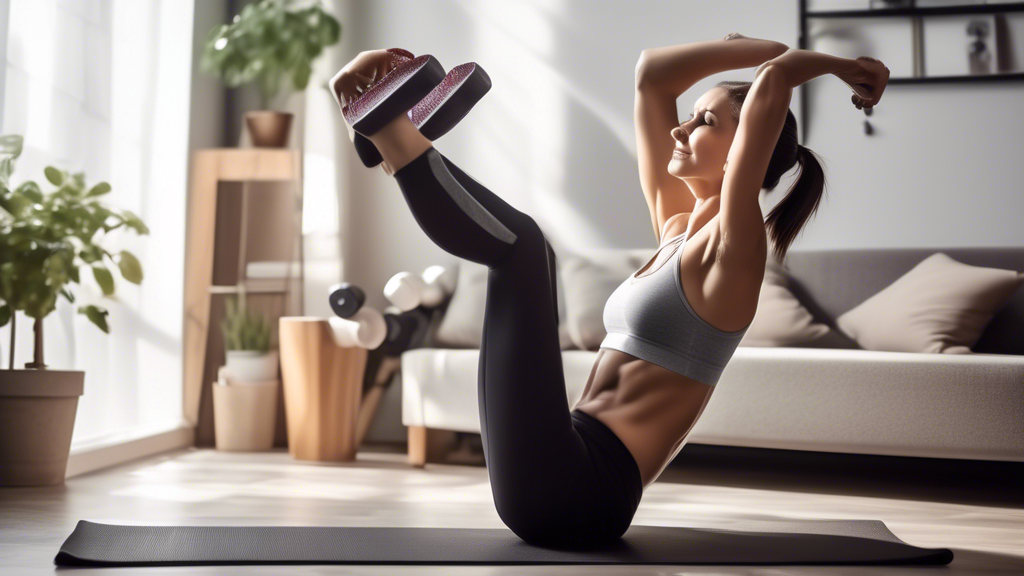
A highly motivated individual performing home workouts, focusing on abdominal exercises like planks, sit-ups, and leg raises, in a well-organized living ro

Six-pack abs require two parallel tracks working together: a training program that develops thick, defined abdominal muscle, and a nutrition approach that reduces body fat enough to reveal it. This guide gives you both — the specific training plan and the honest diet math.

The Diet Math (Why This Comes First)

Your abs are already there. The issue is the fat layer covering them. For most people:

  • Men need to reach roughly 10–14% body fat for abs to be visible
  • Women need to reach roughly 16–20% body fat

The average adult male is around 18–24%. That’s 4–14% of body fat to lose — a process that takes 3–6+ months even with consistent effort. The training program below is worth starting now (it builds the muscle that will show when fat drops), but don’t expect visible abs in 4 weeks if you’re not already near those thresholds.

The Nutrition Approach

Step 1: Calculate your maintenance calories (use a TDEE calculator — Google “TDEE calculator”).
Step 2: Eat 300–500 calories below that daily.
Step 3: Hit 0.7–1g of protein per pound of bodyweight. This preserves muscle while fat is lost.
Step 4: Do this consistently for months, not days.

The Ab Training Program

Three sessions per week. Each 15 minutes. Progress week by week.

Months 1–2: Building the Foundation

Every session:

  • Dead bug — 3 × 8 per side
  • Hollow body hold — 3 × 20–25 sec
  • Plank — 3 × 30 sec
  • Slow bicycle crunch — 3 × 10 per side

Months 3–4: Increasing Difficulty

Every session:

  • Ab wheel rollout — 3 × 6–8
  • Hanging leg raise (or lying straight-leg raise) — 3 × 10
  • Hollow body hold — 3 × 30 sec
  • Side plank hip dip — 3 × 10 per side
  • Dead bug with 3-sec hold — 3 × 6 per side

Why Full-Body Training Matters for Abs

Squats, push-ups, pull-ups, and compound movements create more calorie burn and metabolic demand than ab exercises alone. Including 2–3 full-body sessions per week alongside the dedicated ab training accelerates fat loss and builds muscle that complements the visible abs. Don’t train only your abs — the full-body work is what makes the abs worth training.

Tracking Progress the Right Way

Instead of checking the mirror daily (which shows no change because fat loss is slow), track:

  • Max plank time (week over week)
  • Max hollow body hold
  • How many ab wheel rollouts before form breaks down
  • Waist measurement monthly

These metrics show real progress even when the mirror doesn’t yet. After 3–4 months of consistent training and diet, the mirror will start to reflect what the numbers have been showing all along.

Upper Body Toning for Women at Home: A 4-Week Progressive Plan

A fit, confident woman working out in her living room, performing exercises like push-ups, dumbbell curls, or tricep dips. The room is cozy and well-lit, w

“Toning” describes two things happening at once: building muscle in specific areas and reducing the fat that covers it. You can’t spot-reduce fat, but you can build muscle in targeted areas. This program focuses on the latter — progressively building upper body strength over four weeks using bodyweight and minimal equipment.

The structure increases difficulty each week so your muscles continue adapting rather than plateauing. Week one should feel manageable, week two challenging, week three hard, and week four genuinely difficult.

Muscles This Program Targets

  • Chest (pectorals): Push-up variations
  • Shoulders (deltoids): Pike push-ups, overhead pressing movements
  • Triceps: Close-grip push-ups, tricep dips
  • Upper back (rhomboids, rear deltoids): Table rows, Superman holds
  • Biceps: Resistance band curls, table rows (secondary)

Equipment

This program requires nothing to start. Optional additions that improve results:

  • A sturdy chair or low table (for tricep dips and inverted rows)
  • A resistance band ($10 to $15) for added load on rows and curls in later weeks
  • A filled backpack for weeks 3 to 4 if you want weighted push-ups

Week 1 — Foundation (3 Days, Rest a Day Between Sessions)

3 rounds. Rest 60 seconds between rounds.

  1. Incline push-up (hands on chair): 10 reps
  2. Tricep dip (using chair): 10 reps. Hands on seat edge, bend elbows to lower, press up.
  3. Superman hold: 30 seconds. Lie face down, lift arms and legs simultaneously, hold.
  4. Slow arm circle: 15 forward, 15 backward. Use deliberate control — no momentum.
  5. Table row: 10 reps. Lie under a sturdy table, grip the edge, pull your chest toward it. Keep your body in a straight line.

Week 2 — Load Increase (3 Days)

3 rounds, 45 seconds rest between rounds.

  1. Standard push-up: 10 reps, or as many as possible with good form
  2. Tricep dip with 3-second lower: 8 reps. Slowing the eccentric (lowering) phase makes this significantly harder.
  3. Wide-grip push-up: 8 reps. Hands wider than shoulder-width, more chest emphasis.
  4. Pike push-up: 8 reps. Hips high, lower forehead toward floor, press back up. Targets shoulders.
  5. Table row: 12 reps, with a 2-second pause at the top.

Week 3 — Volume (4 Days)

4 rounds, 30 seconds rest between rounds.

  1. Close-grip push-up: 10 reps. Hands under shoulders, elbows track close to your sides. Harder on triceps.
  2. Decline push-up (feet on chair): 8 reps. Elevating feet shifts emphasis to upper chest and shoulders.
  3. Tricep dip with leg extension: 10 reps. Extend one leg as you dip for added instability.
  4. Pike push-up: 10 reps.
  5. Improvised row: 8 reps per side. Grip a filled gallon jug or water bottle and row it to your hip while braced over a chair.

Week 4 — Intensity (4 Days)

4 rounds, 20 seconds rest between rounds.

  1. Push-up to side plank: 8 per side. Do a push-up, then rotate to a side plank. Alternate sides.
  2. Explosive push-up (or fast incline push-up): 8 reps. Push with enough force that your hands leave the surface briefly.
  3. Tricep dip: 15 reps at a controlled pace.
  4. Pike push-up with pause: 8 reps. Hold 2 seconds at the bottom before pressing up.
  5. Single-arm table row: 10 per side.

Why Progression Matters More Than Volume

Doing the same workout every session produces results for 4 to 6 weeks, then stops — muscles adapt. Adding difficulty through slower tempo, more reps, reduced rest, or harder variations is what drives continued change. After completing this four-week program, don’t stop: week five should be a harder version of week four, continuing the progression.

Nutrition for Muscle Building

Exercise creates the stimulus for muscle change. Protein provides the raw material. Aim for 0.7 to 1 gram of protein per pound of bodyweight daily. Without adequate protein, training produces stimulus but not enough material to build from. Good high-protein sources that work in a home routine: Greek yogurt (17g per cup), eggs (6g each), cottage cheese (25g per cup), canned tuna (20g per 3 oz).