How to Train Your Abs at Home: A 3-Level Core Program

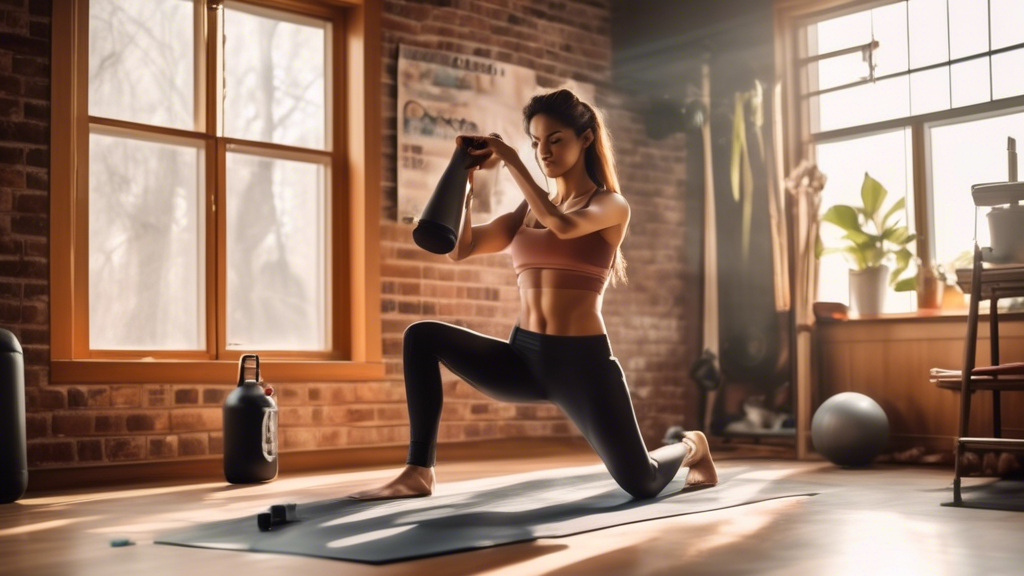
Create an image of a person working out in a cozy living room setting, performing various abdominal exercises like sit-ups, crunches, and planks. Include f

Most ab programs fail because they either do too much isolation work (endless crunches) or too little progression (the same plank hold every week forever). An effective home core program targets the full core — not just the rectus abdominis — and gets harder over time. Here’s a three-level program you can start today.

What “Core” Actually Means

Your core is more than your six-pack muscles. It includes:

  • Rectus abdominis: The “six-pack” — flexion and stability
  • Transverse abdominis: Deep stabilizer, wraps around the spine
  • Obliques (internal and external): Rotation and lateral flexion
  • Erector spinae: Lower back muscles that work alongside the abs

A good core program trains all of these, not just the front.

Level 1 — Foundation Core (4–6 weeks)

Frequency: 3× per week. Time per session: 10–12 minutes.

  • Dead Bug: 3 × 8 per side — Lie on your back, arms up, knees bent 90°. Extend opposite arm and leg simultaneously, keeping lower back pressed to floor. Return and alternate.
  • Glute Bridge: 3 × 12 — Lie on your back, feet flat, drive hips up until body is straight from knees to shoulders. Hold 2 seconds at top.
  • Forearm Plank: 3 × 20–30 seconds — Body straight, core braced, don’t let hips sag or rise.
  • Side Lying Hip Abduction: 3 × 12 per side — Builds the lateral core and glutes together.

Progression signal: complete all sets with good form and no core shaking.

Level 2 — Intermediate Core (4–6 weeks)

Frequency: 3× per week. Time per session: 15–18 minutes.

  • Hollow Body Hold: 3 × 25 seconds — Lie on back, arms overhead, legs extended. Lift arms, head, and legs off the floor. Lower back stays pressed down. This is harder than it looks.
  • Bicycle Crunch: 3 × 15 per side — Slow and controlled (2 seconds per rep), not rushed. Rushing eliminates oblique engagement.
  • Lying Leg Raise: 3 × 10 — Lie flat, lower back pressed down, raise legs from the floor to vertical. Lower slowly over 3 seconds.
  • Side Plank: 3 × 25 seconds per side
  • Bird Dog: 3 × 10 per side — From all fours, extend opposite arm and leg. Hold 2 seconds, maintain spine neutral.

Level 3 — Advanced Core

Frequency: 3× per week. Time per session: 18–22 minutes.

  • Ab Wheel Rollout: 4 × 8 — Requires an ab wheel (~$10). Kneel, roll out slowly (3 seconds), pull back in. Keep core braced throughout.
  • Dragon Flag Negative: 3 × 5 — Lie on a bench or the floor, hands gripping overhead support. Get into a full flag position (body straight), then lower slowly over 5 seconds. Don’t go up yet — just the negative.
  • Hanging Knee-to-Chest: 3 × 12 — Requires pull-up bar. Dead hang, then pull both knees to chest using abs (not hip flexor momentum).
  • Copenhagen Plank: 3 × 20 seconds per side — Side plank with top foot on a chair or bench. Works the adductors and lateral core simultaneously.

How Often to Train Abs

3–4 times per week is sufficient. Abs recover faster than larger muscle groups, but they still need 24–48 hours. Daily ab training isn’t more effective than 3× per week — it just creates more fatigue.

Training Abs vs. Seeing Abs

This program will strengthen your core and improve stability, posture, and athletic performance. Whether it produces visible abs depends almost entirely on your body fat percentage. The training builds the muscle; diet determines whether it’s visible. Both matter — neither works alone.

How to Build Bigger Biceps at Home: A Progressive Training Plan

A detailed instructional scene showing a person performing various bicep exercises at home. The room has minimal but effective equipment like dumbbells, re

Building bigger biceps at home is entirely possible, but it requires more than a list of curling exercises. Here’s a complete approach: the right exercises, the programming behind them, and the nutrition that makes the training worth something.

Why Most Home Bicep Programs Fail

Most home bicep content gives you 5–7 curl variations with no progression strategy. You do them for a few weeks, plateau, and wonder what went wrong. The problem isn’t the exercises — it’s the lack of progressive overload. Muscles grow when they’re challenged beyond what they’re used to. Without a plan for making the work harder over time, growth stops.

The 3-Phase Approach

Phase 1 (Weeks 1–3): Foundation

Goal: establish proper movement patterns and a baseline. Don’t go to failure yet.

  • Resistance Band Curl: 3 × 12 (medium band)
  • Chin-Up or Doorway Row: 3 × 8 (or 3 × 5 negatives if you can’t do chin-ups)
  • Hammer Curl: 3 × 10

Rest 60–90 seconds between sets. Train biceps 2× per week with at least 48 hours between sessions.

Phase 2 (Weeks 4–6): Build

Goal: push closer to failure, add volume.

  • Resistance Band Curl: 4 × 12 (heavier band or double up the band)
  • Chin-Up: 4 × AMRAP (as many reps as possible)
  • Concentration Curl (dumbbell or band): 3 × 10 per arm
  • Reverse Curl (band): 3 × 12 (palms facing down — trains brachialis and forearms)

Last set of each exercise should reach 1–2 reps from failure.

Phase 3 (Weeks 7–9): Intensify

Goal: maximize mechanical tension for hypertrophy.

  • Chin-Up: 5 × AMRAP (add band assistance if needed to keep reps above 5)
  • Band Curl (slow negatives — 4 seconds down): 4 × 8–10
  • Incline-Angle Band Curl (band anchored low, body angled back): 3 × 12
  • Isometric Hold Curl (hold at 90-degree position for 10 seconds): 3 × 3 holds

The Single Best Exercise (If You Only Do One)

Chin-ups. Nothing else matches them for bicep development using bodyweight. A person who can do 10 clean chin-ups has stronger, better-developed biceps than one who only does band curls. Build toward chin-ups from the start.

Equipment That Makes a Real Difference

  • Resistance bands ($15–25): Multiple resistance levels. Bands with handles are easier for curls. Loop bands work for assisted chin-ups.
  • Doorframe pull-up bar ($25–35): Unlocks chin-ups and inverted rows.
  • Adjustable dumbbells ($50–150): If budget allows, dumbbells give you the most progression options.

What to Eat to Grow

Training creates the stimulus for growth. Nutrition provides the material. For bicep (and overall muscle) growth:

  • Protein: 0.7–1g per pound of bodyweight per day. For a 160-pound person, that’s 110–160g daily. Sources: chicken, eggs, Greek yogurt, cottage cheese, protein shakes.
  • Calories: You can’t build muscle in a consistent caloric deficit. Eat at maintenance or a small surplus (200–300 calories above TDEE) during a focused building phase.

Tracking Progress

Measure progress in two ways: reps on chin-ups (a reliable indicator of bicep strength) and arm circumference measured at the same point each time (the widest part of the flexed bicep, measured with a tape measure). Take measurements every 4 weeks, not weekly — change happens slowly enough that weekly measurements create frustration rather than feedback.

How to Get Six-Pack Abs at Home: The Honest Version

A fit person with well-defined six pack abs exercising in a home gym setting, using common household items like water bottles and furniture as workout equi

Six-pack abs are built in the kitchen, revealed in the gym, and undermined by most of the content you’ll find about them. Here’s what actually controls the outcome, and a training plan for the part you can directly control.

The Part Most Articles Skip: Abs Are Always There

Everyone has abdominal muscles. The reason most people can’t see them isn’t that they haven’t done enough crunches — it’s that a layer of body fat is covering them. Until that fat is reduced, no amount of ab training will make six-pack abs visible.

Average body fat percentages for visible abs: roughly 14–17% for women, 10–14% for men. Where you are now determines how much diet work is required.

The training part — which we’ll cover below — builds the muscle underneath. Both matter. But diet is the bigger variable for most people.

The Training Side: 3 Levels of Ab Work

Level 1 — Foundation (if you’re new to core training)

  • Dead Bug: 3 × 8 per side
  • Plank: 3 × 20–30 seconds
  • Glute Bridge: 3 × 12

Do this 3× per week. Progression: increase plank holds to 45–60 seconds, add reps to dead bug.

Level 2 — Intermediate (some core training experience)

  • Hollow Body Hold: 3 × 20–30 seconds
  • Bicycle Crunch: 3 × 15 per side (slow and controlled, not rushed)
  • Leg Raise: 3 × 10 (lying flat, lower back pressed to floor)
  • Side Plank: 2 × 25 seconds per side

Level 3 — Advanced

  • Dragon Flag Negative: 3 × 5 (lower slowly over 4–5 seconds)
  • Hanging Knee-to-Chest: 3 × 12 (requires pull-up bar)
  • Ab Wheel Rollout: 3 × 8
  • Toes-to-Bar: 3 × 8 (requires pull-up bar)

How Often to Train Abs

3–4 times per week is sufficient. Abs recover faster than most muscles, but they still need recovery. More isn’t better — progressive difficulty is.

The Diet Side (The Bigger Variable)

You don’t need a complicated diet. The basics cover most of it:

  • Eat roughly 200–500 calories below your maintenance level to lose fat (use a TDEE calculator for your number)
  • Get 0.7–1g of protein per pound of bodyweight to preserve muscle while losing fat
  • Don’t time this with a hard deadline — “six-pack by [date]” usually leads to unsustainable restriction

Rate of visible progress depends on where you’re starting. Someone at 18% body fat has more work ahead than someone at 15%. Both can get there with consistent training and a moderate calorie deficit.

What Doesn’t Work

  • Spot reduction: Doing 500 crunches a day won’t specifically burn belly fat. Fat loss happens systemically, not locally.
  • Ab belts and stimulators: These don’t build visible abs.
  • “30-day abs challenges”: The timeline is arbitrary. Your body fat percentage on day 30 determines what you’ll see, not how many reps you did.

Realistic Timeline

If you’re consistent with training and maintain a moderate calorie deficit: most people reach visible ab definition within 3–6 months. Some faster. Some slower. Genetics (particularly where your body stores fat last) affects the timeline but doesn’t prevent the outcome.

Bicep Training for Beginners at Home: The Exercises That Actually Work

A person performing bicep curls using household items like water bottles, in a cozy living room setting with a yoga mat on the floor. The individual looks

If you’re new to training and want to build your biceps at home, you’re going to hear a lot of conflicting advice. This article cuts through it. Here’s what actually matters when you’re starting out, what equipment you need (less than you think), and a simple program you can start today.

The Truth About Beginner Bicep Training

Most beginners don’t need bicep isolation exercises right away. Your biceps grow fastest when you do pulling movements — exercises where you drag weight toward your body. Curls matter, but they work better once you’ve built a foundation with compound pulling work.

The good news: you can do effective pulling movements at home with a $20–30 resistance band or a pull-up bar.

The 4 Best Beginner Bicep Exercises at Home

1. Resistance Band Curl

Stand on the middle of a resistance band, one end in each hand. Starting with arms straight, curl both hands toward your shoulders. Squeeze at the top, lower slowly over 2–3 seconds. Sets/reps: 3 × 10–15.

Why it works: the band provides constant tension through the full range of motion, which is harder than it looks. A medium resistance band (typically the green or blue) is right for most beginners.

2. Doorway Row (if you don’t have a pull-up bar)

Stand in a doorway, grab both sides at chest height, walk your feet forward until your body is angled back at roughly 45 degrees. Pull your chest toward the door frame. This works your biceps and entire upper back. Sets/reps: 3 × 8–12.

To make it harder, walk your feet further forward. To make it easier, stay more upright.

3. Chin-Up (with a doorframe pull-up bar)

A chin-up (underhand grip, hands shoulder-width apart) is the single most effective bicep exercise you can do without a gym. If you can’t do a full chin-up yet, use a resistance band looped over the bar for assistance, or do negative reps: jump to the top position, then lower yourself over 5 seconds. Sets/reps: 3 × as many as possible (or 3 × 5 negatives).

4. Hammer Curl (with dumbbells or a filled backpack)

Hold dumbbells or a filled water bottle in each hand with palms facing inward (like you’re holding a hammer). Curl up, keeping palms facing each other throughout. This targets the brachialis, the muscle under your bicep that pushes the peak up. Sets/reps: 3 × 10–12.

A Simple 3-Day Beginner Program

Don’t train biceps every day — they need 48 hours to recover. Here’s a simple weekly structure:

  • Monday: Bicep focus — Band Curls 3×12, Hammer Curls 3×10, Doorway Rows 3×10
  • Wednesday: Push focus (push-ups, dips) — biceps rest
  • Friday: Repeat Monday or add chin-up practice

After 4 weeks, increase reps to 15 before adding more resistance. This is progressive overload — the core principle behind any muscle growth.

What Equipment to Get First

If you’re buying one thing: a resistance band set (~$15–25 on Amazon) gives you multiple resistance levels and lets you do curls, rows, and face pulls. If you’re buying a second thing: a doorframe pull-up bar (~$25–35) opens up chin-ups and rows, which are the most effective upper body pulling exercises you can do at home.

You don’t need dumbbells to start, but if you have them, they work well for curls and hammer curls.

Common Beginner Mistakes

  • Using momentum: Swinging your hips to curl the weight means your bicep isn’t doing the work. Slow the lowering phase down to 2–3 seconds.
  • Only doing curls: Pulling movements (rows, chin-ups) build more total bicep mass than curls alone.
  • Training every day: Muscles grow during rest, not during training. Every other day is enough.

How Long Until You See Results?

Most beginners see noticeable arm size changes within 8–12 weeks of consistent training. Strength gains (more reps, more resistance) come faster — often within 2–3 weeks. If you’re not seeing progress, the most common culprit is diet: bicep growth requires eating enough protein (roughly 0.7–1g per pound of bodyweight per day) and enough total calories.

How to Build Biceps and Triceps at Home: Exercises, Programs, and What to Use Instead of Weights

A highly detailed image of a person performing a home workout in a clean, modern living room equipped with minimal fitness equipment like resistance bands,

Biceps and triceps make up most of your upper arm. Training both equally is what creates the “full arm” look — and both can be developed significantly at home. This guide covers the best exercises for each muscle, how to train them without weights, and how to build a program that makes them grow.

The Triceps: 3 Heads, One Goal

Your triceps have three heads (long, medial, lateral) and make up roughly two-thirds of your upper arm. Most people undertrain them relative to biceps. Every pushing exercise you do works triceps — so if your pushing volume is high, your triceps are already getting significant stimulus.

Best Tricep Exercises at Home

Diamond Push-Up — 3 × 8–10
Hands close under chest in a diamond shape. Most effective bodyweight tricep exercise. Keep elbows pointing back, not flaring out.

Tricep Dip — 3 × 10–12
Hands on a sturdy chair, legs extended. Lower until elbows reach 90°. Progress by elevating feet on a second chair.

Close-Grip Push-Up — 3 × 10
Hands shoulder-width (narrower than standard). Elbows stay close to your ribs throughout. One of the best overall tricep builders in bodyweight training.

Overhead Tricep Extension (with household object) — 3 × 12
Hold a filled water jug or heavy book behind your head with both hands. Extend overhead by straightening your elbows, keeping upper arms stationary.

The Biceps: Training Them Without a Barbell

Biceps are primarily trained through pulling and curling movements. Without a barbell or dumbbells, you need to be creative — but the load is there if you look for it.

Best Bicep Exercises at Home

Table Row — 3 × 10–12
Lie under a sturdy table, grip the edge, pull your chest to the surface. Your biceps do significant work here alongside your back. The best bicep exercise you can do without any equipment at all.

Towel Row — 3 × 10
Loop a towel around a door handle, lean back, and pull your chest toward the anchor. Adjust body angle to control difficulty.

Filled Backpack Curl — 3 × 12
Load a backpack with books to your desired weight. Hold by the top handle and curl. This is a legitimate bicep curl — the load is real regardless of the vessel.

Water Jug Hammer Curl — 3 × 12
Hold a filled gallon jug (about 8.5 lbs) with a neutral grip (thumb pointing up) and curl. Targets the brachialis — the muscle underneath the bicep that pushes it up and makes arms look thicker.

The 3-Day Arm Program

Train arms 3× per week. Combine both muscle groups in each session.

Session A (Monday): Diamond push-up 3×10 → Table row 3×10 → Tricep dip 3×10 → Backpack curl 3×12

Session B (Wednesday): Close-grip push-up 3×10 → Towel row 3×10 → Overhead extension 3×12 → Hammer curl 3×12

Session C (Friday): Repeat Session A with +1 rep per set on each exercise

Progressive Overload Without a Weight Room

The single biggest factor in arm growth is making the work progressively harder. Options:

  • Add weight to the backpack
  • Increase filled jug size
  • Move to harder exercise variations (close-grip → diamond → archer push-up)
  • Reduce rest periods by 10 seconds per week
  • Add a 3-second lowering phase (eccentric) to every rep

How Long Until You See Results

Strength improvements: 2–3 weeks. Visible muscle changes: 6–8 weeks of consistent training with adequate protein intake (0.7–1g per pound of bodyweight daily). The timeline is the same whether you train at home or in a gym — it’s determined by consistency and progressive overload, not the equipment.

How to Get Bigger Arms Without a Gym: Training and Nutrition Combined

A person performing bicep curls with resistance bands in a serene outdoor park, utilizing their own body weight for dips on parallel bars, and doing push-u

Building bigger arms at home is genuinely possible — people do it consistently. What it requires is the same thing that builds arms in a gym: progressive resistance, sufficient protein, and enough training volume over time. The equipment is different; the principles are identical.

What “Bigger Arms” Actually Means

Arm size comes from three muscle groups: biceps (front of upper arm), triceps (back of upper arm — about 60% of the arm’s total mass), and brachialis (sits beneath the biceps and pushes it upward). Most people focus only on biceps; to build genuinely larger arms, all three need progressive training.

The Best Home Arm Exercises

For Triceps (the Bigger Half)

Diamond push-up: Hands close under chest. Best bodyweight tricep exercise. 3 × 8–12.

Close-grip push-up: Shoulder-width hands, elbows tucked. 3 × 10.

Bench/chair dip: Hands on chair edge, lower until elbows at 90°. 3 × 10–12.

Overhead extension: Hold a filled water jug or heavy book behind head with both hands. Extend elbows, keeping upper arms fixed. 3 × 12.

For Biceps and Brachialis

Table row: Under a sturdy table, grip the edge, pull chest up. Biceps do significant work here. 3 × 10.

Backpack curl: Fill a backpack to 15–25 lbs with books. Hold by the top handle and curl — this is a real bicep curl. 3 × 12.

Towel row: Loop a towel around a door handle, lean back, pull toward anchor. 3 × 10.

Hammer curl with jug: Hold a filled gallon water jug (about 8.5 lbs) with thumb pointing up, curl. Targets the brachialis specifically — the muscle that makes arms look thick. 3 × 12 per arm.

Using Household Items as Weights

Don’t dismiss household loads. A gallon of water is 8.3 lbs. A large textbook is 3–5 lbs. A backpack loaded with books is easily 20–30 lbs. The muscle doesn’t know or care what the weight is made of — it responds to tension and load.

Fill a duffle bag with water bottles, grip it by the handle, and you have a usable implement for rows, curls, and carries. The load is adjustable and it costs nothing.

The Nutrition Side: What You Need to Eat

Training provides the signal. Nutrition provides the raw materials. Without enough protein, your muscles can’t rebuild between sessions — and they won’t grow meaningfully no matter how well you train.

Protein target: 0.7–1g per pound of bodyweight daily. At 165 lbs, that’s 115–165g of protein per day. Practical examples: 3 eggs (18g) + 1 cup Greek yogurt (17g) + 6 oz chicken (53g) + 1 cup cottage cheese (25g) = 113g. You’re close with one average meal added.

Calorie target: eat at maintenance or slightly above (+200–300 cal/day) for muscle growth. Trying to build significant muscle in a large deficit is mostly ineffective.

The 3-Day Program

Monday: Diamond push-up 3×10 → Table row 3×10 → Overhead extension 3×12 → Backpack curl 3×12

Wednesday: Close-grip push-up 3×10 → Towel row 3×10 → Bench dip 3×12 → Hammer curl 3×12

Friday: Repeat Monday with +2 reps or slightly more load in the backpack

The Honest Timeline

Visible arm growth takes 8–12 weeks of consistent training with adequate protein. Strength improvements come faster — within 2–4 weeks. People who say home training doesn’t build arms are typically either not applying progressive overload (making the work harder over time) or not eating enough protein. Fix both and the arms grow.