The 30-Minute Full-Body Home Workout: How to Train Efficiently When Time Is Short

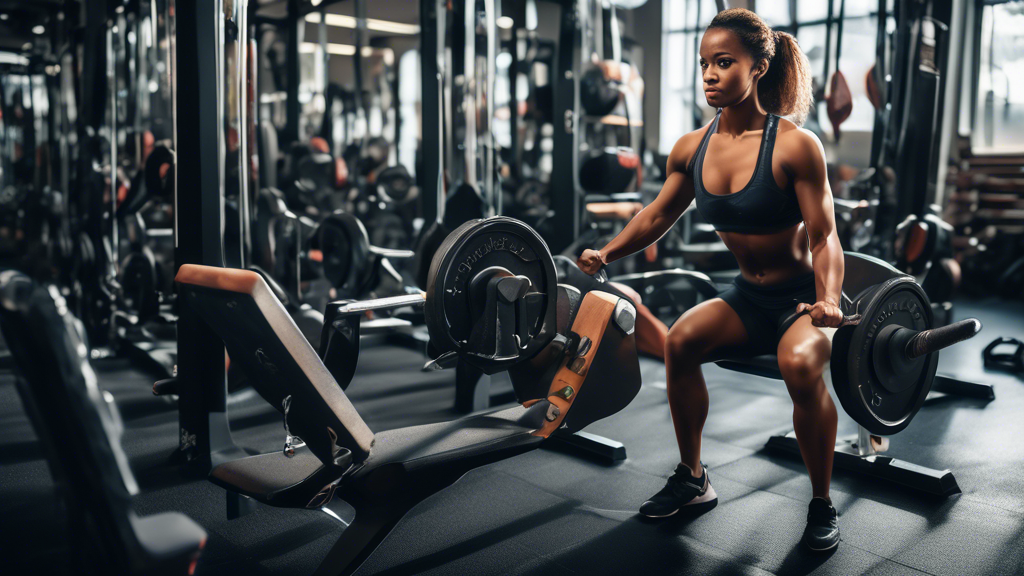
A vibrant gym scene where a diverse group of people are engaging in a time-efficient full-body workout. They are using a combination of equipment such as d

Thirty minutes is enough time for a genuinely effective full-body workout — if you know how to use it. The problem isn’t duration; it’s structure. Most 30-minute workouts either move too slow (turning into a 50-minute session) or skip the exercises that actually produce results. This guide gives you a complete, tested framework for full-body training when you have limited time at home.

The Case for Short, Frequent Sessions

A landmark 2016 study published in the Journal of Strength and Conditioning Research (Ralston et al.) found that training frequency and total weekly volume matter more for strength and muscle maintenance than session length. Three 30-minute sessions produce better results than one 90-minute session per week, even at equal total volume — because higher frequency keeps protein synthesis elevated more consistently.

For fat loss specifically, 30-minute circuit-style sessions have been shown to produce similar caloric expenditure to 45–60 minute moderate-intensity cardio when intensity is maintained throughout (Gibala et al., Journal of Physiology, 2012).

The Structure: How to Build a 30-Minute Full-Body Session

Every efficient session follows this sequence:

Phase Duration Purpose
Warm-up 4–5 min Raise core temp, mobilize joints, activate key muscles
Main circuit 20–22 min Resistance + cardio combined, maximum efficiency
Cool-down 3–4 min Lower heart rate, begin recovery

The Warm-Up (5 minutes)

Don’t skip this — even 3–4 minutes of prep reduces injury risk and improves power output in the main circuit. Do each move for 30–45 seconds:

  • Leg swings (forward/back, then side to side)
  • Hip circles (large, slow rotations both directions)
  • Arm circles (forward and backward)
  • Bodyweight squats (slow and controlled)
  • High knees (marching pace)

The 30-Minute Full-Body Circuit

This session uses a 40-second work / 15-second rest interval structure. Perform 3 rounds of 5 exercises. Total main circuit time: approximately 22 minutes.

Circuit A (Rounds 1–3)

Exercise Work Rest Coaching Cue
Squat 40 sec 15 sec Feet hip-width, drive knees out, chest up — don’t let knees cave inward
Push-Up (any variation) 40 sec 15 sec Body forms a straight line from head to heels — if hips sag, drop to knees
Reverse Lunge 40 sec 15 sec Back knee drops straight down, front knee stays over ankle (not past toes)
Plank to Downward Dog 40 sec 15 sec From plank, push hips up and back — hold 1 second at top, return to plank
Mountain Climber 40 sec 15 sec Hips stay level — don’t let them pike up when you drive knees forward

Rest 90 seconds after completing all 5 exercises in a round before beginning the next round.

Intensity Modifications

The same circuit works at different fitness levels based on intensity adjustment — not different exercises:

Level Adjustment
Beginner 40 sec work / 30 sec rest, 2 rounds only, reduce mountain climber pace
Intermediate 40 sec work / 15 sec rest, 3 rounds — as written
Advanced 45 sec work / 10 sec rest, 4 rounds. Replace squats with jump squats, push-ups with pike push-ups

The Cool-Down (4 minutes)

Hold each stretch for 30–45 seconds:

  • Standing quad stretch (balance on one leg, hold opposite foot behind you)
  • Hip flexor stretch (low lunge, push front hip toward floor)
  • Chest opener (arms wide behind you, squeeze shoulder blades)
  • Child’s pose (kneeling, arms extended forward, hold)

How to Progress Week Over Week

Week Target Progression
1–2 Complete all rounds with solid form — get comfortable with the structure
3–4 Add one round (total 4 rounds). Increase squat depth and push-up range of motion
5–6 Switch one flat-ground exercise for a more demanding variation (squats → jump squats, push-ups → diamond push-ups)
7+ Reduce rest periods by 5 seconds per round or add a resistance band to squat and lunge variations

Common Mistakes in Short Workouts

  • Moving too fast and losing form: The goal is sustained effort, not maximum speed. Sloppy reps reduce stimulus and increase injury risk. Control the movement even when fatigued.
  • Using the same workout for months: After 4–6 weeks without changes, your body adapts and progress slows. Change resistance, rest periods, or exercise variations to keep challenging yourself.
  • Treating 30 minutes as “not a real workout”: The research is clear — 30 minutes of structured, high-intensity work outperforms 60 minutes of unfocused effort. Commit fully to the time you have.

Need a fully customized 30-minute workout plan for your specific goals? Try our AI Workout Plan Builder — it generates a structured plan based on your fitness level, schedule, and available equipment.

References

  • Gibala MJ, et al. “Physiological adaptations to low-volume, high-intensity interval training in health and disease.” Journal of Physiology, 590(5): 1077–1084, 2012.
  • Ralston GW, et al. “The effect of weekly set volume on strength gain.” Journal of Strength and Conditioning Research, 31(8): 2219–2226, 2017.
The Complete At-Home Full-Body Workout Plan: 12 Weeks, 3 Days a Week

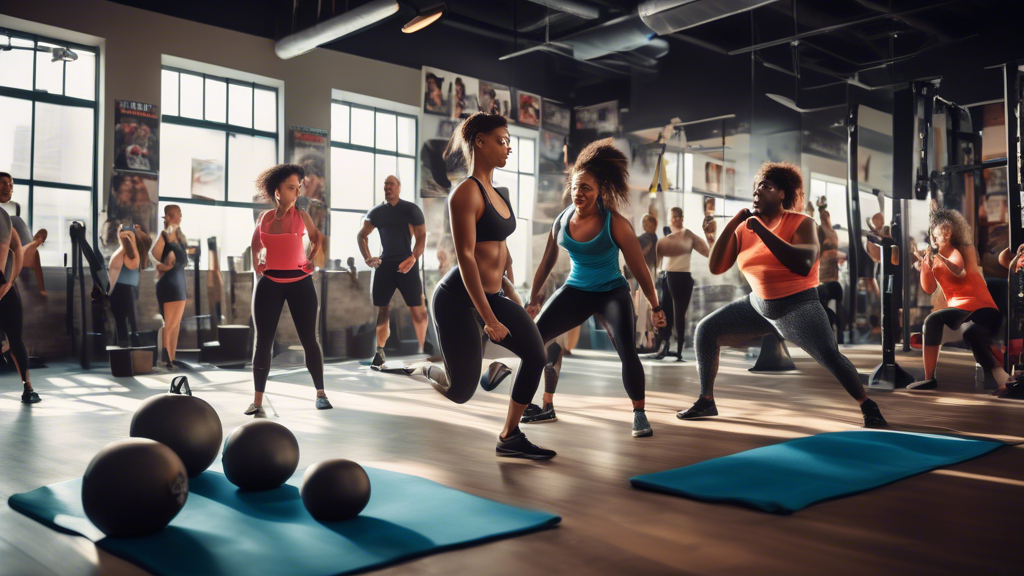
A high-energy scene in a modern gym with diverse individuals engaging in various full-body workout exercises, such as squats, lunges, push-ups, burpees, an

A full-body workout plan that actually works has three components: the right exercises, a clear progression structure, and a sustainable frequency. Skip any one of those and you’re just exercising — not training toward a result. This is a complete 12-week, three-days-per-week, no-equipment full-body plan designed for home training.

Why Full-Body Training Works

Full-body sessions (working all major muscle groups each session) outperform body-part splits for most home exercisers for a simple reason: frequency. Each muscle group gets trained 3x per week instead of once, which means more opportunities for growth stimulus. Research published in the Journal of Strength and Conditioning Research confirmed that training frequency of 2–3 sessions per muscle per week produces superior hypertrophy compared to once-weekly splits at equal total volume.

For fat loss, full-body training burns more calories per session because more muscles are working simultaneously — producing a greater metabolic response than isolated exercises or single-body-part days.

How This Plan Works

Three sessions per week: Day 1 (Monday), Day 2 (Wednesday), Day 3 (Friday). At least one full rest day between each session. The program runs in three four-week phases, each progressively more demanding.

Phase 1 — Weeks 1–4: Foundation

Focus on learning movement patterns with full range of motion. Rest 60 seconds between exercises, 90 seconds between rounds. Complete 3 rounds.

Session A (Days 1 and 3 of each week)

Exercise Reps Coaching Cue
Bodyweight Squat 15 Feet hip-width, knees tracking over toes, chest tall
Push-Up (or knee push-up) 10 Body straight head to heels — hips don’t sag or pike
Reverse Lunge 10 each leg Back knee drops straight down, front knee stays over ankle
Superman Hold 10 (3 sec hold) Lift opposite arm and leg simultaneously — squeeze glute and upper back
Plank 20–30 seconds Hips in line with shoulders — don’t hold your breath

Session B (Day 2 of each week)

Exercise Reps Coaching Cue
Glute Bridge 15 Drive hips up, squeeze glutes at top for 2 seconds
Incline Push-Up (hands on chair) 12 Easier than floor push-ups — use to build confidence and form
Step-Up 12 each leg Drive through the heel of the working leg — don’t push off the back foot
Bird Dog 10 each side Opposite arm and leg extend — keep hips level, don’t rotate
Dead Bug 8 each side Lower back stays pressed flat to floor throughout — don’t let it arch

Phase 2 — Weeks 5–8: Build

Add difficulty to each exercise. Reduce rest to 45 seconds between exercises, 60 seconds between rounds. Complete 4 rounds.

Session A

Exercise Reps Upgrade From Phase 1
Jump Squat 10 Replace bodyweight squat — land softly with bent knees
Close-Grip Push-Up 10 Replace standard push-up — elbows track backward
Walking Lunge 10 each leg Replace reverse lunge — maintain upright torso throughout
Superman with Hold + Pause 10 (5 sec hold) Longer hold increases lower back and glute demand
Plank + Shoulder Tap 10 each arm Tap opposite shoulder — keep hips from rotating

Session B

Exercise Reps Upgrade From Phase 1
Single-Leg Glute Bridge 12 each leg One foot lifted — same drive and squeeze cue applies
Pike Push-Up 8 Replace incline push-up — targets shoulders and triceps
Bulgarian Split Squat 10 each leg Back foot on chair — front leg does all the work
Bird Dog with Band 10 each side Add loop band around thighs for glute activation
V-Up 8 Replace dead bug — full range core compression exercise

Phase 3 — Weeks 9–12: Intensity

Circuit style with 30-second rest between exercises only. 4–5 rounds per session.

Circuit (All sessions this phase use the same circuit)

Exercise Reps / Duration Notes
Burpee 8 Full range — chest to floor on the way down
Diamond Push-Up 10 Slow lower (3 seconds), explosive press
Jump Lunge 8 each leg Alternate legs in the air — land softly
Inverted Row (table or low bar) 10 Body straight, pull chest to table edge
Single-Leg Squat to Box 8 each leg Sit to a chair on one leg, stand using one leg
Hollow Body Hold 20–30 sec Lower back pressed flat, arms and legs hovering

What to Do After Week 12

After completing all three phases, you’ll have built a strong movement foundation. Options for continued progress:

  • Restart Phase 1 with resistance bands added to squat, bridge, and lunge variations
  • Add weighted vest or a loaded backpack for bodyweight exercises
  • Use our AI Workout Plan Builder to generate the next phase based on your updated fitness level

Common Mistakes in Full-Body Programs

  • Adding rest days when sessions feel hard: Hard sessions mean the program is working. Adapt, don’t avoid.
  • Skipping Phase 1 because it “looks too easy”: Movement quality in Phase 1 determines how effective Phases 2 and 3 can be. Master the foundation — don’t skip it.
  • Changing exercises too frequently: Consistency with a good program beats constantly switching to “optimal” programs. Stick with each phase for the full 4 weeks to allow adaptation.

References

  • Ralston GW, et al. “The effect of weekly set volume on strength gain.” Journal of Strength and Conditioning Research, 31(8): 2219–2226, 2017.

  • American College of Sports Medicine. ACSM’s Guidelines for Exercise Testing and Prescription, 11th ed. Wolters Kluwer, 2022.

10 Best Full-Body Exercises to Do at Home (With Progression for Every Level)

A dynamic and energetic gym scene featuring a diverse group of individuals performing a variety of full-body exercises. Participants are engaged in activit

A handful of exercises done consistently will build more strength and fitness than an endless rotation of workouts you never master. These 10 full-body exercises are the ones worth mastering — each works multiple muscle groups simultaneously, requires no equipment, and has a clear progression path from beginner to advanced. Here’s how to do each one correctly, and what to do when it gets easy.

How to Use This Guide

These exercises are organized by movement pattern — not by body part. Each pattern (squat, hinge, push, pull, carry) trains your body in ways that translate to everyday strength. Together they cover every major muscle group. Use them as a standalone workout or mix and match based on your goals.

1. Squat

The squat trains the quadriceps, glutes, hamstrings, and core simultaneously — making it the single most effective lower-body exercise you can do without equipment.

How to do it: Feet hip-width, toes slightly out. Lower by pushing hips back and down until thighs are parallel to the floor (or as low as mobility allows). Drive through heels to stand.

Coaching cue: Keep your chest tall — if your torso falls forward, your heels will lift. Think “chest up” every rep. Knees should track in the same direction as your toes throughout the movement.

Beginner: 3 × 10 bodyweight squats | Intermediate: 3 × 15 with a 3-second pause at the bottom | Advanced: Jump squats, pistol squat progressions

2. Hip Hinge (Glute Bridge)

The hip hinge is the foundational pattern for every pulling movement — it trains the glutes, hamstrings, and lower back. The glute bridge is the safest entry point for most people.

How to do it: Lie on your back, knees bent, feet flat. Drive your hips up by squeezing your glutes until your hips, knees, and shoulders form a straight line. Hold 2 seconds. Lower slowly.

Coaching cue: Most people just lift their hips without squeezing their glutes — the hips go up but the muscles don’t activate fully. Focus on the squeeze at the top. Push your knees outward slightly (don’t let them cave inward) for full glute activation.

Beginner: 3 × 12 double-leg | Intermediate: Single-leg glute bridge | Advanced: Feet elevated on a couch (full hip thrust range of motion)

3. Push-Up

The push-up trains the chest, triceps, anterior deltoids, and core in one integrated movement. It scales from beginner (incline / knee push-up) to advanced (diamond, plyometric, pike) without any equipment.

How to do it: Hands slightly wider than shoulder-width. Body forms a straight line from head to heels. Lower until chest nearly touches the floor. Press back up.

Coaching cue: The most common error is letting hips sag toward the floor — this removes core engagement and puts strain on the lower back. Brace your core as if bracing for a punch, and maintain that tension throughout every rep.

Beginner: 3 × 8 knee or incline push-ups | Intermediate: 3 × 12 full push-ups | Advanced: Diamond push-ups, pike push-ups, decline push-ups

4. Lunge

The lunge is a single-leg movement that builds unilateral leg strength and addresses muscle imbalances that bilateral (both-legged) squats can hide. It trains the quads, glutes, and hamstrings with a balance challenge.

How to do it: Step one foot forward. Lower your back knee toward the floor until front thigh is parallel to the floor. Keep torso upright. Drive through the front heel to return to standing.

Coaching cue: The front knee should stay over the ankle — not collapsing inward (which stresses the knee joint). Keep your torso vertical — leaning forward shifts work to the lower back instead of your legs.

Beginner: 3 × 8 each leg, reverse lunge (lower knee injury risk) | Intermediate: 3 × 12 walking lunges | Advanced: Bulgarian split squat (back foot elevated), jumping lunges

5. Plank

The plank trains the core as a stability system rather than just the abs. It strengthens the deep stabilizing muscles (transverse abdominis, obliques, and spinal erectors) that protect the lower back in every other exercise.

How to do it: Forearms on the floor, elbows under shoulders. Body forms a straight line. Brace your core and squeeze your glutes. Breathe normally.

Coaching cue: Don’t hold your breath — it inflates intra-abdominal pressure artificially and doesn’t train actual core stability. Breathe steadily throughout. If your hips start to drop, drop to your knees rather than compensating.

Beginner: 3 × 15–20 seconds | Intermediate: 3 × 40–60 seconds | Advanced: Plank shoulder taps, plank to downward dog, RKC plank

6. Superman Hold

The Superman targets the posterior chain — glutes, lower back, and upper back — muscles that are chronically underworked by people who sit for most of the day. It’s one of the most important and most neglected home exercises.

How to do it: Lie face down, arms extended overhead. Simultaneously lift your arms, chest, and legs off the floor. Hold 2–3 seconds. Lower slowly.

Coaching cue: The lift should be controlled, not jerked. Focus on squeezing the glutes as you lift your legs — many people only feel this in their lower back, which means the glutes aren’t engaging. Thinking “squeeze the glutes first” fixes this.

Beginner: 3 × 8 with 2-sec hold | Intermediate: 3 × 12 with 3-sec hold | Advanced: Add a resistance band across shoulders for upper back resistance

7. Mountain Climber

Mountain climbers are a full-body exercise combining core stability, hip flexor strength, and cardiovascular demand. They’re one of the most efficient time-per-benefit exercises in home training.

How to do it: Start in a push-up position. Drive one knee toward your chest, then alternate legs rapidly while keeping hips level.

Coaching cue: The most common error is piking the hips up to make knee drive easier — this removes the core challenge and turns the exercise into something different. Hips stay level, in line with shoulders. If hips rise, slow down.

Beginner: 3 × 20 seconds at walking pace | Intermediate: 3 × 30 seconds at running pace | Advanced: 3 × 45 seconds with cross-body knee drive (knee to opposite elbow)

8. Burpee

The burpee combines a squat, plank, push-up, and jump into one movement — making it one of the most metabolically demanding bodyweight exercises available. Research from the American Council on Exercise identified high-intensity exercises like burpees as among the most effective for caloric expenditure per minute.

How to do it: Stand → squat and place hands on floor → jump or step feet back to plank → lower chest to floor (optional push-up) → jump feet forward → jump up with hands overhead.

Coaching cue: Land with soft, bent knees — not stiff straight legs. Landing stiff compresses the joints and dramatically increases injury risk over time. Every landing is a mini-squat.

Beginner: 3 × 5 step-back burpees (no jump) | Intermediate: 3 × 8 standard burpees | Advanced: 3 × 10 with push-up at the bottom and tuck jump at the top

9. Bird Dog

The bird dog trains core anti-rotation stability — the ability to resist the rotational forces that occur in every movement. It’s particularly valuable for lower back health and carryover to all other exercises.

How to do it: Kneel on all fours, hands under shoulders, knees under hips. Extend one arm forward and the opposite leg back simultaneously. Hold 2–3 seconds. Return. Alternate sides.

Coaching cue: Hips should not rotate as the leg extends — the moment your hip rotates up, you’ve gone too far. Think about keeping your back flat enough that a water glass resting on your lower back wouldn’t spill. This cue immediately reveals overextension.

Beginner: 3 × 8 each side | Intermediate: 3 × 12, add 3-sec hold | Advanced: Add a resistance band around thighs for glute challenge

10. Step-Up

The step-up is one of the most functional exercises in home training — it mirrors the hip extension pattern used in climbing stairs, getting out of a car, and rising from a low seat. It builds single-leg strength and glute power.

How to do it: Stand facing a sturdy step, low chair, or stair. Place one foot fully on the surface. Drive through that heel to stand on the step. Lower the trailing leg back to the floor. Complete all reps on one leg before switching.

Coaching cue: Drive through the working heel — don’t push off the back foot. If you’re pushing off the back foot to help yourself up, the step is too high or you’re not strong enough yet in that position. Lower the step height until you can drive cleanly from the working leg alone.

Beginner: 3 × 8 each leg on a low step (6–8 inches) | Intermediate: 3 × 12 each leg on a chair height (16–18 inches) | Advanced: Weighted step-up (loaded backpack), explosive step-up with knee drive

Sample Full-Body Workout Using These Exercises

Exercise Sets Reps / Duration
Squat 3 15
Push-Up 3 10–12
Glute Bridge 3 15
Reverse Lunge 3 10 each leg
Plank 3 30 sec
Bird Dog 3 8 each side
Step-Up 3 10 each leg
Mountain Climber 3 20 sec

Rest 45–60 seconds between exercises. Complete 2–3 days per week with at least one rest day between sessions.

Want these exercises built into a structured program with progressions tailored to your fitness level? Try our AI Workout Plan Builder. If you need substitutes for any exercise, our Exercise Substitute Finder has you covered.

References

  • American Council on Exercise. “New ACE Research Reveals ‘Best’ and ‘Worst’ Ab Exercises.” ACE Fitness, 2001.
  • Schoenfeld BJ, et al. “Effects of resistance training frequency on measures of muscle hypertrophy.” Sports Medicine, 46(11): 1689–1697, 2016.

The 20-Minute Full-Body Home Workout: 4 Routines for Every Fitness Level

A vibrant, energetic scene showing a diverse group of people in a modern gym, engaged in various full-body workouts. Some are doing jumping jacks, others a

Twenty minutes is enough time for a genuinely effective full-body workout — if it’s structured right. These four routines use compound movements that hit multiple muscle groups simultaneously, so no time is wasted on isolation work when the clock is ticking.

Pick the routine that fits your current level. No equipment required; dumbbells or resistance bands are optional additions.

How These Routines Work

Each routine uses a circuit format — you move through exercises back-to-back with short rest periods. This keeps your heart rate elevated while building strength, so you get cardiovascular and muscular benefits in the same session. The key variable between levels is intensity, not duration — all four routines fit in 20 minutes.

Routine 1: Beginner — 20 Minutes

For people new to exercise or returning after a long break. Every exercise has a modification if you need it.

Warm-up (3 min): March in place 1 min → slow arm circles 30 sec → hip circles 30 sec → 10 slow bodyweight squats

Circuit — 3 rounds, 30 sec work / 15 sec rest:

  • Wall push-up (or knee push-up)
  • Bodyweight squat
  • Alternating reverse lunge
  • Bird dog (alternating sides)
  • Glute bridge

Cool-down (2 min): Standing quad stretch → seated hamstring stretch → cat-cow × 10

Each round takes about 4–5 minutes. Three rounds plus warm-up and cool-down lands at 20 minutes.

Routine 2: Intermediate — 20 Minutes

For people who’ve been training consistently for at least 8 weeks and can do full push-ups with good form.

Warm-up (2 min): 30 sec jumping jacks → 30 sec inchworms → 30 sec hip flexor stretch → 30 sec leg swings

Circuit — 3 rounds, 40 sec work / 20 sec rest:

  • Push-up
  • Goblet squat (hold a dumbbell, water jug, or go slow bodyweight)
  • Plank row (from push-up position, row one arm up while the other stays planted)
  • Reverse lunge to knee drive
  • Mountain climbers
  • Single-leg glute bridge (switch legs each round)

Cool-down (2 min): Pigeon pose 30 sec per side → thoracic rotation → slow breathing

Routine 3: HIIT — 20 Minutes

Work at maximum effort. If you’re not breathing hard, you’re not going hard enough. This format uses Tabata intervals: 20 seconds work, 10 seconds rest, 8 rounds per exercise pair.

Warm-up (3 min): Light jog in place → dynamic stretches → 20 sec high knees

4 rounds × 4 minutes each (20 sec on / 10 sec off, alternating two exercises):

  • Round 1: Squat jump ↔ push-up
  • Round 2: Burpee ↔ plank hold
  • Round 3: Alternating reverse lunge ↔ mountain climbers
  • Round 4: Jumping jack ↔ hollow body hold

Cool-down (3 min): Walk in place → full-body static stretch → slow breathing

Limit HIIT to twice per week maximum. It’s taxing on your central nervous system and needs 48 hours of recovery between sessions to be effective.

Routine 4: Low-Impact — 20 Minutes

No jumping, no impact. Ideal for recovery days, joint issues, or apartment workouts where floor noise matters.

Warm-up (3 min): March in place → shoulder rolls → slow lateral steps → 5 slow bodyweight squats

Circuit — 3 rounds, 45 sec work / 15 sec rest:

  • Step-touch lateral shuffle
  • Slow squat (4 sec down, 2 sec hold, 2 sec up)
  • Modified push-up (knees or wall)
  • Standing hip abduction (lift one leg out to the side, controlled)
  • Dead bug
  • Seated torso twist

Cool-down (2 min): Full-body stretch sequence

Choosing the Right Routine

Routine Best for Frequency
Beginner New to exercise, returning after a break 3×/week
Intermediate Active for 2+ months, ready to increase intensity 3–4×/week
HIIT Maximum calorie burn in minimum time 2×/week max
Low-Impact Joint issues, recovery days, quiet environment As needed

How to Keep Progressing

Without progressive overload, your body adapts to these routines in 4–6 weeks and the results plateau. To keep progressing with no equipment:

  • Increase work intervals (30 sec → 40 sec → 45 sec)
  • Decrease rest intervals (20 sec → 15 sec → 10 sec)
  • Move to harder exercise variations (wall push-up → knee push-up → full push-up → archer push-up)
  • Add a resistance band or light dumbbells to lower-body exercises

Track your rounds and reps. If the same routine feels significantly easier than it did last week, it’s time to add difficulty.

Leg and Glute Gains at Home: The Training and Nutrition Blueprint

A person performing a barbell squat in a modern gym, with detailed emphasis on the leg and glute muscles. The image captures the effort and concentration o

Building bigger, stronger legs and glutes at home requires two things working together: the right training stimulus and enough nutrition to support recovery and growth. Most home workout guides cover the exercises. This one covers both sides — because you can train perfectly and still see minimal results if your diet isn’t supporting the work.

The Training Side: What Actually Builds Legs and Glutes

The glutes are the largest muscle group in your body. The quadriceps are one of the strongest. Both respond to the same basic stimulus: progressive resistance over time.

The Best Home Exercises for Legs and Glutes

Bulgarian Split Squat — Rear foot elevated on a chair, front foot forward. This is the most effective single-leg exercise you can do at home. It loads the glutes and quads heavily and exposes any strength imbalances. Start with bodyweight, then add a loaded backpack.

Hip Thrust — Shoulders on a couch or bench, drive hips upward with a resistance band across your hips or a loaded backpack. Research consistently shows hip thrusts produce superior glute activation compared to squats. Do them last in your workout when glutes are pre-fatigued.

Romanian Deadlift — Hold dumbbells, water jugs, or a loaded backpack. Hinge at the hips with a slight knee bend, lowering the weight along your legs until you feel a strong hamstring stretch, then drive through your hips to stand. This is the primary hamstring exercise in any home program.

Pause Squat — At the bottom of a squat, hold for 3 seconds before driving up. Eliminating the stretch reflex forces your quads and glutes to generate force from a dead stop — much harder than a regular squat.

Sample Weekly Training Structure

  • Day 1: Bulgarian split squat 3×8 per leg, Romanian deadlift 3×10, calf raises 3×15
  • Day 2: Rest or upper body
  • Day 3: Hip thrust 4×12, pause squat 3×8, Nordic hamstring curl 3×5
  • Day 4: Rest
  • Day 5: Walking lunge 3×12 per leg, single-leg RDL 3×8 per leg, jump squat 3×8
  • Days 6–7: Rest or active recovery

The Nutrition Side: Feeding Muscle Growth

Training creates the signal for muscle growth. Nutrition provides the raw materials. Without sufficient protein and calories, your muscles can’t rebuild between sessions — and they don’t grow.

Protein: The Most Important Variable

The current consensus from sports nutrition research: 0.7–1 gram of protein per pound of bodyweight per day is the effective range for muscle growth. At 150 lbs, that’s 105–150g of protein daily.

What that looks like in practice:

  • 3 eggs at breakfast: 18g protein
  • Greek yogurt (1 cup): 17g protein
  • Chicken breast (6 oz): 53g protein
  • Lentils (1 cup cooked): 18g protein
  • Cottage cheese (1 cup): 25g protein

Spread protein intake across 3–4 meals. Your body can use about 30–40g of protein per meal for muscle protein synthesis — eating more in one sitting doesn’t add extra benefit.

Calorie Target: Maintenance or Slight Surplus

To build muscle efficiently, you need to be eating at or slightly above your maintenance calories — roughly 200–300 extra calories per day. Trying to build significant muscle in a large calorie deficit is mostly futile; you’ll train hard and see little change in muscle size.

If you want to lose fat while maintaining (not building) muscle, a moderate deficit of 300–500 calories below maintenance while keeping protein high is the right approach.

Pre-Workout Nutrition

Eat a meal containing both carbohydrates and protein 1–2 hours before training. Carbohydrates fuel the workout; protein signals muscle protein synthesis.

  • Option 1: 2 eggs + oatmeal
  • Option 2: Greek yogurt + banana
  • Option 3: Rice + chicken (if you have time to cook)

If you train first thing in the morning and can’t eat beforehand, a small amount of protein (20g) immediately pre-workout is better than training completely fasted.

Post-Workout Nutrition

The “anabolic window” is less critical than it’s often made out to be — you don’t need to slam a protein shake within 30 minutes of training. What matters more is that you get adequate protein across the whole day.

That said, eating a meal with 30–40g of protein within 2 hours of training is a simple habit that supports recovery.

The Factor Most People Ignore: Sleep

Muscle is built during sleep, not during training. Training breaks muscle tissue down; sleep is when it rebuilds stronger. Research shows that people sleeping fewer than 6 hours per night see significantly reduced muscle protein synthesis even when training and nutrition are on point.

If you’re training consistently and eating enough protein but not seeing progress, sleep is the first variable to examine — before changing your program or diet.

Putting It Together: A Simple Weekly Checklist

  • 3 leg/glute training sessions per week
  • 0.7–1g protein per pound bodyweight daily
  • Eating at or slightly above maintenance calories
  • 7–9 hours of sleep per night
  • Progressive overload: making exercises harder every 1–2 weeks

Hit all five consistently and your legs and glutes will grow — regardless of whether you have access to a gym.

4-Week Leg and Glute Strength Program You Can Do at Home

A well-equipped gym with a diverse range of exercise equipment, focusing on a person performing various leg and glute strength exercises. The person is usi

Most leg workout content gives you a list of exercises. This is a structured 4-week program — with specific sets, reps, and progressions built in — that you can run at home with no equipment. Each week builds on the last, so by week 4 you’re working at significantly higher intensity than week 1.

Three sessions per week, roughly 30–40 minutes each. Rest at least one day between sessions.

Before You Start: Baseline Test

Before week 1, test your baseline. Complete the following and note your numbers:

  • Bodyweight squat — max reps with good form
  • Reverse lunge — max reps per leg
  • Glute bridge hold — max time
  • Calf raise — max reps

You’ll retest these after week 4 to measure progress.

Week 1: Foundation

Focus on movement quality. These weights and volumes should feel manageable — you’re building the base, not testing your limits.

Session A (Monday):

  • Bodyweight squat — 3 × 15 (rest 60 sec)
  • Reverse lunge — 3 × 10 per leg (rest 60 sec)
  • Glute bridge — 3 × 15, 2-sec hold at top (rest 60 sec)
  • Standing calf raise — 3 × 20 (rest 45 sec)

Session B (Wednesday):

  • Step-up (sturdy chair) — 3 × 10 per leg (rest 60 sec)
  • Single-leg glute bridge — 3 × 10 per leg (rest 60 sec)
  • Wall sit — 3 × 30 seconds (rest 60 sec)
  • Hip hinge (bodyweight) — 3 × 12 (rest 45 sec)

Session C (Friday): Repeat Session A

Week 2: Volume

Same exercises, more sets. Add one set to each exercise this week.

Session A:

  • Bodyweight squat — 4 × 15 (rest 60 sec)
  • Reverse lunge — 4 × 10 per leg (rest 60 sec)
  • Glute bridge — 4 × 15 (rest 60 sec)
  • Single-leg calf raise — 3 × 15 per leg (rest 45 sec)

Session B:

  • Step-up — 4 × 12 per leg (rest 60 sec)
  • Single-leg glute bridge — 4 × 12 per leg (rest 60 sec)
  • Wall sit — 4 × 35 seconds (rest 60 sec)
  • Hip hinge — 4 × 12 (rest 45 sec)

Session C: Repeat Session A

Week 3: Intensity

Fewer reps, harder variations. The goal this week is quality over quantity. Introduce the more demanding exercise variations.

Session A:

  • Pause squat (3-sec hold at bottom) — 3 × 8 (rest 90 sec)
  • Walking lunge — 3 × 10 per leg (rest 90 sec)
  • Hip thrust (shoulders on couch, bodyweight) — 3 × 12 (rest 60 sec)
  • Single-leg calf raise with slow tempo — 3 × 12 per leg (rest 60 sec)

Session B:

  • Bulgarian split squat — 3 × 6 per leg (rest 90 sec). This is hard. Use a chair for your rear foot and go slowly.
  • Single-leg RDL (bodyweight) — 3 × 8 per leg (rest 90 sec)
  • Nordic hamstring curl negative — 3 × 4 (rest 90 sec). Hook feet under sofa, lower slowly, catch yourself with your hands.
  • Jump squat — 3 × 8 (rest 60 sec)

Session C: Repeat Session A

Week 4: Power + Endurance

The final week alternates between heavy/explosive work and high-rep endurance sets. This is the hardest week.

Session A (Power):

  • Bulgarian split squat — 3 × 8 per leg, add resistance (backpack) if available (rest 2 min)
  • Hip thrust — 4 × 12 (rest 90 sec)
  • Jump squat — 3 × 10 (rest 90 sec)
  • Nordic hamstring curl negative — 3 × 5 (rest 2 min)

Session B (Endurance):

  • Bodyweight squat — 1 × max reps (aim to beat your week 1 baseline)
  • Reverse lunge — 1 × max reps per leg
  • Glute bridge — 1 × max time held
  • Calf raise — 1 × max reps

Session C: Repeat Session A

After Week 4: Retest and Reset

After completing the program, retest your week 1 baseline numbers. Most people see significant improvements in squat reps and hold times within 4 weeks of consistent training.

To continue making progress, repeat the program but use harder exercise variations as your “week 1” starting point (e.g., Bulgarian split squats instead of bodyweight squats). Apply the same volume and intensity progression to the harder variations.

Recovery Rules

  • Never train legs on consecutive days — muscle repair requires 48 hours minimum
  • Soreness 24–48 hours after training is normal; soreness that’s still severe at 72 hours means you trained too hard
  • Sleep 7–9 hours — this is when muscle rebuilds
  • Eat enough protein — 0.7–1g per pound of bodyweight daily supports muscle repair