Arm Exercises Without Weights for Beginners: 6 Moves to Start With

A cheerful beginner performing a variety of arm exercises without any weights, utilizing everyday objects like a towel and chair for resistance. The settin

If you’re new to fitness and don’t have weights, you can still build arm strength with bodyweight movements — but only the right ones. Here are the 6 most effective arm exercises for beginners without weights, with clear instructions and the progressions to use as you get stronger.

What Beginners Actually Need to Know First

Your triceps (back of upper arm) respond well to bodyweight pressing — push-ups, dips, and their variations are genuinely effective. Your biceps (front of upper arm) are harder to train without external resistance, but doorway rows and table rows provide a pulling stimulus that does work the biceps. Start with both.

The 6 Exercises

1. Wall Push-Up (Easiest Starting Point for Absolute Beginners)

Stand facing a wall, hands at chest height, slightly wider than shoulder-width. Lean in and bend your elbows to bring your chest toward the wall, then push back. This is the lowest-difficulty version of a push-up. If you can’t do a floor push-up yet, start here. 3 × 10–15.

Progress to: knee push-up, then standard push-up.

2. Knee Push-Up

Standard push-up position but with knees on the floor. This reduces the weight you’re pushing to about 50% of body weight. Focus on keeping your hips in line with your shoulders — don’t let them sag or pike up. 3 × 8–12.

Progress to: full push-up when you can do 3 × 12 cleanly.

3. Standard Push-Up (Triceps + Chest + Shoulders)

Hands slightly wider than shoulder-width, body straight from head to heels. Lower your chest to the floor (or close to it), then push back up. Elbows should angle back at about 45 degrees, not flare straight out. 3 × 5–10.

Even 3 sets of 5 is worth doing. Build to 3 × 10 before adding harder variations.

4. Tricep Dip Off a Chair (Triceps)

Sit on the edge of a sturdy chair, hands on the seat beside your hips. Slide forward so your weight is on your hands, feet flat on the floor. Lower your body by bending your elbows to about 90 degrees, then push back up. Keep elbows pointing back, not flaring wide. 3 × 6–10.

5. Doorway Row (Biceps)

Stand in a doorway, grip the frame at chest height with both hands (palms facing you). Walk your feet forward until your body leans back at about 30–40 degrees. Pull your chest toward the door frame. This is a horizontal pulling movement — your biceps do real work. 3 × 8–12.

To make it harder: walk feet further forward (more horizontal angle = harder).

6. Diamond Push-Up (Triceps Emphasis)

Push-up position with hands close together, thumbs and index fingers forming a diamond shape. Lower your chest toward your hands, keeping elbows pointing back and somewhat in. Harder than standard push-ups — only add this once you can do 3 × 10 regular push-ups. 3 × 5–8.

A Simple Beginner Weekly Plan

Train arms 2× per week, at least 2 days apart:

  • Session 1: Wall or Knee Push-Up 3×10, Tricep Dip 3×8, Doorway Row 3×10
  • Session 2: Standard Push-Up 3×5–8, Diamond Push-Up 2×5, Doorway Row 3×12

This takes about 15–20 minutes per session. Progress is measured by increasing reps, then moving to harder variations (not by adding more exercises).

When to Add Equipment

Once you can do 3 × 10 push-ups and 3 × 12 doorway rows comfortably, a resistance band set ($15–25) adds enough variety and resistance to keep progressing. A pull-up bar ($25–35) lets you do chin-ups — the single most effective bicep exercise available at home.
No-Equipment Arm Exercises: 7 Moves and What They Can (and Can’t) Do

Create an image of a person performing various arm exercises without any equipment in a bright and airy living room. The person is shown doing activities l

No-equipment arm exercises work — but only if you understand their limits. Here’s an honest breakdown of which movements produce real arm development without weights, which are filler, and how to structure them for actual progress.

The Honest Limitation

Bicep isolation without external resistance is nearly impossible. Your biceps are a pulling muscle — they need something to pull against. Bodyweight alone doesn’t provide that unless you’re pulling your own bodyweight (rows, chin-ups). Without at least a doorframe, table, or pull-up bar, bicep development from pure bodyweight training is limited.

Triceps, on the other hand, respond well to bodyweight pressing. The 7 exercises below maximize what’s achievable without any equipment.

The 7 Exercises

1. Diamond Push-Up (Triceps ★★★★★)

The best bodyweight tricep exercise. Hands close together under your chest (thumbs and index fingers touching or near-touching), elbows pointing back as you lower. 3 × 8–15. When you can do 3 × 15, add a 3-second lowering phase.

2. Tricep Push-Up (Triceps ★★★★)

Standard push-up position but elbows stay tight against your sides throughout. This shifts load from the chest to the triceps. 3 × 10–15.

3. Doorway Row (Biceps ★★★★)

Requires a doorframe (no equipment purchased). Stand in the doorway, grip the frame at chest height, walk feet forward until your body angles back ~45 degrees, pull your chest toward the frame. Biceps do significant work here. 3 × 10–15.

4. Table Row (Biceps ★★★)

Lie under a sturdy table. Grip the edge with palms facing you, body straight from feet to head. Pull your chest to the table underside. Very similar to a row with a barbell. 3 × 8–12. Harder the more horizontal you are.

5. Pike Push-Up (Shoulders ★★★★)

Inverted V position (downward dog). Bend elbows to lower the top of your head toward the floor, keeping hips high throughout. Trains anterior deltoid more than triceps, but the triceps do assist. 3 × 8–12.

6. Decline Push-Up (Upper Chest + Triceps ★★★)

Feet on a chair, hands on the floor. The angle shifts more load to the upper chest and triceps vs. standard push-ups. 3 × 8–12.

7. Isometric Bicep Hold (Biceps ★★ — supplementary only)

Press your forearm upward against the underside of a table. Hold maximum tension for 8–10 seconds. This trains the bicep isometrically — limited for building size but useful if you have truly zero equipment or pull-up bar access. 3 × 3 holds per arm.

What’s Missing From This List (And Why)

“Arm circles” are not an arm exercise — they’re a shoulder mobility drill. Including them in an arm workout is filler. This list excludes exercises that don’t produce meaningful arm stimulus.

A Complete No-Equipment Arm Session (25 minutes)

  • Diamond Push-Up: 3 × 10
  • Tricep Push-Up: 3 × 12
  • Doorway Row: 3 × 12
  • Pike Push-Up: 3 × 8
  • Decline Push-Up: 3 × 10

Rest 60 seconds between sets. 2× per week is enough frequency for arms — they get secondary work from any pushing or pulling you do on other days.

When to Add Equipment

If you’ve been consistent with this routine for 4–6 weeks and want to keep progressing, the single best upgrade is a resistance band (~$15) for bicep curls, or a doorframe pull-up bar (~$25–30) for chin-ups. Either dramatically expands what’s achievable without requiring a gym membership or a dedicated workout space.

At-Home Arm Workouts: Complete Routines for Every Level

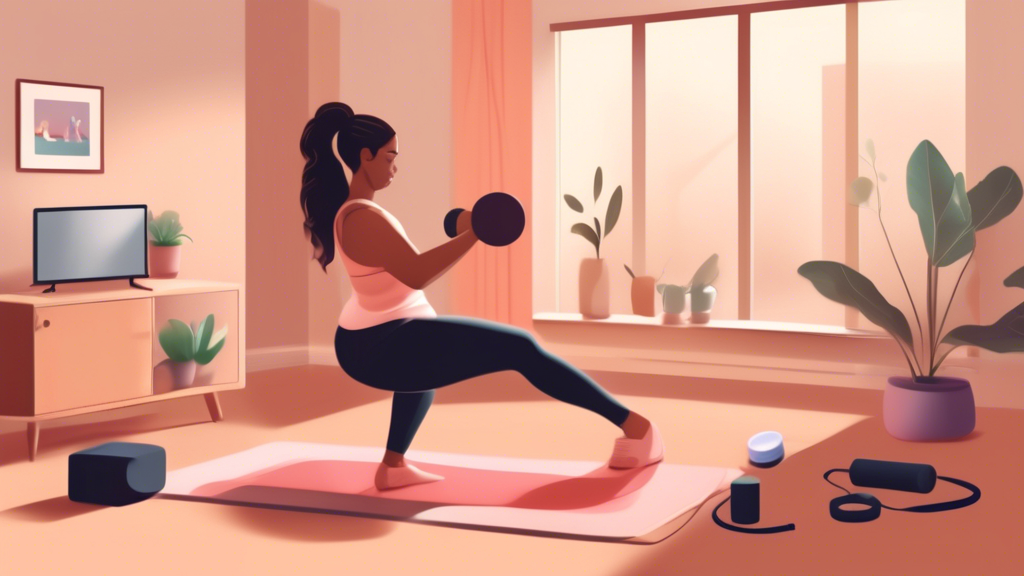
A detailed illustration showing a person performing various arm exercises at home, using minimal equipment such as resistance bands, dumbbells, and body we

Most at-home arm workouts focus only on biceps. Your arms have three major muscle groups: biceps (front), triceps (back of upper arm, making up about two-thirds of arm size), and forearms. A complete arm training program addresses all three. Here are three full routines — beginner, intermediate, and advanced — with equipment options for each.

What to Train and Why

  • Triceps: The larger muscle — trains through pushing movements (push-ups, dips, overhead extensions)
  • Biceps: Trains through pulling movements (chin-ups, rows, curls)
  • Forearms: Trained as secondary muscles in most arm work; can be targeted with reverse curls and grip exercises

If you want bigger arms, prioritize chin-ups and dips before isolated curls and extensions. They provide more stimulus with less time investment.

Beginner Routine (Equipment: none required)

Frequency: 2× per week, at least 2 days apart. Total time: 20–25 minutes.

  • Push-Up: 3 × 10 (standard width)
  • Tricep Dip (off a chair): 3 × 8
  • Doorway Row: 3 × 10
  • Diamond Push-Up: 2 × 6–8
  • Arm Circles (shoulder warm-up): 2 × 20 each direction

Rest 60 seconds between sets. Focus on control, not speed. When you can complete all sets cleanly, move to the intermediate routine.

Intermediate Routine (Equipment: resistance bands + pull-up bar)

Frequency: 2–3× per week. Total time: 30–35 minutes.

  • Chin-Up: 4 × AMRAP (use band assistance if needed)
  • Band Bicep Curl: 3 × 12
  • Tricep Dip: 4 × 10–12
  • Diamond Push-Up: 3 × 10
  • Reverse Band Curl: 3 × 12 (palms down — hits brachialis and forearms)
  • Band Overhead Tricep Extension: 3 × 12

Advanced Routine (Equipment: pull-up bar + bands or dumbbells)

Frequency: 2× per week as dedicated arm sessions, or 1× per week as part of a push/pull split. Total time: 40–45 minutes.

  • Weighted Chin-Up (backpack with books): 4 × 6
  • Incline Band Curl (band anchored low, body angled back): 4 × 10
  • Archer Push-Up: 3 × 6 per side
  • Parallel Bar Dip (two chairs side by side): 4 × 10–12
  • Band Hammer Curl: 3 × 12
  • Close-Grip Push-Up Negative (6-second lowering): 3 × 5
  • Forearm Plank with wrist extension: 2 × 30 seconds

Programming Notes

  • Arms need 48 hours recovery — don’t train them on consecutive days
  • Increase reps before increasing resistance (complete top of the rep range for all sets before progressing)
  • Arm isolation work (curls, extensions) supplements compound work (chin-ups, dips) — don’t replace one with the other

Common Mistakes

  • Training arms 5+ days a week: Growth happens during recovery, not training
  • Skipping triceps: Triceps are larger than biceps — neglecting them limits total arm size
  • Using momentum on curls: Slow the eccentric (lowering) to 2–3 seconds to maximize bicep engagement

Bodyweight Arm Exercises: 8 Moves That Build Real Strength Without Equipment

Create an image showcasing a diverse group of people performing various bodyweight arm exercises in an outdoor park setting. Exercises can include push-ups

Bodyweight arm training has a real limitation: your arms can’t be fully isolated without some form of external resistance. But that doesn’t mean bodyweight exercises can’t build strong, defined arms — they can, if you choose the right movements and apply progressive overload. Here’s what actually works.

The Honest Limitation (and the Workaround)

Most bodyweight pressing movements (push-ups, dips) primarily train the triceps and chest. True bicep isolation is harder without weights. The solution: focus on pulling movements where your biceps do heavy work, even if the pulling is against your own bodyweight.

The 8 Exercises

1. Diamond Push-Up (Triceps)

Place hands close together under your chest, thumbs and index fingers touching. Lower your chest to your hands, elbows pointing back (not flaring wide). This shifts emphasis from chest to triceps. 3 × 8–15.

Progression: elevate feet, add a pause at the bottom.

2. Tricep Dip (Triceps)

Use two sturdy chairs or a low table behind you. Hands on the surface, fingers forward, feet extended. Lower your body by bending your elbows to 90 degrees. 3 × 8–15.

Progression: elevate feet on another chair.

3. Wide Push-Up (Chest + Triceps)

Hands wider than shoulder-width. This shifts more load to the chest while still working the triceps through the lockout. 3 × 10–20.

4. Doorway Row (Biceps + Back)

Grab a doorframe at chest height, walk feet forward until your body angles back ~45 degrees. Pull your chest toward the door. The biceps do real work here. 3 × 10–15.

Progression: increase angle (feet further forward), add a pause at chest.

5. Chin-Up (Biceps)

The gold standard for bodyweight bicep development. Underhand grip (palms facing you), hands shoulder-width. Pull until your chin clears the bar. If you can’t do one yet, use negatives: jump to the top, lower over 5 seconds. 3 × AMRAP or 3 × 5 negatives.

6. Plank to Downward Dog (Shoulders + Triceps)

Start in plank, push your hips up and back into downward dog, pressing through your hands. Return to plank. Slow and controlled. This loads the triceps and shoulders through an extended range. 3 × 10.

7. Pike Push-Up (Shoulders)

Start in downward dog, then bend your elbows to lower the top of your head toward the floor, keeping hips high. Push back up. This is a shoulder-dominant pressing movement. 3 × 8–12.

Progression: elevate feet on a chair for a near-vertical press.

8. Isometric Bicep Curl (Biceps — no equipment)

Grip the underside of a sturdy table or desk. Try to curl your hands upward against the resistance of the table (which won’t move). Hold for 8–10 seconds of maximum tension. This is an isometric contraction for the biceps — limited for building size, but useful when you have zero equipment. 3 × 3 holds of 8–10 seconds.

A Complete Weekly Structure

  • Day 1 (Push focus): Diamond Push-Up 3×12, Pike Push-Up 3×8, Tricep Dip 3×10
  • Day 2 (Pull focus): Chin-Up 3×AMRAP, Doorway Row 3×12
  • Day 3: Rest or active recovery
  • Day 4: Repeat Day 1 with a different push-up variation
  • Day 5: Repeat Day 2 + add Wide Push-Up 3×15

How to Progress Without Adding Weight

Progressive overload without weights means making the exercises harder over time:

  • Increase reps before increasing difficulty
  • Add a 2–3 second pause at the hardest point
  • Slow the lowering phase to 4 seconds
  • Change the leverage (elevate feet, increase body angle)
  • Move toward one-arm or archer variations

Once you can do 20 clean push-ups and 8 clean chin-ups, you’ve built meaningful arm strength without a single weight.

Dance Cardio at Home: How to Start and What to Actually Expect

A vibrant and energetic fitness studio with colorful lights, featuring a group of diverse individuals engaged in a high-energy dance cardio class. The inst

Dance cardio is one of the more sustainable forms of home cardio because it doesn’t feel like a workout — at least not at first. Here’s an honest look at what dance cardio delivers, who it’s best suited for, and how to build a routine that actually sticks.

What Dance Cardio Actually Does

Dance cardio is aerobic exercise. It raises your heart rate, burns calories (roughly 200–400 per hour depending on intensity and body weight), and improves coordination and balance. It does not build significant muscle mass or replace strength training. Think of it as a cardio tool you enjoy doing — which makes consistency far more likely than activities you dread.

It’s particularly good for people who find traditional cardio (running, cycling) boring, or who have joint issues that make high-impact exercise painful.

What You Need to Start

  • Space: About 6×6 feet of clear floor
  • Footwear: Athletic shoes with lateral support (running shoes work; bare feet are fine on carpet or a yoga mat)
  • Video or music: YouTube has free options — Zumba tutorials, hip-hop cardio, and follow-along dance workouts from channels like The Fitness Marshall or PopSugar Fitness

You don’t need any equipment. A phone or laptop is enough.

Dance Styles That Work Well for Home Cardio

  • Zumba-style: Latin rhythms (salsa, merengue, cumbia) with easy-to-follow choreography. Great for beginners — the moves repeat and build.
  • Hip-hop cardio: Higher intensity, more upper body involvement. Better once you’re comfortable with basic step patterns.
  • Low-impact dance: Arms and torso movement with one foot on the floor at all times. Best for people with knee or ankle issues, or beginners who want to ease in.

A 4-Week Beginner Dance Cardio Plan

Start shorter than you think you need to. Quitting after 20 minutes because you’re having fun beats quitting after 10 because you’re overwhelmed.

  • Week 1: 2 sessions × 20 minutes. Follow a beginner Zumba or low-impact dance video. Focus on learning the steps, not intensity.
  • Week 2: 3 sessions × 20 minutes. Same style but add one intermediate video to the rotation.
  • Week 3: 3 sessions × 25–30 minutes. You should be keeping up with most moves by now.
  • Week 4: 3–4 sessions × 30 minutes. Add a higher-intensity session once per week.

After 4 weeks, aim for 3–5 sessions per week at 30–45 minutes each. At that frequency and duration, dance cardio provides meaningful cardiovascular benefit.

Combining Dance Cardio With Strength Training

Dance cardio alone won’t build muscle. If your goals include body composition changes (less fat, more definition), pair it with 2 days per week of bodyweight or resistance training. A simple split: dance cardio Monday/Wednesday/Friday, strength training Tuesday/Thursday.

Is Dance Cardio Effective for Weight Loss?

Yes, if you do enough of it consistently. A 150-pound person burns roughly 300 calories in 45 minutes of moderate dance cardio. That’s meaningful if you’re doing it 3–5 times a week and managing your diet. But no cardio outpaces a poor diet — the two work together.

When Dance Cardio Isn’t Working

If you’ve been doing 3+ sessions per week for 6 weeks and aren’t seeing cardio fitness improvements (easier to keep up, lower resting heart rate), the sessions are probably too low intensity. Try a harder video, increase duration, or add a 5-minute “all-out” interval at the midpoint of each session.

Pilates Core Workout: 6 Key Exercises and What They’re Actually Training

A brightly lit fitness studio with large windows revealing a serene outdoor setting. The room is filled with students of various ages and body types, each

Pilates core training works differently from standard ab exercises. Rather than isolating specific muscles through flexion (like crunches), Pilates prioritizes deep stabilization, control under load, and coordination between breath and movement. Understanding what each exercise is actually training helps you do it correctly and explains why the results transfer to everything else you do physically.

The Core in Pilates: Deeper Than “Abs”

Pilates targets the “powerhouse” — what modern anatomy calls the deep core system: the transverse abdominis (deepest ab layer), pelvic floor, diaphragm, and multifidus (deep spinal stabilizers). These muscles work together to create intra-abdominal pressure that protects the spine. Strengthening them improves posture, reduces back pain, and makes every movement more efficient.

Exercise 1: The Hundred

What it trains: Core endurance and breath coordination

Lie on your back, curl head and shoulders off the mat, extend legs at 45° (or keep knees bent for beginners). Arms by your sides, pump them up and down in small pulses — 5 pumps inhale, 5 pumps exhale. Complete 10 breath cycles = 100 pumps.

The sustained hold demands constant deep core engagement. The breathing pattern coordinates the diaphragm and pelvic floor — the “top and bottom” of the core cylinder.

Exercise 2: The Roll-Up

What it trains: Spinal articulation and sequential core activation

Lie flat with arms overhead. Slowly curl up vertebra by vertebra, reaching forward over your legs, then reverse back down with the same control. Do not use momentum. Each vertebra should peel off and return to the mat sequentially.

This reveals and addresses spinal mobility restrictions — segments that “clunk” rather than roll are areas of stiffness or weakness. 3 × 5 reps.

Exercise 3: Single-Leg Stretch

What it trains: Anti-rotation stability and hip flexor strength

Lie on your back, curl up, pull one knee to chest while the other leg extends. Alternate legs in a coordinated rhythm while maintaining a still, curled torso. Your core stabilizes the pelvis as the legs create rotational forces that want to pull it off-center.

3 × 10 alternating reps.

Exercise 4: Plank (Pilates Version)

What it trains: Whole-core anti-extension with neutral spine

The Pilates plank differs from a standard plank in emphasis: neutral spine (no tucked pelvis), ribcage drawn down (not flared), and active shoulder stabilization. Hold for 20–30 sec, 3 sets. Your focus is on the quality of engagement, not the duration.

Exercise 5: Leg Circles

What it trains: Pelvis stabilization during limb movement

Lie on your back with one leg extended to the ceiling. Circle the leg in small, controlled circles — the pelvis must stay completely still while the leg moves. This isolates the hip socket movement from the pelvis and trains the deep hip stabilizers. 5 circles each direction per leg, 2 sets.

Exercise 6: Criss-Cross

What it trains: Obliques with rotational control

Like a bicycle crunch but with full shoulder rotation and a 1-second pause at the top of each rotation. Bring one elbow toward the opposite knee while extending the other leg. The key is rotating from your thoracic spine, not just swinging your elbow. 3 × 8 per side.

A Beginner Pilates Core Session (30 Minutes)

  • Breathing practice (diaphragmatic) — 2 min
  • The Hundred — 3 rounds (aim for 50–100 pumps)
  • Roll-Up — 3 × 5
  • Single-Leg Stretch — 3 × 10
  • Pilates Plank — 3 × 20 sec
  • Leg Circles — 2 × 5 per direction, per leg
  • Criss-Cross — 3 × 8 per side

Practice 3× per week. The learning curve is in the quality of movement — these exercises become more effective as your body awareness improves.