Pilates for Abs and Core: 6 Exercises That Build Deep Core Strength

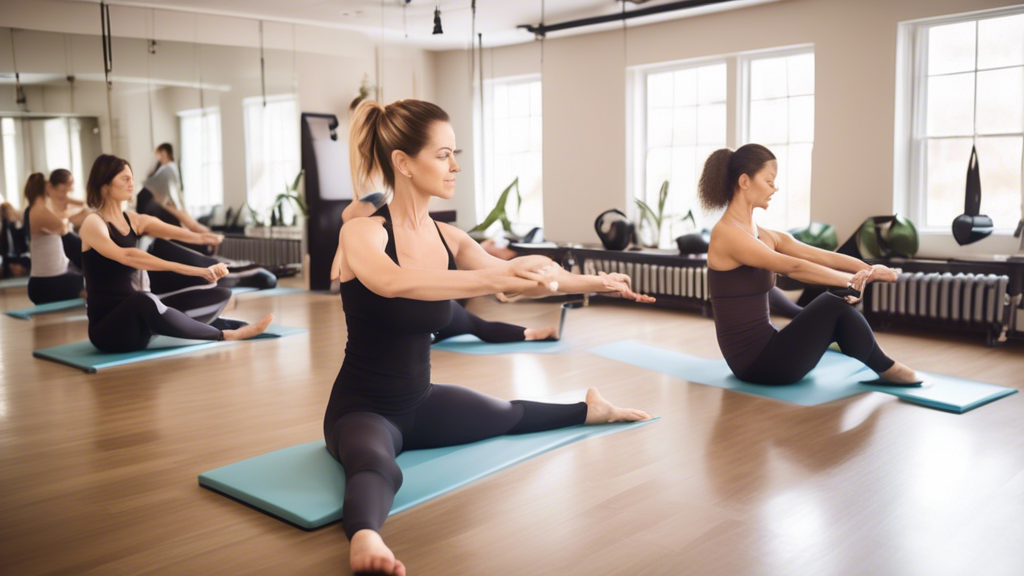
A brightly lit, modern Pilates studio with people engaging in various Pilates exercises focused on abs and core strengthening. The backdrop includes large

Pilates doesn’t just work your abs — it trains the entire deep core system that stabilizes your spine and transfers force through your body. The six exercises below are the most effective in the Pilates repertoire for this purpose, with instructions for both beginners and those with some Pilates experience.

Why Pilates Builds a Different Kind of Core Strength

Most ab training works the rectus abdominis (the surface six-pack muscle) through spinal flexion — crunches, sit-ups, leg raises. Pilates prioritizes the transverse abdominis (the deepest layer), the obliques, and the muscles that stabilize the spine in neutral — producing functional core strength that transfers to every movement you make.

The result is a core that’s stronger from the inside out: better posture, less lower back pain, and more efficient movement in everyday activities and exercise.

Exercise 1: The Hundred

Curl head and shoulders off the mat, extend legs to 45° (or keep knees bent). Arms by sides, pump them in short pulses — 5 inhales, 5 exhales per 10 pumps. Complete 100 pumps.

Beginner: Knees bent, head on mat if neck tires → Intermediate: Legs extended at 45°, held strongly

Exercise 2: Roll-Up

Lie flat, arms overhead. Inhale to prepare, exhale and curl up vertebra by vertebra until sitting upright, reach forward. Inhale, exhale to roll back the same way. Never use momentum.

3 × 5. This is harder than it looks — many people can’t complete a full Roll-Up initially without hip flexors taking over. Start with knees bent until spinal articulation improves.

Exercise 3: Leg Circles

Lie on your back, one leg extended to the ceiling. Circle the leg across the body, down, out, and back up. The entire circle should leave your pelvis completely still. 5 circles each direction per leg, 2 sets.

The deep hip stabilizers and obliques work continuously to prevent the pelvis from rocking — this is the training goal, not just the hip mobility.

Exercise 4: Double-Leg Stretch

Head and shoulders curled up, both knees pulled to chest. Inhale, extend arms overhead and legs to 45°. Exhale, circle arms and pull knees back in. The moment of full extension is where the deep core is maximally challenged — don’t let your lower back arch.

3 × 8. Raise leg angle if lower back arches at 45°.

Exercise 5: Scissors

Curl up with both legs extended. One leg reaches toward the ceiling while the other lowers toward the floor. Hold the upper leg, pulse it twice, then switch. Pelvis stays perfectly still as legs alternate.

3 × 6 per side. Excellent for the deep hip flexors and lower abdominals working together.

Exercise 6: Teaser

Lie flat, arms overhead. Simultaneously raise legs to 45° and curl your torso up until you form a V-shape — upper body and legs balancing on your tailbone. Pause, then slowly return to flat. This is the most challenging exercise here — it requires full core strength, hip flexor strength, and balance.

3 × 5. Modify by keeping knees bent until you can manage straight legs.

A Complete Pilates Core Session (25 Minutes)

  • Imprinting + breathing — 3 min
  • Hundred — 2 sets
  • Roll-Up — 3 × 5
  • Leg Circles — 2 × 5 per direction, per leg
  • Double-Leg Stretch — 3 × 8
  • Scissors — 3 × 6 per side
  • Teaser — 3 × 5 (or modification)
  • Spine Stretch Forward — 3 × 5

Practice 3× per week. Pilates rewards patience — the control and precision improve over weeks, and so do the results.

Abs in 30 Days at Home: What’s Realistic and a Program That Actually Delivers

A fit individual demonstrating effective at-home ab exercises, surrounded by everyday household items, with a visible transformation calendar chart showing

Most “abs in 30 days” programs make a promise they can’t keep because they conflate two different things: building core strength (which 30 days of training absolutely can accomplish) and achieving visible six-pack abs (which requires a level of fat loss that takes most people 3–6 months). Here’s an honest breakdown and a 30-day program built on what’s actually achievable.

What 30 Days of Ab Training Can Accomplish

Will accomplish:

  • Measurably stronger core — better plank time, more controlled leg raises, improved stability in squats and everyday movement
  • Reduced lower back discomfort (for most people with desk jobs)
  • Better posture from improved deep core activation
  • The muscle foundation that becomes visible as body fat decreases over subsequent months

Will not accomplish (in 30 days):

  • Visible six-pack abs if you’re currently above ~15% body fat (men) or ~22% (women)
  • Spot fat reduction from your midsection

The 30-Day Ab Training Program

Train abs 5 days per week, rest 2. Each session is 12–15 minutes. The difficulty increases week by week.

Week 1 (Days 1–5): Foundation

  • Plank — 3 × 20 sec
  • Dead bug — 3 × 6 per side
  • Glute bridge — 3 × 12
  • Slow bicycle crunch — 3 × 8 per side

Week 2 (Days 8–12): Volume

  • Plank — 3 × 30 sec
  • Dead bug (full extension) — 3 × 8 per side
  • Hollow body hold — 3 × 20 sec
  • Slow bicycle crunch — 3 × 10 per side
  • Leg raise (bent knee) — 3 × 10

Week 3 (Days 15–19): Intensity

  • Plank shoulder tap — 3 × 10 per side
  • Hollow body hold — 3 × 25 sec
  • Leg raise (straight) — 3 × 10
  • Dead bug + 3 sec hold — 3 × 6 per side
  • Side plank — 3 × 20 sec per side

Week 4 (Days 22–26): Peak

  • Ab wheel rollout — 3 × 6 (or lying version with towel)
  • Hanging leg raise (bar) or straight-leg floor raise — 3 × 8
  • Hollow body hold — 3 × 30 sec
  • Criss-cross (Pilates) — 3 × 10 per side
  • Side plank hip dip — 3 × 10 per side

Day 30: Retest

Measure: max plank time, max bicycle crunch reps with 1-sec pause, and max hollow body hold time. Compare to Day 1. The improvement will be significant — this is real, measurable progress.

What to Do After Day 30 for Visible Abs

Continue the Week 4 program. Add the diet component: a 300–500 calorie daily deficit with 0.7–1g protein per lb bodyweight. The abs you’ve spent 30 days building will progressively become visible as body fat decreases over the following 3–6 months. The training and diet phases aren’t separate steps — they’re parallel tracks that run together.

Dorm Room Workout: A Complete Bodyweight Routine for Small Spaces

A college student performing bodyweight exercises in a cozy, small dorm room. The room has a bed, a desk with a laptop, bookshelves, and posters on the wal

Dorm rooms present specific workout constraints: minimal floor space (often 8×10 feet with a bed and desk occupying most of it), noise concerns for the rooms adjacent and below, no equipment, and a schedule that alternates between intensely busy and completely free. This routine works within all of those.

The Dorm Room Constraints

  • Space: Clear a 4×5 foot area between your bed and desk — that’s enough
  • Noise: Avoid jumping between 10pm and 8am. Use the low-impact circuit then; use the full circuit during daytime hours
  • Roommate: Either coordinate schedules or use the low-impact version which is quiet enough not to disturb anyone

The Full Dorm Workout (25 Minutes, Daytime)

Warm-up (3 min): March in place → arm circles → hip circles → 8 slow bodyweight squats

Circuit — 3 rounds, 35 sec work / 15 sec rest:

  • Squat jump (land softly) — or fast squat if noise is a concern
  • Push-up
  • Reverse lunge
  • Mountain climbers
  • Glute bridge
  • Plank shoulder tap

Cool-down (2 min): Hip flexor stretch + hamstring stretch

The Low-Impact Version (Evening/Early Morning)

Zero jumping. Quieter than walking to class.

3 rounds, 40 sec work / 20 sec rest:

  • Slow squat (3 sec down, 1 sec hold)
  • Push-up (or knee push-up)
  • Bulgarian split squat (one foot on chair, if you have a chair)
  • Dead bug
  • Tricep dip (on desk chair or bed edge)
  • Side plank

The 10-Minute Desk Break Circuit

For study days when you need to move but don’t want to change clothes. Takes 10 minutes from your chair to done and back:

  • Bodyweight squat × 15
  • Push-up × 10
  • Plank × 30 sec
  • Glute bridge × 15
  • Reverse lunge × 8 per leg

One round. Repeat twice for a 20-minute session. This preserves study momentum better than a full workout.

Using Dorm Furniture

  • Desk chair: Tricep dips, Bulgarian split squat rear leg elevation
  • Bed edge: Hip thrust (shoulders on edge), incline push-up, tricep dip
  • Bed itself: Decline push-up (feet on bed), mountain climbers
  • Wall: Wall sit, wall push-up (beginner), pike push-up

Fitting Workouts Into a Student Schedule

The biggest obstacle isn’t motivation on any given day — it’s that busy class weeks followed by social weekends break the habit completely. Maintaining a minimum: even 10 minutes 3× per week preserves fitness through exam seasons. The 10-minute desk break circuit is specifically designed for this — it removes the “I don’t have time” barrier entirely.

Home Leg Workout: 7 Exercises, Sets, Reps, and How to Progress Each One

Create an image of a person exercising in a living room, performing various leg workouts such as squats, lunges, and leg lifts. Include a yoga mat, resista

This is a reference guide for home leg training — seven exercises with specific sets, reps, and progression paths for each. Use it to build a program or add exercises to an existing routine. All exercises require no equipment; optional additions (resistance bands, loaded backpack) are noted where they help.

Exercise 1: Bodyweight Squat

Muscles: Quads, glutes, hamstrings
How to: Feet shoulder-width, chest up, sit back and down until thighs parallel, drive through heels.
Sets/reps: 3 × 15
Progress to: Pause squat (3 sec at bottom) → Bulgarian split squat → Pistol squat

Exercise 2: Reverse Lunge

Muscles: Quads, glutes, hamstrings, balance
How to: Step backward into lunge, lower rear knee toward floor, return. Alternate legs.
Sets/reps: 3 × 10 per leg
Progress to: Walking lunge → Lateral lunge → Deficit lunge (front foot elevated)

Exercise 3: Glute Bridge

Muscles: Glutes, hamstrings, lower back stabilizers
How to: On your back, feet flat, drive hips up, hold 2 sec, lower.
Sets/reps: 3 × 15
Progress to: Single-leg glute bridge → Hip thrust (shoulders on couch) → Hip thrust with resistance band

Exercise 4: Calf Raise

Muscles: Gastrocnemius, soleus
How to: Rise onto toes, hold 1 sec, lower fully. Use a step for extra range if available.
Sets/reps: 3 × 20
Progress to: Single-leg calf raise → Single-leg with slow tempo (3 sec up, 3 sec down) → Add load

Exercise 5: Step-Up

Muscles: Quads, glutes
How to: Step onto a sturdy chair with one foot, bring the other up, step back down.
Sets/reps: 3 × 10 per leg
Progress to: Higher surface → Add loaded backpack → Single-leg step-down (controlled descent on one leg)

Exercise 6: Nordic Hamstring Curl

Muscles: Hamstrings (best bodyweight hamstring exercise available)
How to: Hook feet under a sofa, kneel upright, lower body to floor by resisting with hamstrings only. Catch with hands. This is very difficult — start with just the lowering phase.
Sets/reps: 3 × 4–5 negatives (lower over 3–4 sec)
Progress to: Lower more slowly → Reduce assistance from hands → Full Nordic curl (pulling back up)

Exercise 7: Wall Sit

Muscles: Quads, glutes (isometric)
How to: Back against wall, thighs parallel to floor, hold position. 90-degree angle at the knee is the target.
Sets/reps: 3 × 30–45 sec
Progress to: Longer duration → Single-leg wall sit → Add resistance band above knees

Building a Weekly Program

Train legs 2–3× per week. A simple structure:

Session A (knee-dominant): Squat + Lunge + Step-up + Calf raise

Session B (hip-dominant): Glute bridge + Nordic curl + Single-leg RDL + Wall sit

Alternate between sessions. When any exercise reaches the top of its rep range easily, progress to the next variation.

Space-Saving Home Workout: A Complete Full-Body Routine in a 6×6 Foot Area

A minimalist home gym setup in a small apartment, featuring a person performing bodyweight exercises such as push-ups, squats, and planks. The room has sim

Every exercise below has been selected because it fits within a 6×6 foot square — roughly the size of a yoga mat with a foot of clearance on each side. No lateral lunges that require width, no broad jumps that need length. Just effective movements in a genuinely compact footprint.

How to Set Up

Clear a 6×6 foot area completely. Check the floor surface — a yoga mat or non-slip rug prevents sliding. If you’re in an apartment, check what’s below you before adding any jumping. That’s all the setup required.

The Full-Body Circuit (25 Minutes)

Four rounds. 35 seconds work, 15 seconds rest between exercises, 90 seconds rest between rounds.

Lower Body

Bodyweight squat — All movement is vertical. Fits in a 2×2 foot footprint.

Reverse lunge — Step backward (not sideways), requiring roughly 4 feet of length. Fits comfortably in 6 feet.

Glute bridge — Lying movement. Needs ~6 feet length × 2 feet width. Exactly within the space.

Upper Body

Push-up — Requires a 4×2 foot space. Easily within limits.

Tricep dip (if you have a chair at the edge of the space)

Pike push-up — Inverted V position, fits in 4×4 feet.

Core

Dead bug — Lying on back, small limb movements. 6×2 feet maximum.

Plank + shoulder taps — 4×2 feet.

Mountain climbers — Plank position, feet alternate forward. 4×2 feet.

Complete 25-Minute Session

Warm-up (3 min): Standing — arm circles, hip circles, slow squats, calf raises

4 rounds of this circuit (35 sec on / 15 sec rest):

  1. Squat
  2. Push-up
  3. Reverse lunge (alternating)
  4. Dead bug
  5. Pike push-up
  6. Glute bridge
  7. Mountain climbers
  8. Plank shoulder tap

Rest 90 sec between rounds.

Cool-down (2 min): Hip flexor stretch, hamstring stretch, cat-cow

No-Jump Modification

Every exercise above is already low-impact — none involve jumping. For apartment buildings with thin floors, you can run this entire session without concern about noise. The only modification needed for maximum quiet: squat even more slowly (4 sec descent) to prevent foot-landing noise.

Progressing Without More Space

You can make these exercises progressively harder without expanding the footprint:

  • Slow the tempo (3–4 seconds per rep)
  • Add pauses at the hardest point
  • Progress to single-leg versions (single-leg bridge, pistol squat prep)
  • Add a resistance band above the knees for squats and glute bridges

The 6×6 foot constraint is not a ceiling on results — it’s just a physical parameter. Progressive overload applied within that space drives continuous improvement.

5 Best Pilates Exercises for Core Strength: A Beginner’s Step-by-Step Guide

A serene fitness studio with soft, natural lighting, showcasing a diverse group of individuals engaged in a variety of Pilates exercises specifically targe

Pilates is one of the most effective approaches to building a strong, stable core — but the exercises look deceptively simple and are often done incorrectly by beginners. This guide breaks down the five most effective Pilates core exercises with precise instructions, common mistakes, and beginner modifications for each.

Before You Start: The Pilates Breath

In Pilates, breathing is technique, not just breathing. The pattern is: inhale to prepare, exhale on the effort. Each exhale should be fully complete — this activates the deep transverse abdominis automatically, which is the primary muscle Pilates targets. Practice this breathing before adding any exercise.

Exercise 1: The Hundred

What it builds: Core endurance, breath coordination, deep abdominal engagement

How to: Lie on your back. Curl head and shoulders off the mat. Arms reach long by your sides. Pump arms in small, controlled beats — 5 beats inhale, 5 beats exhale = 1 breath cycle. Complete 10 breath cycles (100 beats).

Beginner modification: Keep knees bent and feet flat on the mat rather than extending legs.

Common mistake: Lifting with the neck instead of the core. If your neck tires first, place your head on the mat and focus only on the breath and arm pump.

Exercise 2: The Roll-Up

What it builds: Spinal articulation, hamstring flexibility, sequential core control

How to: Lie flat, arms reaching overhead. Inhale, then exhale as you peel your spine off the mat starting from your head — one vertebra at a time — until you’re sitting upright reaching over your legs. Inhale, then exhale to roll back down the same way.

Beginner modification: Bend knees slightly to reduce hamstring demand. Use a towel behind your thighs to assist the roll-up phase.

Common mistake: Using momentum to “throw” yourself up. If you can’t roll up without momentum, your spinal flexibility is limited — the exercise is still worth doing slowly with assistance.

Exercise 3: Single-Leg Stretch

What it builds: Oblique strength, anti-rotation stability, hip flexor endurance

How to: Lie on your back, curl head and shoulders up. Pull your right knee to your chest while your left leg extends to 45°. Switch. Maintain a still torso as the legs alternate — no rocking, no hip rotation. 3 × 10 alternating reps.

Beginner modification: Keep the extended leg higher (60–70° from floor) to reduce demand on the core.

Common mistake: Letting the hips rock side to side as you switch legs. The pelvis should be completely still throughout.

Exercise 4: Leg Circles

What it builds: Deep hip stability, pelvic stability, hip joint mobility

How to: Lie on your back, one leg extended to ceiling, other leg flat on mat. Circle the raised leg across your body, down, out, and back to center — keeping the pelvis completely still. 5 circles each direction. Switch legs. 2 sets.

Beginner modification: Make the circles small — perhaps 6 inches in diameter initially. Increase size only as you can maintain pelvic stability.

Common mistake: Letting the pelvis rock with each circle. The entire point of the exercise is not letting it move.

Exercise 5: Spine Stretch Forward

What it builds: Spinal flexion mobility, posterior chain awareness, seated core stability

How to: Sit upright with legs extended and slightly wider than hip-width. Inhale to lengthen the spine tall. Exhale as you slowly round forward from your head down through each vertebra, reaching hands toward feet. Inhale, then exhale to roll back to upright. 3 × 6.

Beginner modification: Sit on a rolled mat or blanket to tilt your pelvis slightly forward if tight hamstrings make upright sitting difficult.

Common mistake: Bending from the hips (hip flexion) instead of the spine (spinal flexion). The rounding should start from the top of the head and progress downward.

A Complete 20-Minute Beginner Pilates Session

  • Breathing practice — 3 min
  • Hundred (modified) — 2 sets of 50 pumps
  • Roll-Up — 3 × 5
  • Single-Leg Stretch — 3 × 10
  • Leg Circles — 2 × 5 per direction, per leg
  • Spine Stretch Forward — 3 × 6

Practice 3× per week. Progress shows in control and precision rather than difficulty — when you can do all five exercises with full control and no compensations, the exercises produce more results, not less.