Water Aerobics for Seniors: Benefits, What to Expect, and How to Get Started

A group of smiling seniors laughing and doing water aerobics in a sunny swimming pool, wearing colorful swimwear.

Water aerobics takes place in a pool, typically in chest-deep water, and involves cardio, strength, and range-of-motion movements against water resistance. For seniors — particularly those with arthritis, joint pain, or mobility limitations — it’s often the most comfortable exercise option available because water buoyancy reduces effective body weight by roughly 90%, eliminating almost all joint impact.

Note: Water aerobics requires access to a pool. Community pools, YMCAs, senior centers, and recreation centers are the most common venues. Class costs typically range from $5 to $15 per session, with membership discounts often available.

What the Research Shows

Studies consistently show that water aerobics produces cardiovascular improvements comparable to land-based exercise at the same intensity while creating significantly less joint stress. For older adults specifically, it reduces osteoarthritis pain, improves balance and gait, maintains bone density (less effectively than weight-bearing exercise, but meaningfully), and provides social engagement that supports mental health and long-term adherence.

Why Water Is Particularly Good for Seniors

Buoyancy eliminates impact: The force that damages aging joints — the landing force of every step — doesn’t exist in water. You can move your legs and arms vigorously without the repetitive impact that wears on knees, hips, and ankles on land.

Water resistance is automatic: Move your arm slowly through water and it provides little resistance. Move it quickly and resistance increases proportionally. This means you automatically exercise at the intensity you’re capable of — the water self-regulates. You can’t accidentally overdo it the way you can with weights.

Fall risk is reduced: In chest-deep water, a stumble doesn’t result in a fall — the water catches you. For seniors who are anxious about falling during exercise, this removes a significant barrier to participation.

Temperature regulation: A cool pool lowers core temperature, allowing people who overheat easily to exercise for longer than they could on land.

Common Water Aerobics Exercises

Cardiovascular Movements

Water walking: Walk forward, backward, and sideways through chest-deep water. More resistance than air walking — it’s a genuine workout at brisk pace. Start here if you’re new to water exercise.

Water jogging: Jog in place or across the pool. The buoyancy makes this dramatically lower-impact than land jogging while the resistance makes it harder cardiovascularly.

Flutter kick: Hold a kickboard (provided at most pools) and kick your legs in alternating short kicks. Targets the hip flexors and quadriceps without upper body load.

Strength Movements

Arm push and pull: Stand in chest-deep water. Push both arms forward through the water, then pull them back. Repeat for 30 to 60 seconds. Water resistance provides the load — move faster for more resistance.

Water leg lifts: Stand near the pool wall, hold the edge. Lift one leg to the side, return. Lift it forward, return. Lift it back, return. Targets all hip muscle groups.

Water wall push-up: Face the pool wall, hands on the edge at shoulder width. Lean in, push back. Equivalent to an incline push-up.

Flexibility and Range-of-Motion

Hip circles: Hold the pool wall, circle one leg slowly at the hip joint. Full range of motion in all directions.

Ankle circles: In the water, rotate each ankle through its full range. Water supports the leg, allowing complete focus on the ankle movement.

What to Expect From Your First Class

Most water aerobics classes are 45 to 60 minutes. Instructors stand at pool deck (they don’t get in), lead the movements, and provide modifications. The class will almost certainly feel social — regular attendees tend to be community-oriented, and the group format is a significant part of what makes water aerobics an activity people sustain for years.

Bring: swimsuit, water shoes (optional but helpful on slippery pool decks), towel, and a water bottle — you still need to hydrate in a pool.

Getting Started

Call your nearest YMCA, community recreation center, or senior center and ask about water aerobics class schedules. Many offer senior-specific sessions at lower-demand times of day. If no classes are available in your area, individual lap swim time and a YouTube water aerobics follow-along session can accomplish the same thing independently — you just need pool access.

Aim for 2 to 3 sessions per week to see meaningful improvement in cardiovascular fitness and joint comfort within 6 to 8 weeks.


Strength Training on a Budget: What to Buy, What to Skip, and What to Improvise

A diverse group of people happily lifting colorful weights made of fruits and vegetables in a public park.

You don’t need a gym membership or expensive equipment for effective strength training. The most important variable in a strength program is progressive overload — gradually increasing the challenge on your muscles over time. That can be done with bodyweight, improvised tools, or a small amount of targeted equipment. This guide gives you the honest breakdown of what’s worth spending money on and what isn’t.

Start Here: What’s Free

A complete beginner can train for 8 to 12 weeks on pure bodyweight before hitting a wall. The exercises that produce the most strength gain without equipment:

  • Push-up: Chest, shoulders, triceps. Scales from wall push-up (easy) to single-arm push-up (very hard) — that’s years of progression in one movement.
  • Squat: Quads, hamstrings, glutes. Scales from standard to pause squat to single-leg squat.
  • Glute bridge: Glutes, hamstrings. Scales from standard to single-leg. Effective even without external load.
  • Plank: Core stability. Progress through hold time, then variations.
  • Table row: Lie under a sturdy table, pull chest to the underside. This is your back exercise — arguably the most important movement pattern to train and the hardest to hit without equipment.
  • Pike push-up: Shoulder strength. Hips high, lower your head toward the floor.

Improvised Equipment From Home

Before spending money:

  • Filled water jugs (1 gallon = 8.3 lbs): Use as dumbbells for rows, curls, and overhead presses. Grip the handle or the body of the jug for different exercises.
  • Filled backpack: Wear it for push-ups, squats, and lunges to add resistance. A $30 backpack filled with textbooks is functionally a 20-pound weighted vest.
  • Canned goods: 1 to 2 lbs each. For arm curls, lateral raises, and tricep extensions — not heavy enough for lower body work but useful for upper body isolation.
  • Chairs: Tricep dips, step-ups, incline push-ups, Bulgarian split squats. A sturdy chair extends your exercise options significantly.
  • Towels: Loop a towel over a door handle for rows, or over a bar for a grip training tool.

What to Buy First (In Order of Value)

1. Doorframe Pull-Up Bar — $20 to $30

The single highest-value purchase for home training. Solves the vertical pulling problem (lats, biceps) that bodyweight training cannot address otherwise. Fits most standard doorframes without drilling. Can also be used at floor height for rows.

2. Resistance Bands — $15 to $25 for a Set

A set of loop bands or tube bands provides variable resistance for all major movement patterns. Bands add load to bodyweight squats and push-ups, enable standing rows and cable-equivalent exercises, assist pull-ups for beginners, and provide enough resistance for most upper body isolation work. The highest versatility-to-cost ratio of any equipment.

3. Exercise Mat — $20 to $40

Not strictly necessary but reduces discomfort during floor exercises significantly. A 3/8-inch foam mat provides adequate cushioning. If you’ll train on carpet, a thinner mat or no mat at all works fine.

4. Adjustable Dumbbells — $150 to $300

The transition to adjustable dumbbells makes sense after you’ve exhausted bodyweight progressions (typically 6 to 12 months of consistent training). They provide specific, trackable resistance for every exercise and open programming options that bands and bodyweight don’t. Fixed-weight dumbbells (sets at specific weights) cost more per kilogram of weight but are cheaper upfront for a limited range.

What to Skip

Expensive home gym machines: Bowflex, rowing machines, and cable systems all work — but cost $500 to $3,000 and occupy significant space. They produce no better results than the cheaper options above for most people.

Weight benches (initially): Useful at advanced levels, but a couch, the floor, and a chair substitute for virtually all bench uses in the early to intermediate phases.

Supplements marketed as essential: Protein powder is useful if you struggle to hit protein targets from food. Pre-workout, BCAAs, fat burners, and most other supplements add cost without meaningful benefit for home trainers. Spend that money on equipment instead.

Total Investment for a Complete Setup

Pull-up bar ($25) + resistance bands ($20) + mat ($25) = $70 total. This covers every major movement pattern effectively for 12 to 18 months of consistent training. Add adjustable dumbbells when you’ve genuinely outgrown the above — which most people don’t for over a year.

Pelvic Floor Exercises at Home: Kegels, Reverse Kegels, and 5 Supporting Moves

A woman smiling serenely while practicing pelvic floor exercises in a calming yoga studio with soft lighting and lush plants.

The pelvic floor is a group of muscles and connective tissue that forms the base of your pelvis. It supports your bladder, bowel, and uterus, keeps you continent, and contributes to core stability. It also takes a beating — from pregnancy, childbirth, high-impact exercise, prolonged sitting, and normal aging.

The good news: pelvic floor muscles respond to training just like any other muscle. You can strengthen them at home with no equipment. This guide covers the most effective exercises, the common technique errors that make Kegels useless, and five full-body movements that support pelvic floor recovery without overloading it.

Health note: If you have pelvic organ prolapse, persistent incontinence, or pelvic pain, work with a pelvic floor physiotherapist before starting. Self-guided exercise is appropriate for general strengthening and mild dysfunction — not for active injury.

Finding Your Pelvic Floor

Before you can train these muscles, you need to locate them. Try this: imagine you’re stopping the flow of urine mid-stream, then release. The muscles you just contracted are your pelvic floor. Don’t actually stop urine mid-stream regularly — it’s a technique cue only, not an exercise.

A different cue that works better for many people: imagine picking up a blueberry with your vaginal opening, then setting it back down. The lift is the contraction; the release is equally important.

Kegels: The Foundation

Kegels are the basic contraction-and-release exercise for the pelvic floor. Most people do them wrong, which is why they don’t work.

Common errors:

  • Holding your breath — breathe normally throughout
  • Squeezing your glutes or inner thighs instead of the pelvic floor
  • Skipping the release — the muscle needs to fully relax between reps to strengthen
  • Doing them only when you remember, not consistently

How to do a Kegel:

  1. Lie on your back, knees bent, feet flat. This removes gravity load while you learn the movement.
  2. Inhale to prepare. On the exhale, gently lift and squeeze the pelvic floor — think “up and in.”
  3. Hold for 3–5 seconds. Keep your breathing normal. Don’t grip your glutes or abs.
  4. Fully release and let the muscles rest for 5–10 seconds.
  5. Repeat 10 times. Do 3 sets, once per day.

Progression: once 3-second holds feel easy, work toward 10-second holds. When 10 seconds is easy in lying, practice seated, then standing.

Reverse Kegels: The Release

If Kegels are about strengthening through contraction, reverse Kegels are about lengthening through release. A hypertonic (too-tight) pelvic floor causes just as many problems as a weak one — including urgency, pelvic pain, and painful intercourse.

How to do a reverse Kegel:

  1. Sit comfortably or lie on your back.
  2. Inhale slowly and imagine your pelvic floor “blooming” downward and outward — like opening a flower.
  3. You’re not bearing down; you’re releasing tension without straining.
  4. Hold the release for 3–5 seconds, then gently return to neutral.
  5. Repeat 8–10 times.

Use reverse Kegels before Kegels if you tend toward tension rather than weakness, or alternate them — one contraction, one release.

5 Supporting Exercises

These exercises load the pelvic floor through functional positions, which builds strength you can actually use during daily activity.

1. Glute Bridge

Lie on your back, knees bent, feet hip-width apart. As you exhale, engage your pelvic floor lightly and press your hips toward the ceiling. Hold 2 seconds at the top, lower with control. The key is the breath timing — don’t hold your breath or bear down on the way up. 3 sets × 12 reps.

2. Bird Dog

Start on all fours. On your exhale, extend your right arm forward and left leg back simultaneously, keeping your spine neutral. The pelvic floor engages reflexively with the core during this movement. Hold 3 seconds, return, repeat on the other side. 3 sets × 8 each side.

3. Clamshell

Lie on your side with hips stacked, knees bent at 45 degrees. Keep your feet together and rotate your top knee upward like a clamshell opening. Don’t let your pelvis roll back. This targets the hip external rotators, which work with the pelvic floor for stability. 2 sets × 15 each side.

4. Standing Hip Hinge

Stand feet hip-width, soft knees. Hinge forward from your hips (not your waist) until your torso is roughly parallel to the floor, then drive through your hips to return upright. Think of the pelvic floor as helping to “close” as you come back to standing. 3 sets × 10 reps.

5. Heel Slides

Lie on your back, knees bent. Exhale and engage your pelvic floor lightly. Slowly slide one heel along the floor until your leg is straight, then slide it back. The challenge is keeping your pelvis still throughout. This builds endurance in the pelvic floor stabilizers. 2 sets × 8 each leg.

How Often to Train

For general strengthening: Kegels once daily (3 sets of 10), supporting exercises 3 times per week. You’ll notice improvements in 4–6 weeks if you’re consistent. For postpartum recovery, give yourself 6 weeks minimum before starting any impact exercise, and clear exercise with your healthcare provider first.

These exercises don’t require a gym, a class, or equipment — just consistent practice. The pelvic floor is a muscle, and muscles respond to training.

What to Expect From Your First HIIT Workout (So You Don’t Quit After Round One)

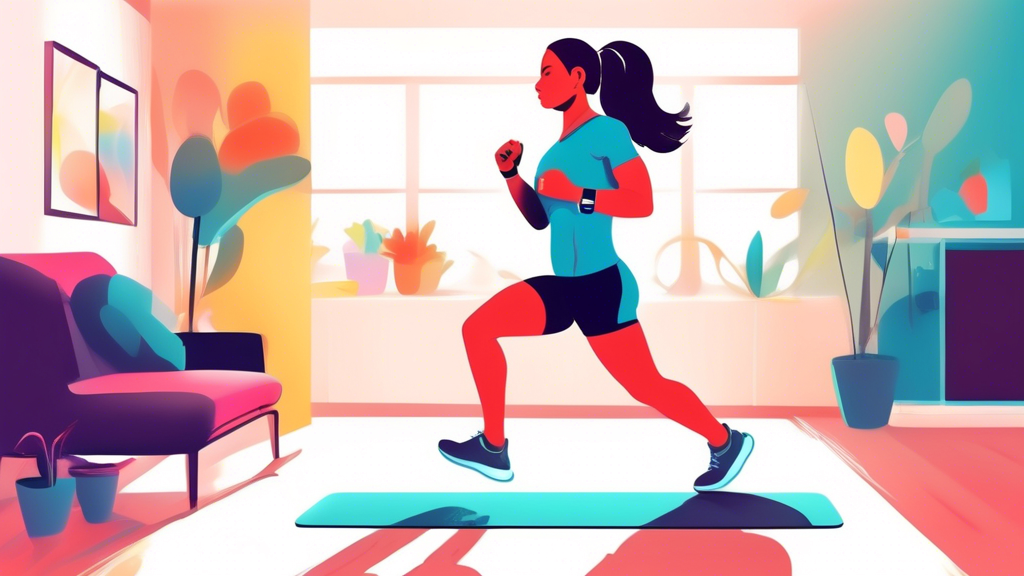
A determined beginner with a colorful smartwatch doing high intensity interval training at home, with a timer visible.

Most people try HIIT for the first time, survive two rounds, and decide it’s not for them. That’s usually not a fitness problem — it’s an expectations problem. This guide tells you exactly what a beginner should feel during a HIIT session, what’s normal, what’s a warning sign, and how to adjust on the fly so you finish the workout and come back for the next one.

What HIIT Actually Is

High-Intensity Interval Training alternates short bursts of hard effort with brief recovery periods. A typical beginner structure: 20–30 seconds of work, 40–60 seconds of rest, repeated 6–10 times. The work intervals should be genuinely hard — you’re aiming for 7–8 out of 10 on a perceived effort scale, not a leisurely jog.

The catch: for beginners, “hard effort” doesn’t mean advanced exercises. It means doing a basic movement like jumping jacks or mountain climbers at a pace that makes conversation difficult. The intensity comes from your effort, not the complexity of the exercise.

What You’ll Feel in the First 10 Minutes

Your heart rate will spike fast. HIIT is designed to elevate heart rate quickly. During the first few work intervals, you may reach 80–90% of your max heart rate within 20 seconds. This is normal and the whole point.

Your legs will feel heavy by round 3. Even if you’re only doing air squats or step-touches, the accumulation of intervals makes muscles fatigue faster than you’d expect. Beginners often hit this wall around the third round.

You’ll be breathless. Short-of-breath is expected. The test: can you speak a short sentence? If yes, you’re working appropriately. If you can’t catch any breath even during rest periods, slow down.

You may feel a burn in muscles you don’t normally notice. HIIT recruits muscle fibers differently than steady-state cardio. The lateral quad burn, the hip flexor fatigue, the burning arms — all normal.

What’s Normal vs. What’s a Warning Sign

Normal Stop and rest (or stop entirely)
Heavy breathing that recovers within 60 seconds Breathing that stays labored throughout rest periods
Muscle burning and fatigue Chest pain or tightness
Elevated heart rate for 10–20 minutes after Dizziness or lightheadedness that doesn’t pass
Feeling tired and accomplished after Nausea that gets worse, not better
Shaky muscles on the last round Sharp joint pain (knee, hip, ankle)

The First 4 Sessions Will Feel the Worst

Your cardiovascular system and muscles are adapting. The first two sessions feel brutal. The third feels slightly less brutal. By session four or five, you’ll be completing the same workout that destroyed you initially and wondering why it seemed so hard.

This improvement is real and measurable. Don’t use “I can’t do HIIT” as a conclusion after one session — it’s an adaptation process that takes a few weeks to show results you can feel.

How to Scale When You’re Struggling

You don’t need to power through if you’re genuinely dying. These adjustments keep the workout effective while matching your current fitness:

  • Extend rest periods: Change 20 sec work / 40 sec rest to 20 sec work / 60 sec rest. Same effort, more recovery.
  • Reduce rounds: If you planned 8 rounds, do 5 today. Finish strong rather than crawl through the last three.
  • Lower-impact swaps: Jumping jacks → step jacks. Burpees → squat-to-stand. Mountain climbers → slow marching. All maintain the cardio stimulus without the joint load.
  • Active recovery instead of full rest: Walk slowly during rest periods instead of standing still — keeps blood moving and prevents dizziness.

What You Should Feel Afterward

Immediately after: tired, possibly sweaty, heart rate elevated but settling within a few minutes. A good sign: you feel better than you expected at the end compared to mid-workout.

Next day: mild muscle soreness, especially in your legs and core. This is normal for the first 2–3 sessions and decreases as your body adapts. Not normal: joint pain, sharp soreness, or soreness that prevents walking.

Two to four days later: you should feel recovered and ready to go again. HIIT shouldn’t leave you wiped out for a week. If it does, you went too hard — scale back next time.

What to Do Before Your First Session

Eat something light 60–90 minutes before — a small amount of carbs and protein works well. Don’t train on a full stomach or completely fasted. Do a 5-minute warm-up (arm circles, leg swings, light march) before starting intervals. Have water ready.

Most importantly: go in expecting it to be hard. Expecting it to be hard means you won’t interpret difficulty as failure. The difficulty is the point.

Working Out With Your Child: 10 Partner Exercises for Moms and Kids

A mom and her two children laughing while doing yoga poses in a park with bright colorful balloons.

Getting exercise as a parent is genuinely difficult — not because of willpower, but because the logistics of childcare and the demands of a baby or toddler make carving out solo workout time nearly impossible. The solution that works for many parents: make the child part of the workout.

This isn’t about forcing a toddler through a fitness routine. It’s about using your child’s weight as resistance, making movement playful, and getting a real workout while keeping them engaged. Here’s what actually works, organized by what you need (not much) and what your child can do.

What You Need

For baby/infant exercises (under 6 months): a stable floor surface, a mat, and a baby with good head control for the exercises that involve lifting.

For toddler/preschool exercises (6 months – 4 years): same, plus enough floor space for both of you to move. A yoga mat for ground exercises is helpful but not required.

Check with your pediatrician before doing lifts or overhead movements with very young infants. The exercises that involve bouncing or jostling are for babies 3+ months with confirmed head control.

10 Partner Exercises

1. Baby Chest Press

Lie on your back with knees bent. Hold your baby securely on your chest, hands on their torso. Press them straight up, pause, lower back to your chest. This is a chest press with the added motivation of your baby’s face above you. 3 sets × 8–10 reps. Only for babies with head control; always support the neck.

2. Baby Squat (Child as Weight)

Hold your baby against your chest in a bear-hug position. Squat until thighs are parallel, drive through heels to stand. As your baby grows, this squat gets harder automatically — built-in progressive overload. 3 sets × 12 reps.

3. Airplane (Core + Back)

Lie on your back, knees bent to 90 degrees. Hold your baby tummy-down on your shins (they face forward like Superman). Slowly extend and flex your legs, keeping core tight. Babies who can hold their heads up love this. 3 sets × 10 slow reps.

4. Dance Cardio

Hold your toddler and dance to music for 3–5 minutes. Vary the pace, do squats during the chorus, add lunges. It counts as cardio. Your child thinks it’s hilarious. Do 2–3 songs back-to-back for a 10-minute cardio bout.

5. Toddler Wheelbarrow

For mobile toddlers: hold their ankles while they walk on their hands. You walk forward with them. This is a genuine upper body and core exercise for you, and a coordination challenge for them. 3 × 10 meters.

6. Piggyback Squats

Once your child is stable enough to hold on (typically 2+), let them ride on your back while you squat. Their weight (20–40 lbs typically) adds meaningful resistance. 3 sets × 10 reps.

7. Peekaboo Push-Ups

Get into a push-up position with your baby lying on the floor beneath your face. Do a push-up and make a silly face at the top of each rep. Keeps the baby entertained; keeps you doing push-ups. 3 sets × 8–10 reps.

8. Toddler Obstacle Course (You’re the Obstacle)

Set yourself up in a plank or bridge position. Your toddler crawls under you, over your legs, around you — they’re playing, you’re holding the position. Most parents can hold a plank significantly longer when they’re busy watching their child navigate around them. Sets of 30–60 second holds, 3 rounds.

9. Seated Row With Resistance Band (Baby on Lap)

Sit on the floor, legs extended, resistance band around your feet. Hold the handles and row toward your chest — your toddler can sit between your legs or on your lap for added fun. 3 sets × 12 reps.

10. Walking Lunges (Child “Racing” Alongside)

Walking lunges down the hallway while your toddler runs alongside. Make it a game — “can you beat me to the kitchen?” You do your lunges; they sprint. Repeat 3–4 times. Gets both of you moving.

Making It Work With a Baby Who Won’t Cooperate

Some sessions your baby will be perfectly happy. Others, they’ll want to be held constantly and nothing else. Build your workout around option B: exercises you can do one-handed or while holding them (squats, lunges, standing core work) should always be your backup plan.

Five minutes of squats while holding a fussy baby beats zero minutes of a planned workout that never started.

Safety Notes

  • Always secure your grip before any lift. If you’re unsure, don’t do it.
  • Keep lifting movements slow and controlled — no jerking motions with an infant.
  • Stop if your child shows any distress.
  • Don’t do overhead presses with babies younger than 3–4 months or any infant who hasn’t developed head control.

How to Build Your First HIIT Workout: Intervals, Exercise Selection, and Progressions

A diverse group of people smiling and doing a variety of HIIT exercises like burpees, jumping jacks, and mountain climbers in a bright and airy gym.

Most beginner HIIT guides give you a workout and tell you to follow it. That’s fine, but it doesn’t help you understand why the workout is structured the way it is — which means you can’t adapt it when you need to, fix it when it’s too hard or too easy, or build on it as you improve.

This guide explains the design principles behind HIIT so you can build a session that matches your fitness level, your goals, and the time you have. By the end, you’ll also have a complete sample workout you can use immediately.

The Core Variable: Work-to-Rest Ratio

The most important number in HIIT programming is your work-to-rest ratio — how long you work relative to how long you rest.

  • Beginners (first 4–6 weeks): 1:2 or 1:3 ratio. Example: 20 seconds work, 40–60 seconds rest.
  • Intermediate (3+ months of training): 1:1 ratio. Example: 30 seconds work, 30 seconds rest.
  • Advanced: 2:1 ratio. Example: 40 seconds work, 20 seconds rest.

If you’ve never done HIIT before, use 1:2. The shorter rest periods are something you work toward — they’re not a badge of seriousness, they’re a result of cardiovascular adaptation.

Choosing Exercises

Good HIIT exercises for beginners have three qualities: they’re high enough effort to elevate heart rate quickly, they’re low enough complexity to maintain form while tired, and they don’t create injury risk when your muscles are fatigued.

Beginner-friendly HIIT exercises:

  • Jumping jacks (or step jacks for low-impact)
  • Bodyweight squats
  • Mountain climbers (slow to moderate pace)
  • High knees
  • Alternating reverse lunges
  • Push-ups (any variation)
  • Plank holds
  • Step-ups (on a low surface)

Avoid exercises that require significant coordination or balance when you’re fatigued (box jumps, single-leg hops) until you’ve built a base. Also avoid loading the spine heavily (heavy deadlifts) in a metabolic fatigue state.

Structure your exercise selection to alternate upper and lower body, or full-body movements and core. This prevents any single muscle group from being the limiting factor — you can keep your heart rate up even as one area fatigues.

Session Structure

A complete beginner HIIT session looks like this:

  1. Warm-up (5 minutes): Light cardio and dynamic movement — arm circles, leg swings, marching, slow squats. Never skip this.
  2. Work intervals: 6–10 rounds of work-rest cycles. Total work time: 10–20 minutes depending on rounds and interval length.
  3. Cool-down (5 minutes): Slow walking, static stretches for the muscles you used — hip flexors, quads, hamstrings, calves.

Total session time: 20–30 minutes. You don’t need 45-minute HIIT sessions as a beginner. Shorter sessions done consistently outperform long sessions done rarely.

Sample Beginner HIIT Workout

Warm-up (5 min): 1 min light march in place → 1 min arm circles + torso twists → 1 min leg swings → 2 min slow squats and hip circles

Main circuit — 8 rounds, 20 sec work / 40 sec rest:

  1. Jumping jacks
  2. Bodyweight squat
  3. Mountain climbers
  4. Reverse lunge (alternating legs)
  5. Push-ups (full or modified)
  6. High knees
  7. Glute bridge
  8. Squat hold (bottom position, pulse)

Total work time: 2 min 40 sec. Total session time including rest: ~8 minutes of intervals. Add warm-up and cool-down for a 20-minute full session.

Cool-down (5 min): Walk in place 1 min → standing quad stretch 30 sec each side → hip flexor lunge stretch 30 sec each side → seated hamstring stretch 30 sec each side → deep breathing 1 min

How to Progress Over 4 Weeks

  • Week 1: 6 rounds, 20 sec work / 60 sec rest
  • Week 2: 8 rounds, 20 sec work / 50 sec rest
  • Week 3: 8 rounds, 25 sec work / 45 sec rest
  • Week 4: 10 rounds, 30 sec work / 40 sec rest

This progression gradually increases total work time and reduces rest time — both increase the cardiovascular demand in a controlled way.

How Often to Train

Two to three HIIT sessions per week is enough. More than three sessions per week for a beginner leads to insufficient recovery, accumulated fatigue, and a higher injury risk. The days between sessions are when your body adapts — skipping them doesn’t make you fitter faster.